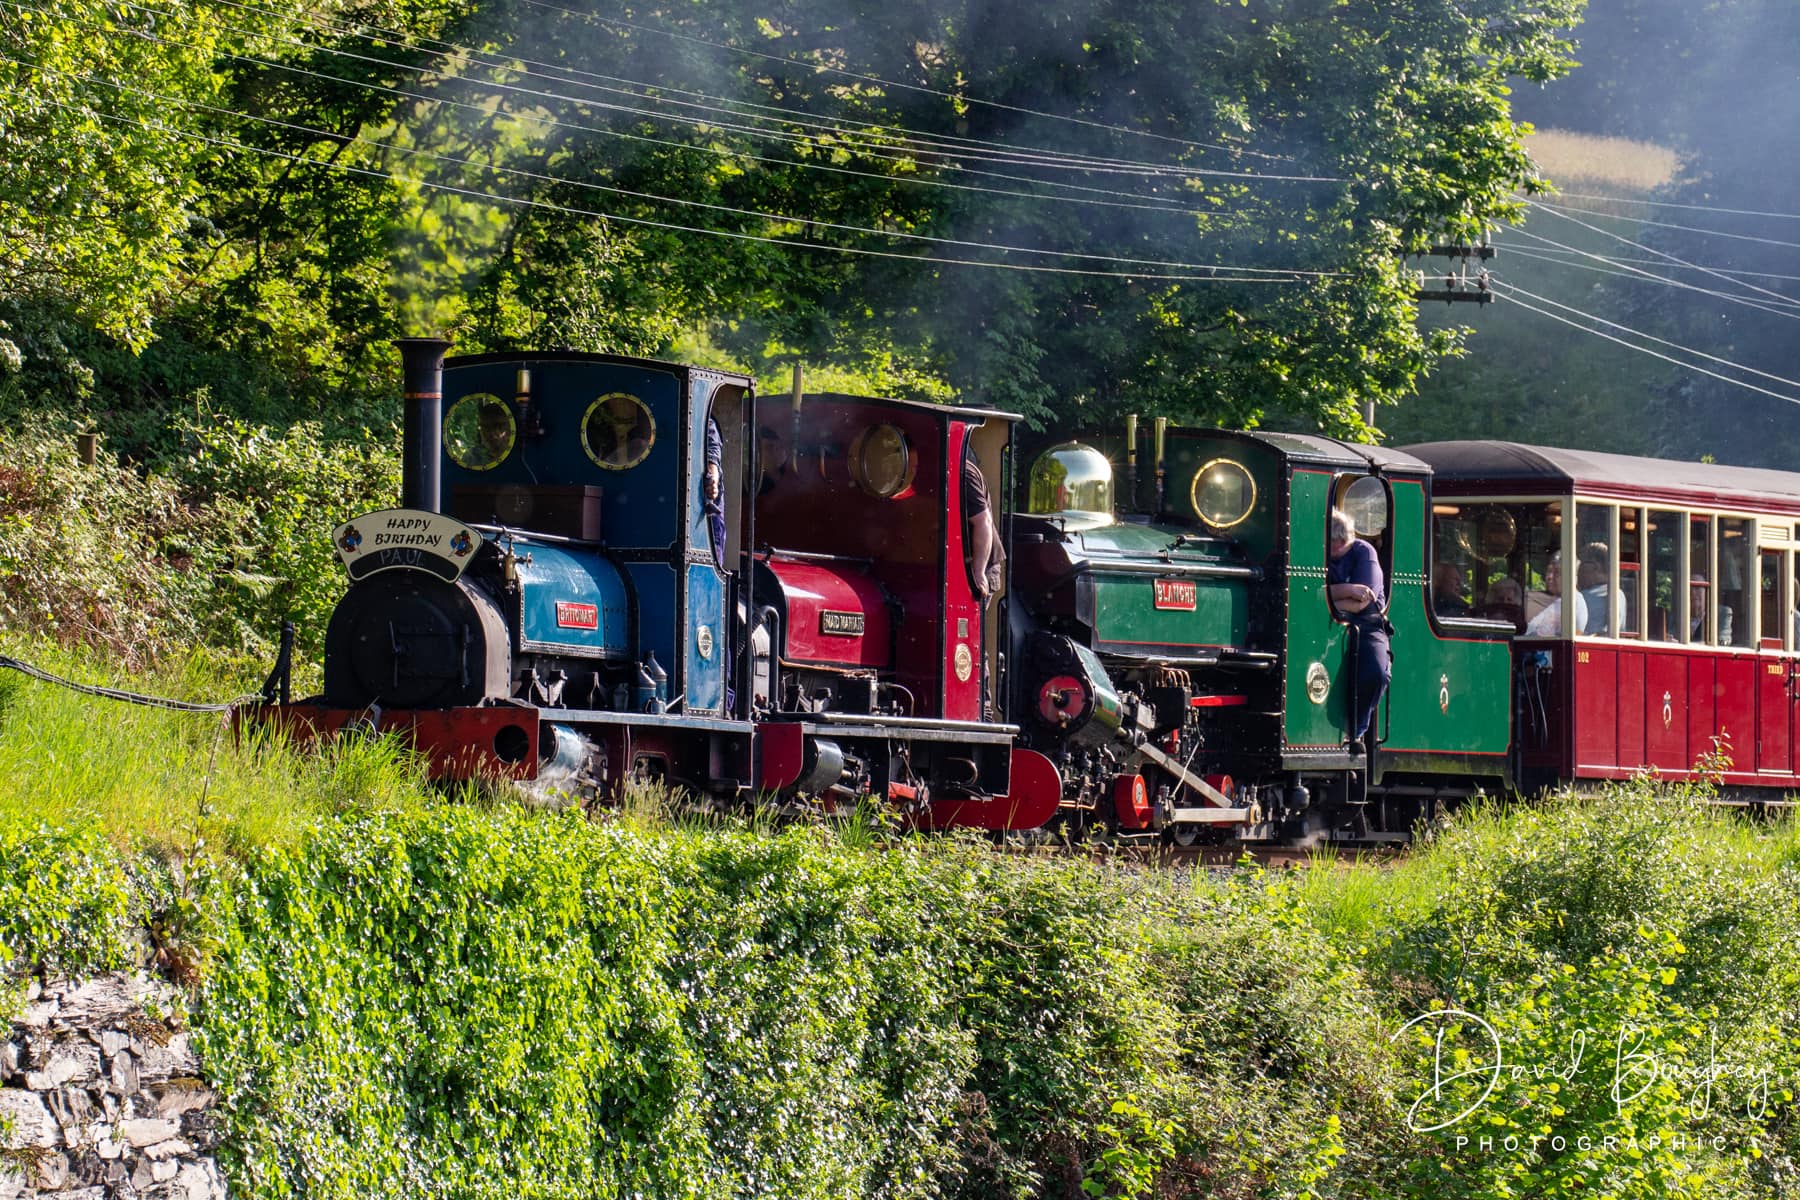
Engines

Photo:; David F Boughey

The week before the bank holiday was an interesting one for me. Starting with the two day model show at Minffordd at which I was doing a kit building demonstration. A feature of the weekend was a “do” to celebrated the 90th Birthday of the organiser Paul Towers.

There was an evening train to Tan-y-Bwlch for a meal on which I was invited. I was definitely not driving the train. Well, not until the Wednesday before after which we ended up with more engines that carriages. Three locomotives to two carriages.

I’ll explain that in a moment but first……   One of the engines was Maid Marian from the Bala Lake Railway which visited for this one train only.  Paul was an early member of the Maid Marian Society and then its President for seven and a half years. With that special connection Paul arranged for Maid Marian to visit to pull his train.

Photo: Chris Parry

Enter Plans A, B & C.

Plan A was for Britomart and Maid Marian to pull the train. Two carriages is well within their capability. Britomart is vacuum braked and we have a piped quarry Hunslet kit that fits on the guests.

Problem! Wales is tinder dry and keeps catching fire. Maid Marian doesn’t have any/enough spark arrestors.

Plan B. Maid Marian would lead the train and Blanche would go along too. Blanche has full spark arrestors and could easily pull the train and push MM past the flammable bits.

Plan C. Can we take Britomart along too? So we end up with the three for two. Blanche, which I drove, did the vacuum and pulled much of the load. Britomart lead the way with Maid Marian coasting along in the middle.

Photo: James Hoyle

On arrival at TyB we ran Blanche round and then the little ones gave footplate rides up and down the station.

There was one bit of interesting operational expediency.  To form the two car train we had taken a five car set from a blocked road in the new carriage shed as we wanted the top two. The set was taken in to Porthmadog 2 road and the two we wanted taken off and put in the platform.

At the end of the evening the set had to go back from whence it came so the little engine put the two on to the three in two road and I put Blanche on the back. Britomart and Maid Marian pulled us all back to Pen Cob and then disappeared to the engine shed. Blanche then pushed the set back into the carriage shed before disposal on the pit, into the shed and us to the pub just in time for last orders.

Photo: Becky Knight Booths’ Mum

Monday was the start of three days on the loco roster proper. Monday was earlies with the first Mountain Spirit of the Day with Merddin Emrys.

Its an early start but another crew do the second one so you’re done by about 14:30.

Tuesday was payback with doing the second Mountain Spirit again with Merddin Emrys. You don’t start until 13:00 and aren’t done until 19:00 by which time its almost impossible to pass Spooners on the way home.

The B&W photo of us leaving Port was sent to me by Becky and taken by her mum whose name I don’t know but thank you.
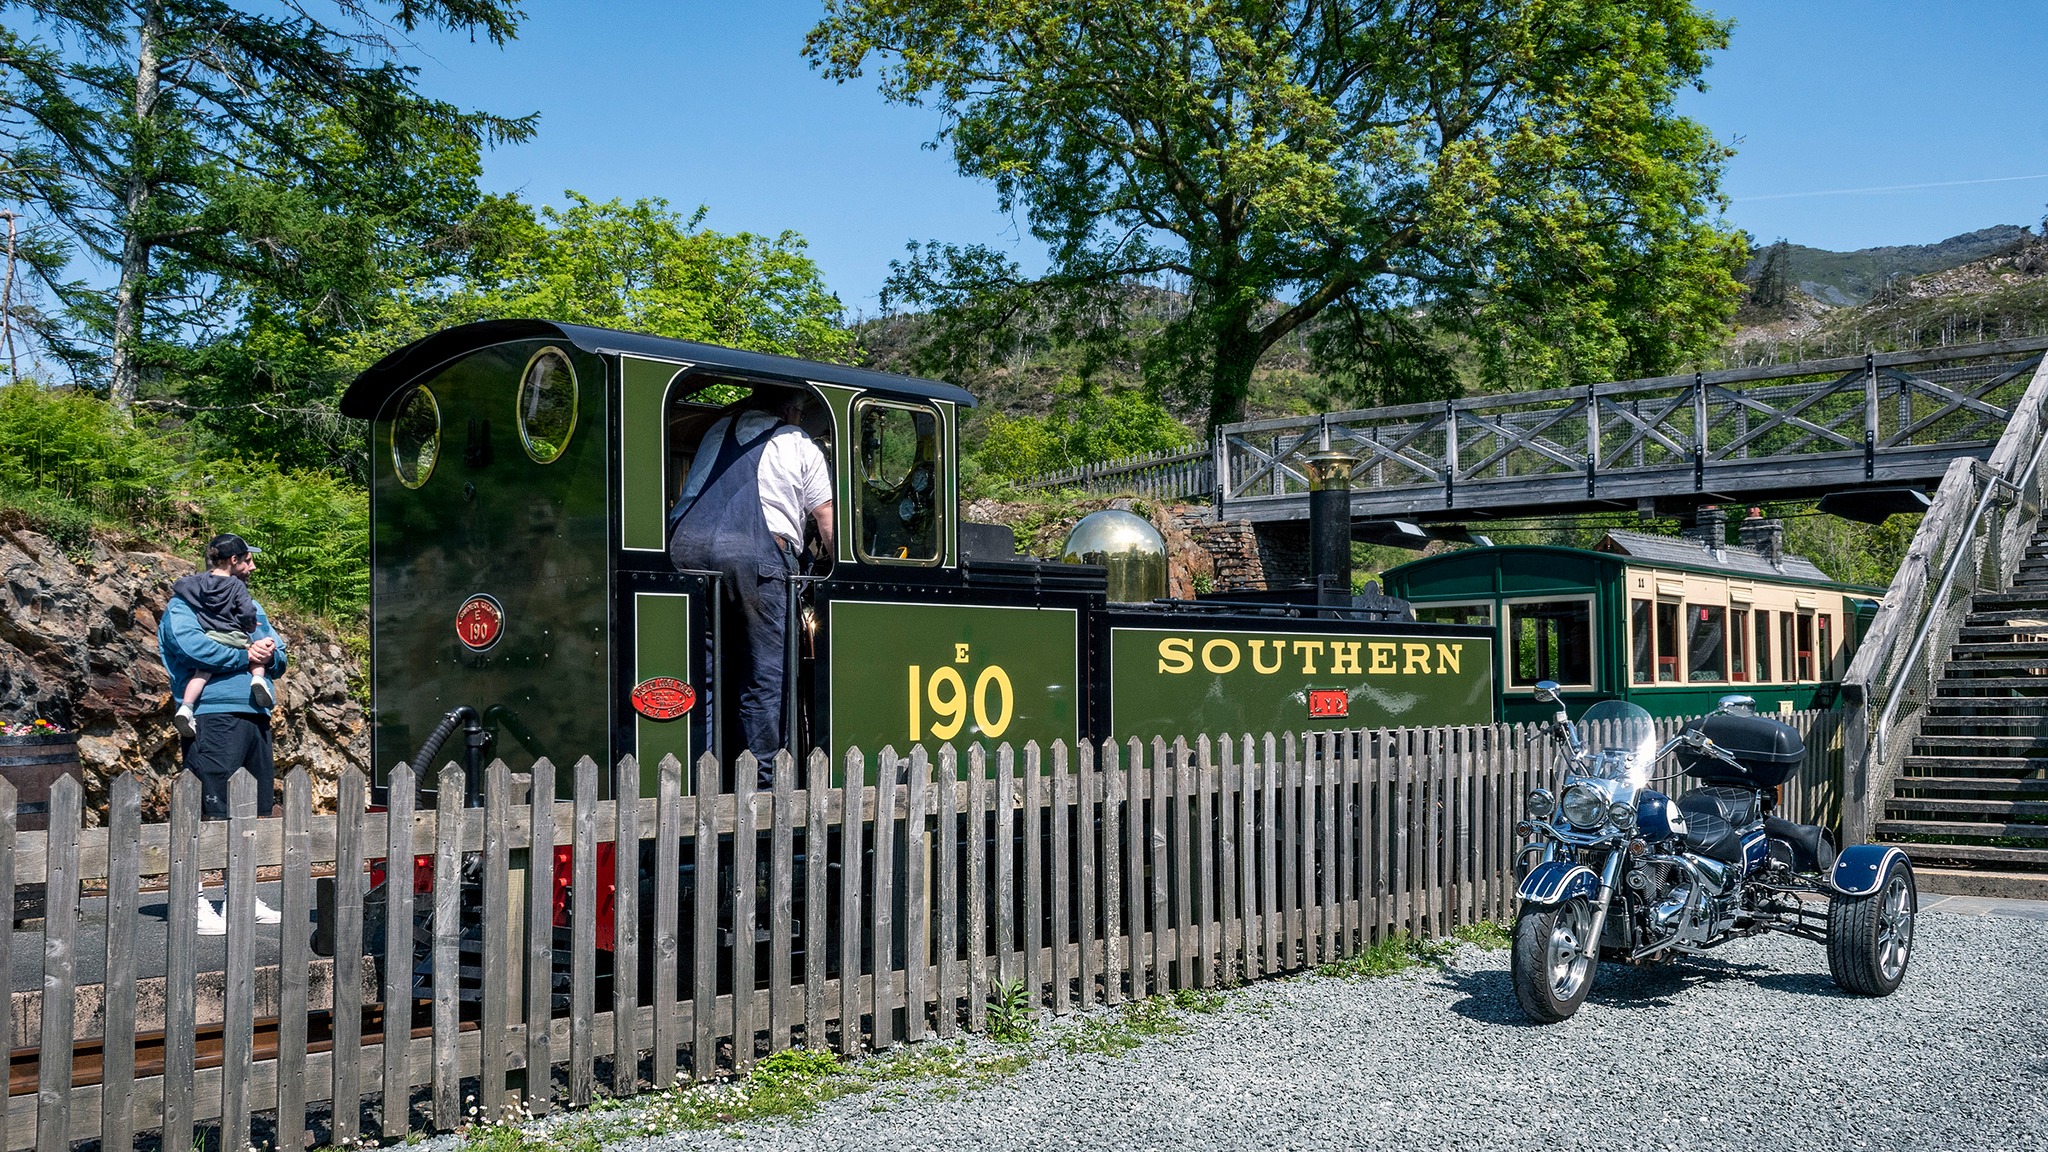
Photo: Roger Dimmick

Wednesday was two Woodland Wanderers to Tan-y-Bwlch driving Lyd. Actually, with a trainee driver and a trainee fireman I was mostly chauffer driven.


The Trike in this picture belongs to my landlord when in Wales, Phil, and is ten years older than the steam engine.


Photo: Bruce Brayne


There was quite a fuss during the week as this arrived from Aberystwyth having been overhauled by the Vale of Rheidol for the Welsh Highland Heritage Railway.

It was delivered to the FR at Minffordd, commissioned and tested at Boston Lodge, did a loaded test run and spark arrestor test through the tunnels to Beddgelert and then delivered itself to Gelerts farm already certified for working vacuum braked stock and working up the WHR when the opportunity arises.

Its been the star turn at the WHHR through the bank holiday weekend of its official launch.


One advantage of the easy part days was that it allowed some research and some CAD drawing work. More of that in a future episode.

Loading

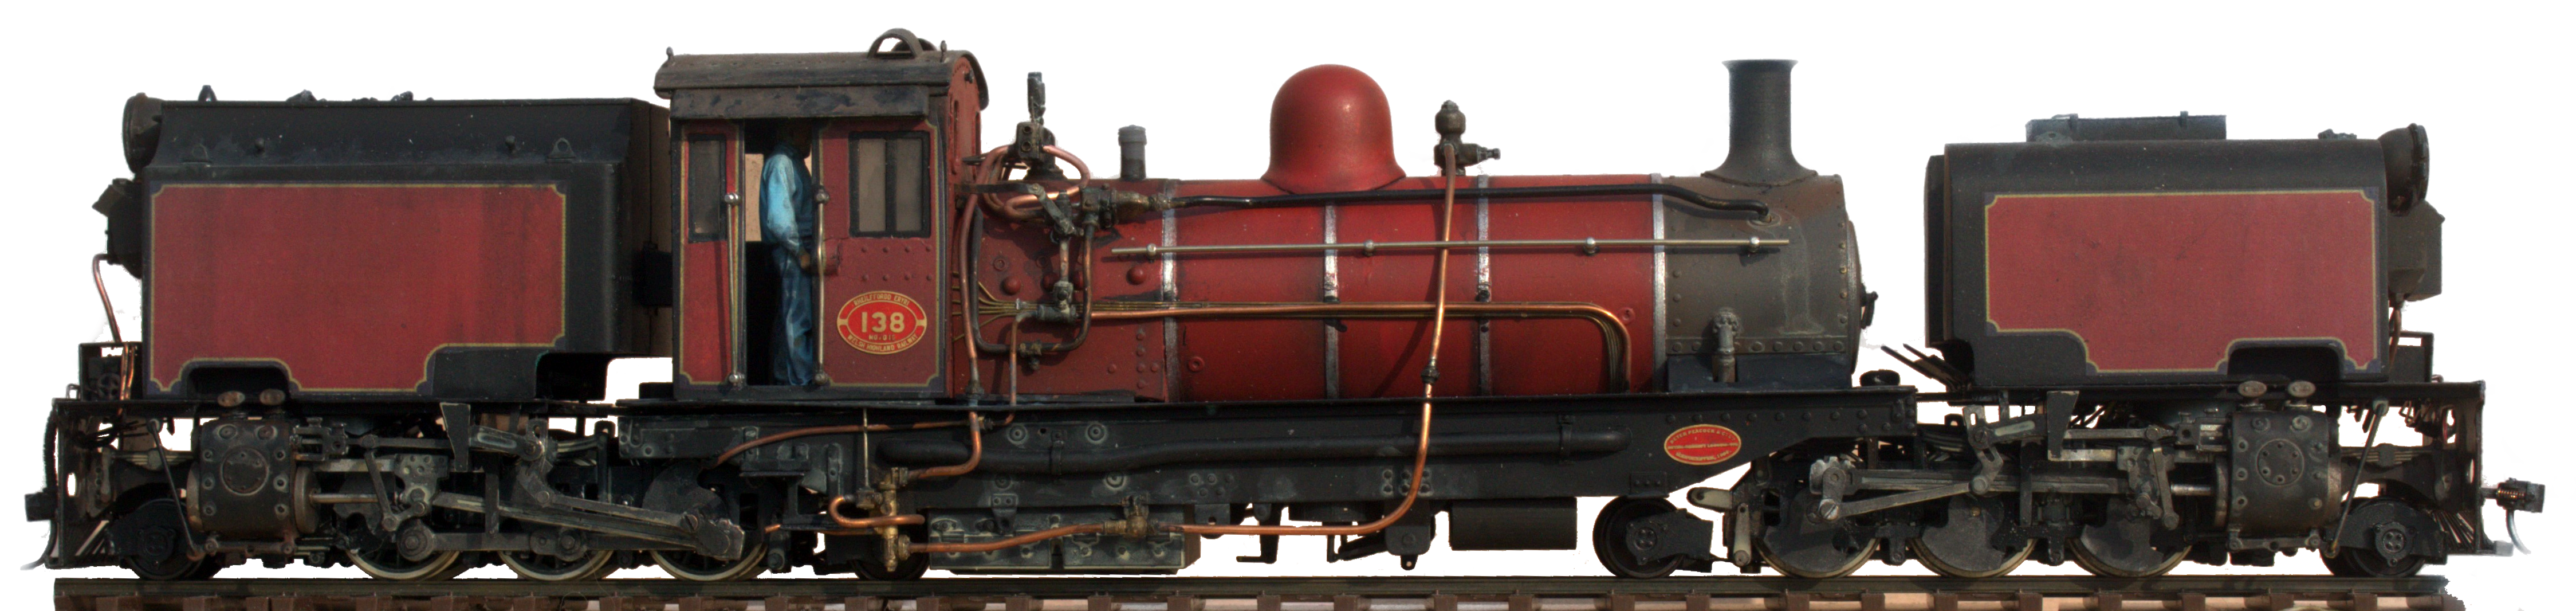
NGG16 Garratt #138 – The Finale

NGG16 Garratt #138 – The Finale

138 has finally gone to its new home and I went from loathing it to not wanting to part with it. I hope the new owner is pleased with it.

This is a job that took way too long. Why? Me really.

  • Scope creep as I was always wanting to do a bit more or a bit better to it.
  • Poor starting point as it started as one of the Chinese assembled models. That said starting from a kit would have many of the frustrations too.
  • Several times I got to the point with it where I just had to put it aside as the more I tried the more I struggled. Inevitably, picking it up some time later I’d wonder just why I was struggling.
  • Dissatisfaction with the source model just left me struggling for motivation.

That last point probably needs some explanation on two counts. The NGG16’s were built in five batches each batch had subtle differences. The biggest being between the first batch that includes the WHR’s #87 which were built in Belgium by Cockerill and the ones that followed. The model tries to be a medley of all of them. Notable the tanks are the shape of the later welded tanks but were covered in rivets. The water filler was early, the cab later.

It would be easy to say the kit was scaled up from 009 but that doesn’t explain the whole issue. The model dates from the pre CAD hand drawn artwork era. Standard when hand drawing artwork was to draw it several times finished size, typically six, and then photo reduce it as this shrinks out any pen errors. This model was only drawn 2 x full size for a finish in 4mm scale so that’s less than 2:1. That might be acceptable for the 009 model as might the simplifications in the construction. [Those that have built the 4mm one might tell a different story]. To produce a 7mm scale kit the reduction from 8mm to 7mm scale gives virtually no error correction and the compromises no longer stand up to scrutiny. The other thing not noticed is that each axle of the power unit has a different shaped fly crank but the model has them all the same. Well, nearly the same as in the model they are made of three layers each, so that’s 36 copies yet there is no cut and paste with a pencil as there would be with CAD.

The model has all manner of detail changes with new 3D printed and cast parts. I filed off all the rivets and added all the pipework with copper wire. The cad and the tanks were coloured and lined by doing the model version of a vinyl wrap as they were covered in decals with the livery and lining onto a black surface. The boiler was spray painted. All was then weathered. It’s also now a very heavy loco as the boiler and tanks have a lot of lead in them.

It is DCC and sound fitted. The speakers are under the loco in a an enclosure that looks like the vacuum reservoirs. It also has a large keep alive that smooths the operation of the loco but also keeps the sound and lights alive for several minutes after the power is removed.

Having said all of that I am delighted with how the finished model turned out. I couldn’t resist having a shunt with it as seen in this video

You might think that I would never want to see another NGG16 ever again!  As I was fighting to finish 138 I would have agreed with you. However………

Now its done my mind turned to how to address many of those issues that frustrated me with this one and thoughts are turning to a new design of power bogie. The thought being to address the poor detail, missing bits and the captive wheels (really don’t like them) and making the pony trucks less of a dangly thing that are prone to derailing.

Then there’s this

It had a feline induced flying lesson that it failed in spectacularly. I don’t have the parts to mend it so if I am making new its back to the new bogie ideas.


I do need a break from NGG16 nonsense so it will be a little while before it sees any progress.

So, what am I doing next? Seems I have an articulated problem as there is a 3 truck Shay to mend, Two Uintah 2-6-6-2 Mallets to sort out and four O&K 0-4-4-0 Mallets to build.


That’s the end of this series

Loading

TVG Modelling Day – Post Match Report

Trent Valley Group Modelling Day – Post Match Report

OK so coming back to life is perhaps a bit melodramatic but that’s how it felt on Monday.  After an excellent weekend I was knackered and it’s taken a bit of time to recharge.

Liz delivering the news that there was no cake left

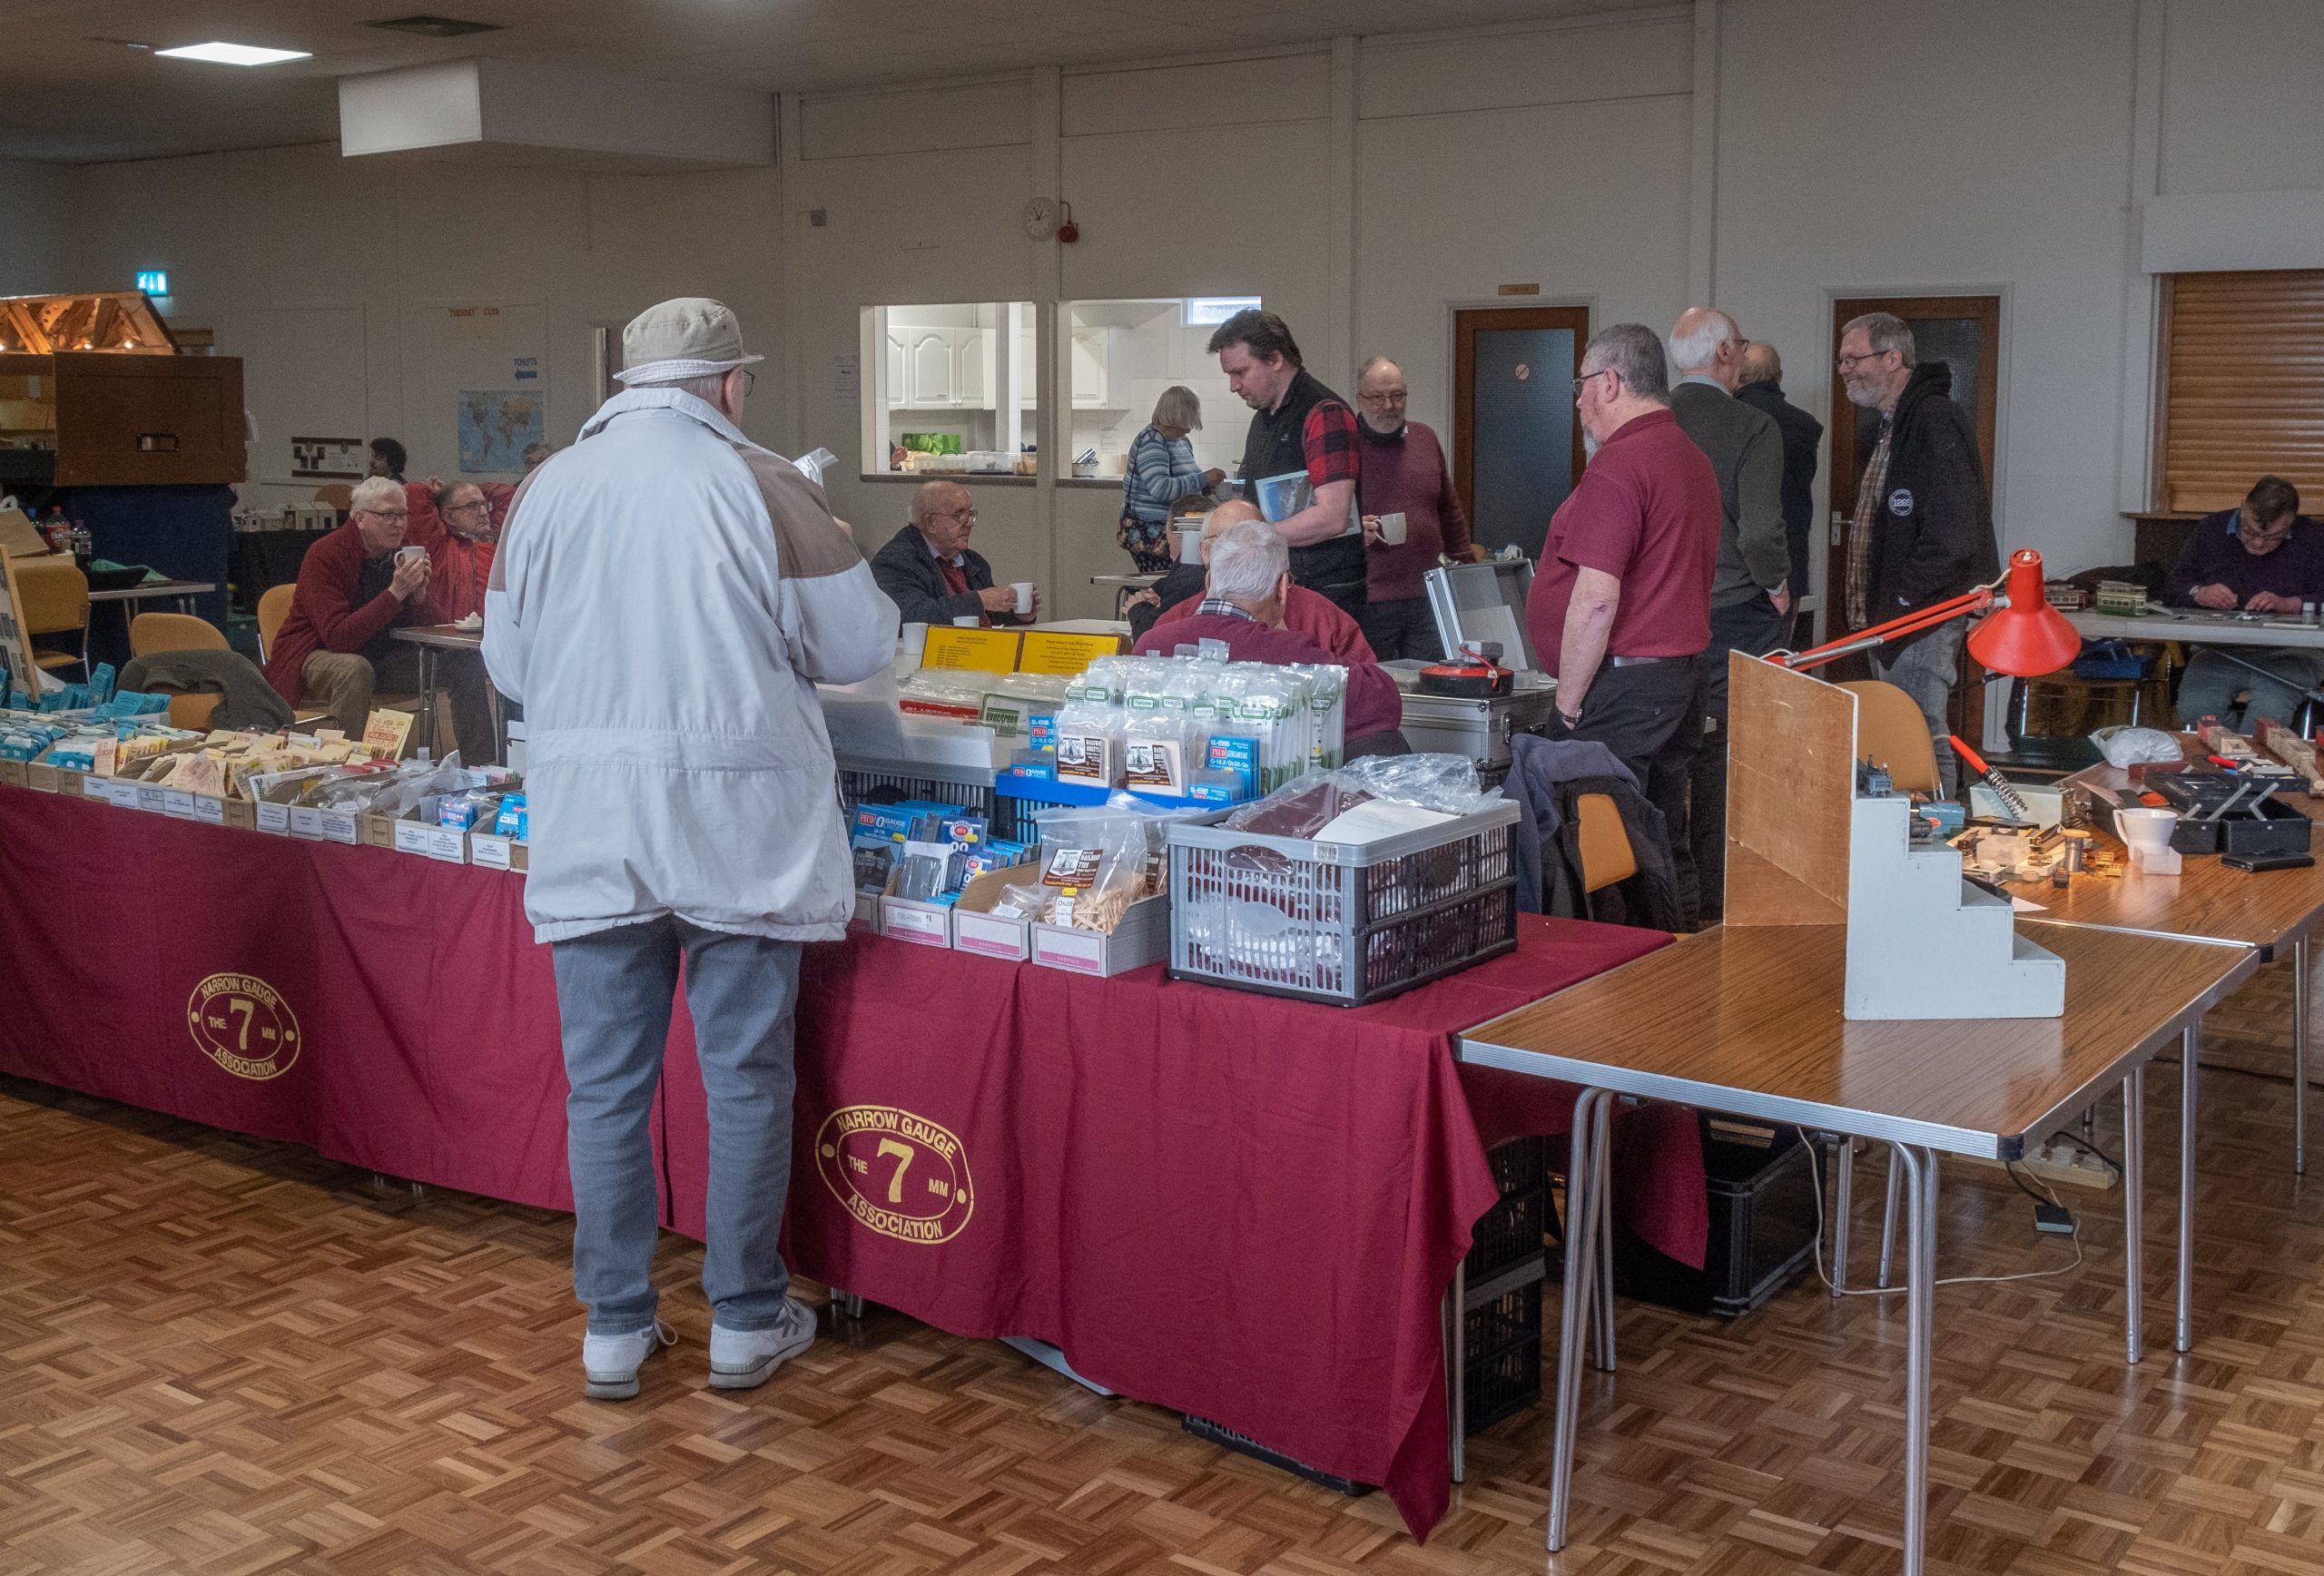
To rewind a bit Saturday 28th January was the Trent Valley Group of the 7mm NGA’s annual Modelling Day. A day of modelling, Tea/Coffee, Bacon Butties, Cake and Gossip and 2023 was a bit of a relaunch event for which the core group of organisers had put a lot on effort into hoping for a return to the pre Covid sort of event.

This day is not an exhibition in the usual sense. Its not turn up and spectate event, you might be expected to get involved. The aim of the day is to have a mix of layouts, demos and trade in an environment that promotes having a chat and having a go.

Most of the layouts were operated from the front and you could easily find yourself having a drive. Demonstrations were of the sort where you could find yourself trying it. Mention in earshot of the soldering demo that “I wish I could Solder” and you’re likely to find yourself iron in hand trying it.

There is no magic that we were gifted with the ability to solder, paint, build layouts etc. They’re all learned skills. It’s a fair bet that if you asked the smug looking person showing their latest model he’d also tell you there was a trail of rubbish ones buried away whilst he learned how to do it. The key is to make a start and we hope these days promote people making that start.

Credits: As with most events there’s a core few who do the organising so that would be Neil, Mike, Andy, Simon and me. On the day others are roped in for key roles which adds Dan, Mary, Liz and Leigh manning the kitchen on the day and baking in advance.  I am bound to have missed someone, for that I apologise, consider yourself thanked.

Then there is the exhibitors and demonstrators and I suspect we must be organising a decent day as the usual suspects seem to want to come back each year with something different.

I’ll come back to these ideas and plans but for now here are some pictures. Keen to see the day recorded but knowing we’d be too busy to do it ourselves we asked a few people to take pictures. Those in this document are from Andy’s dad

The Pictures all get bigger if you click on them.


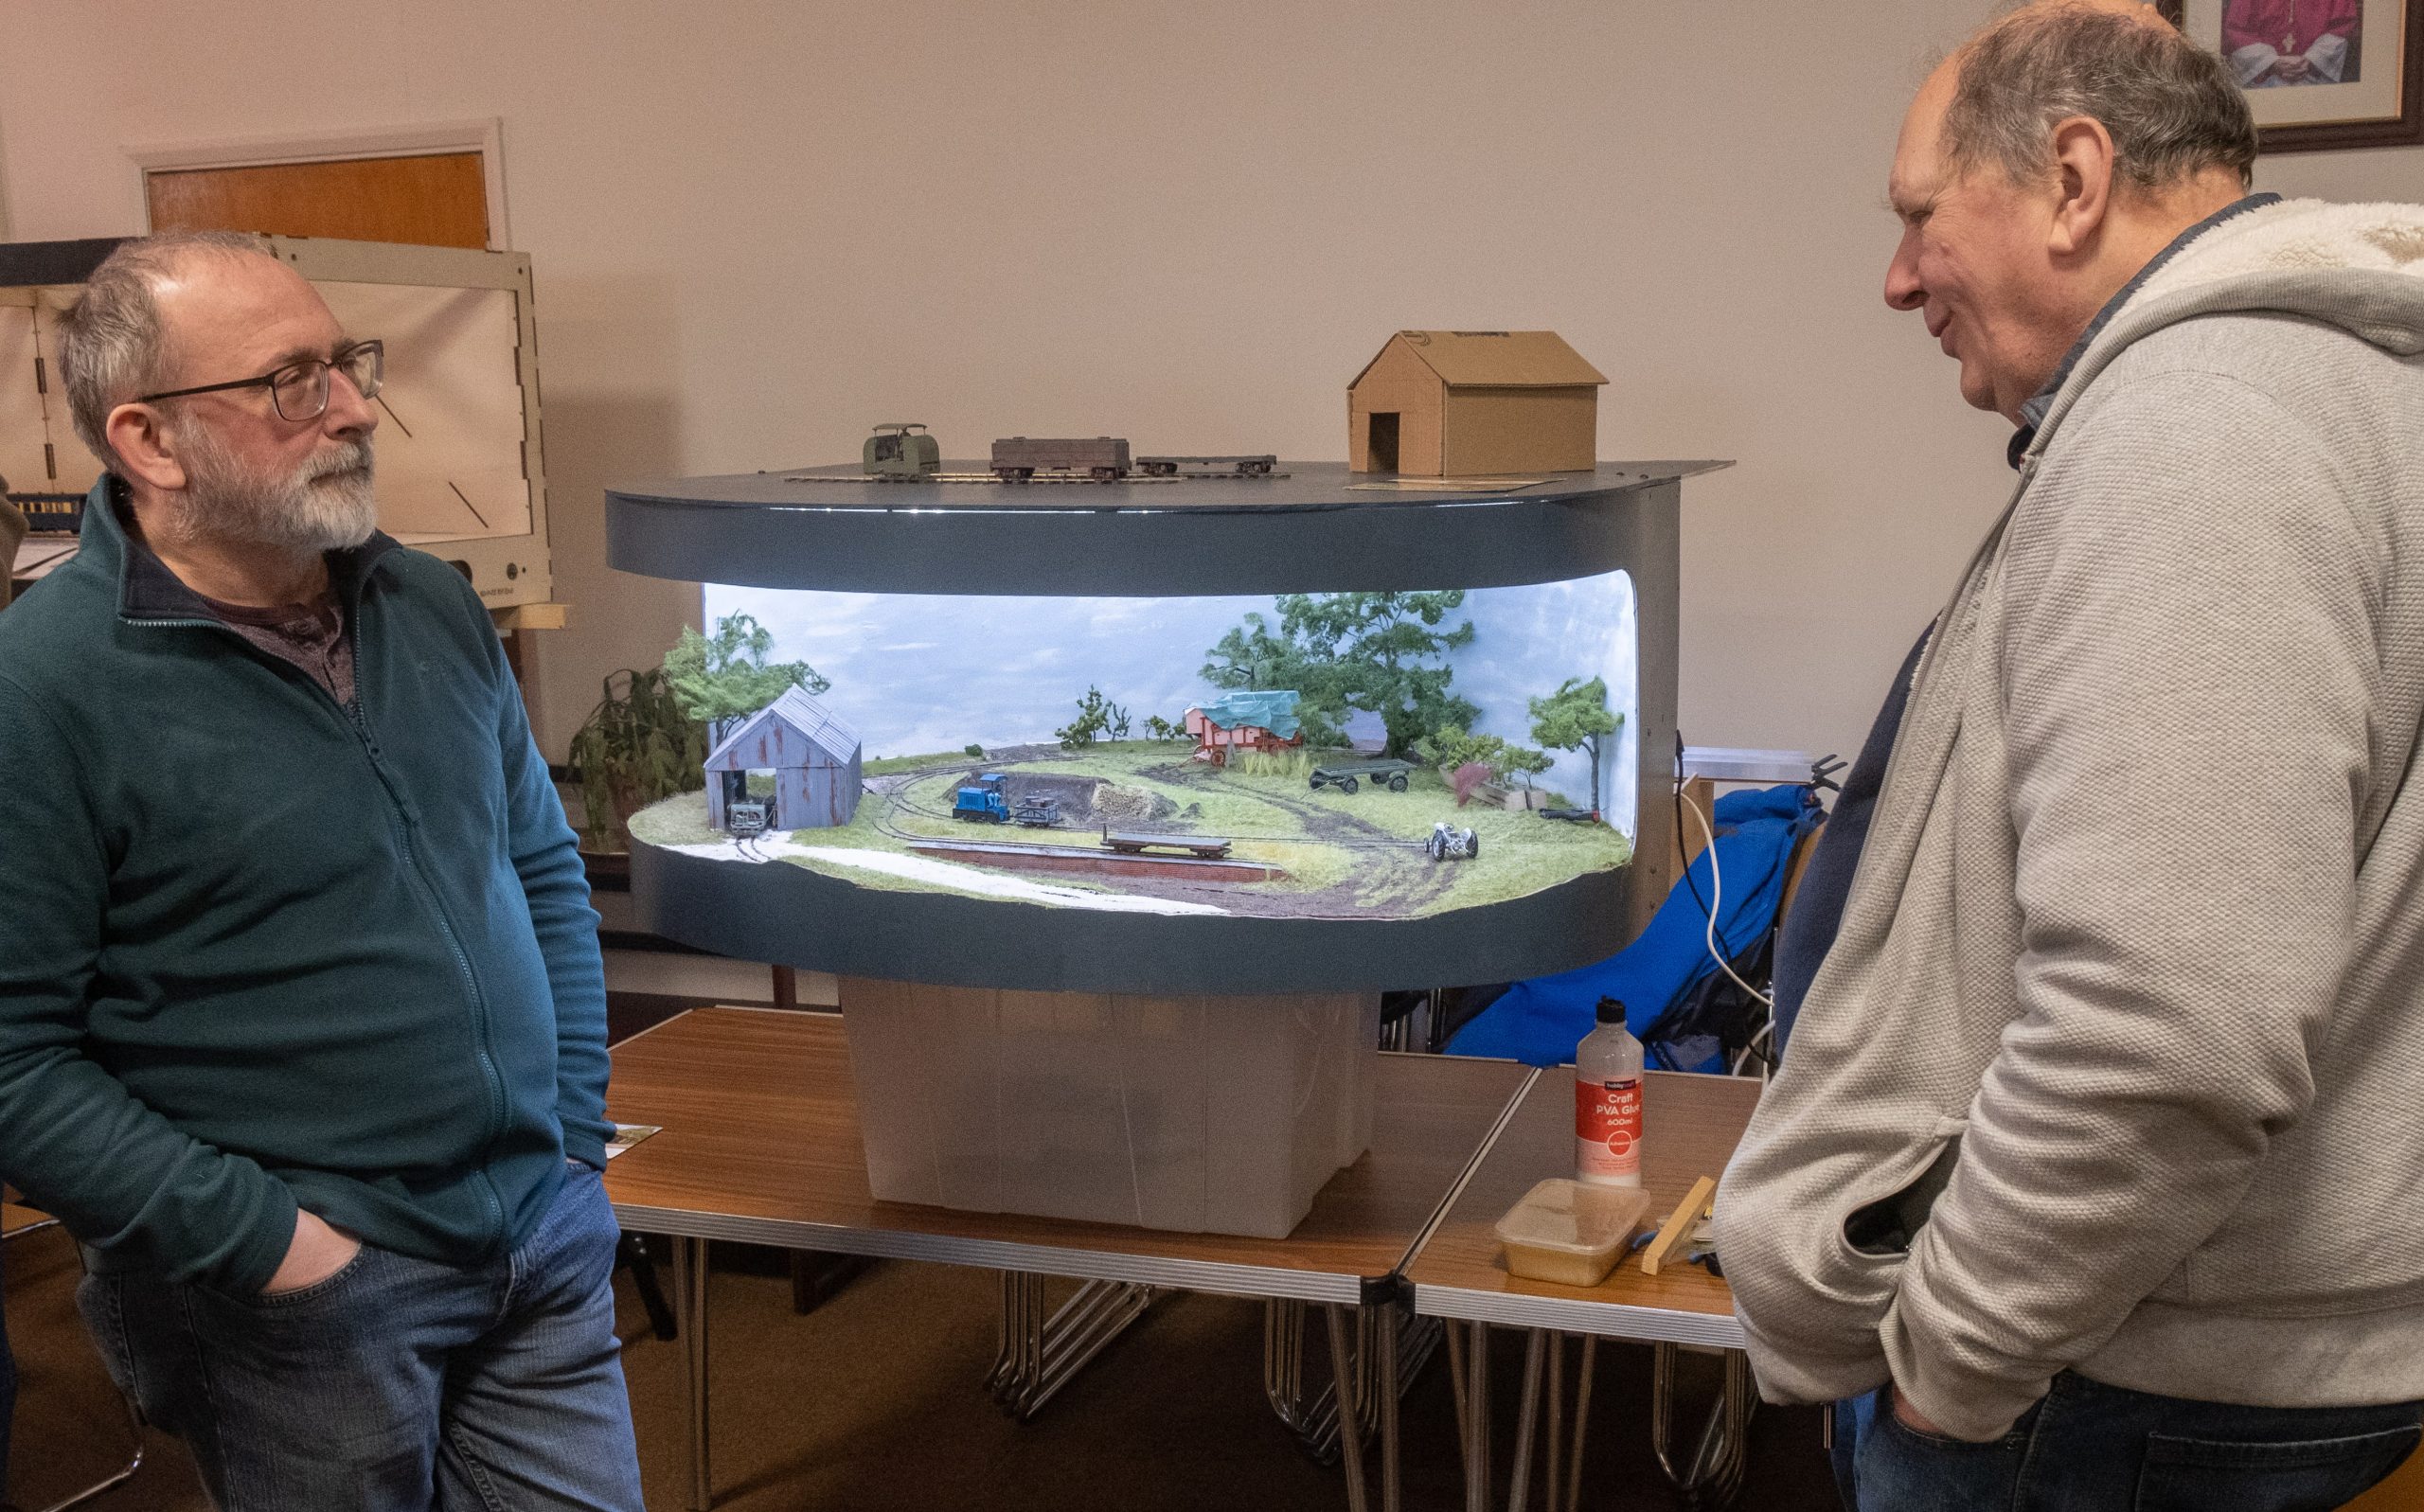
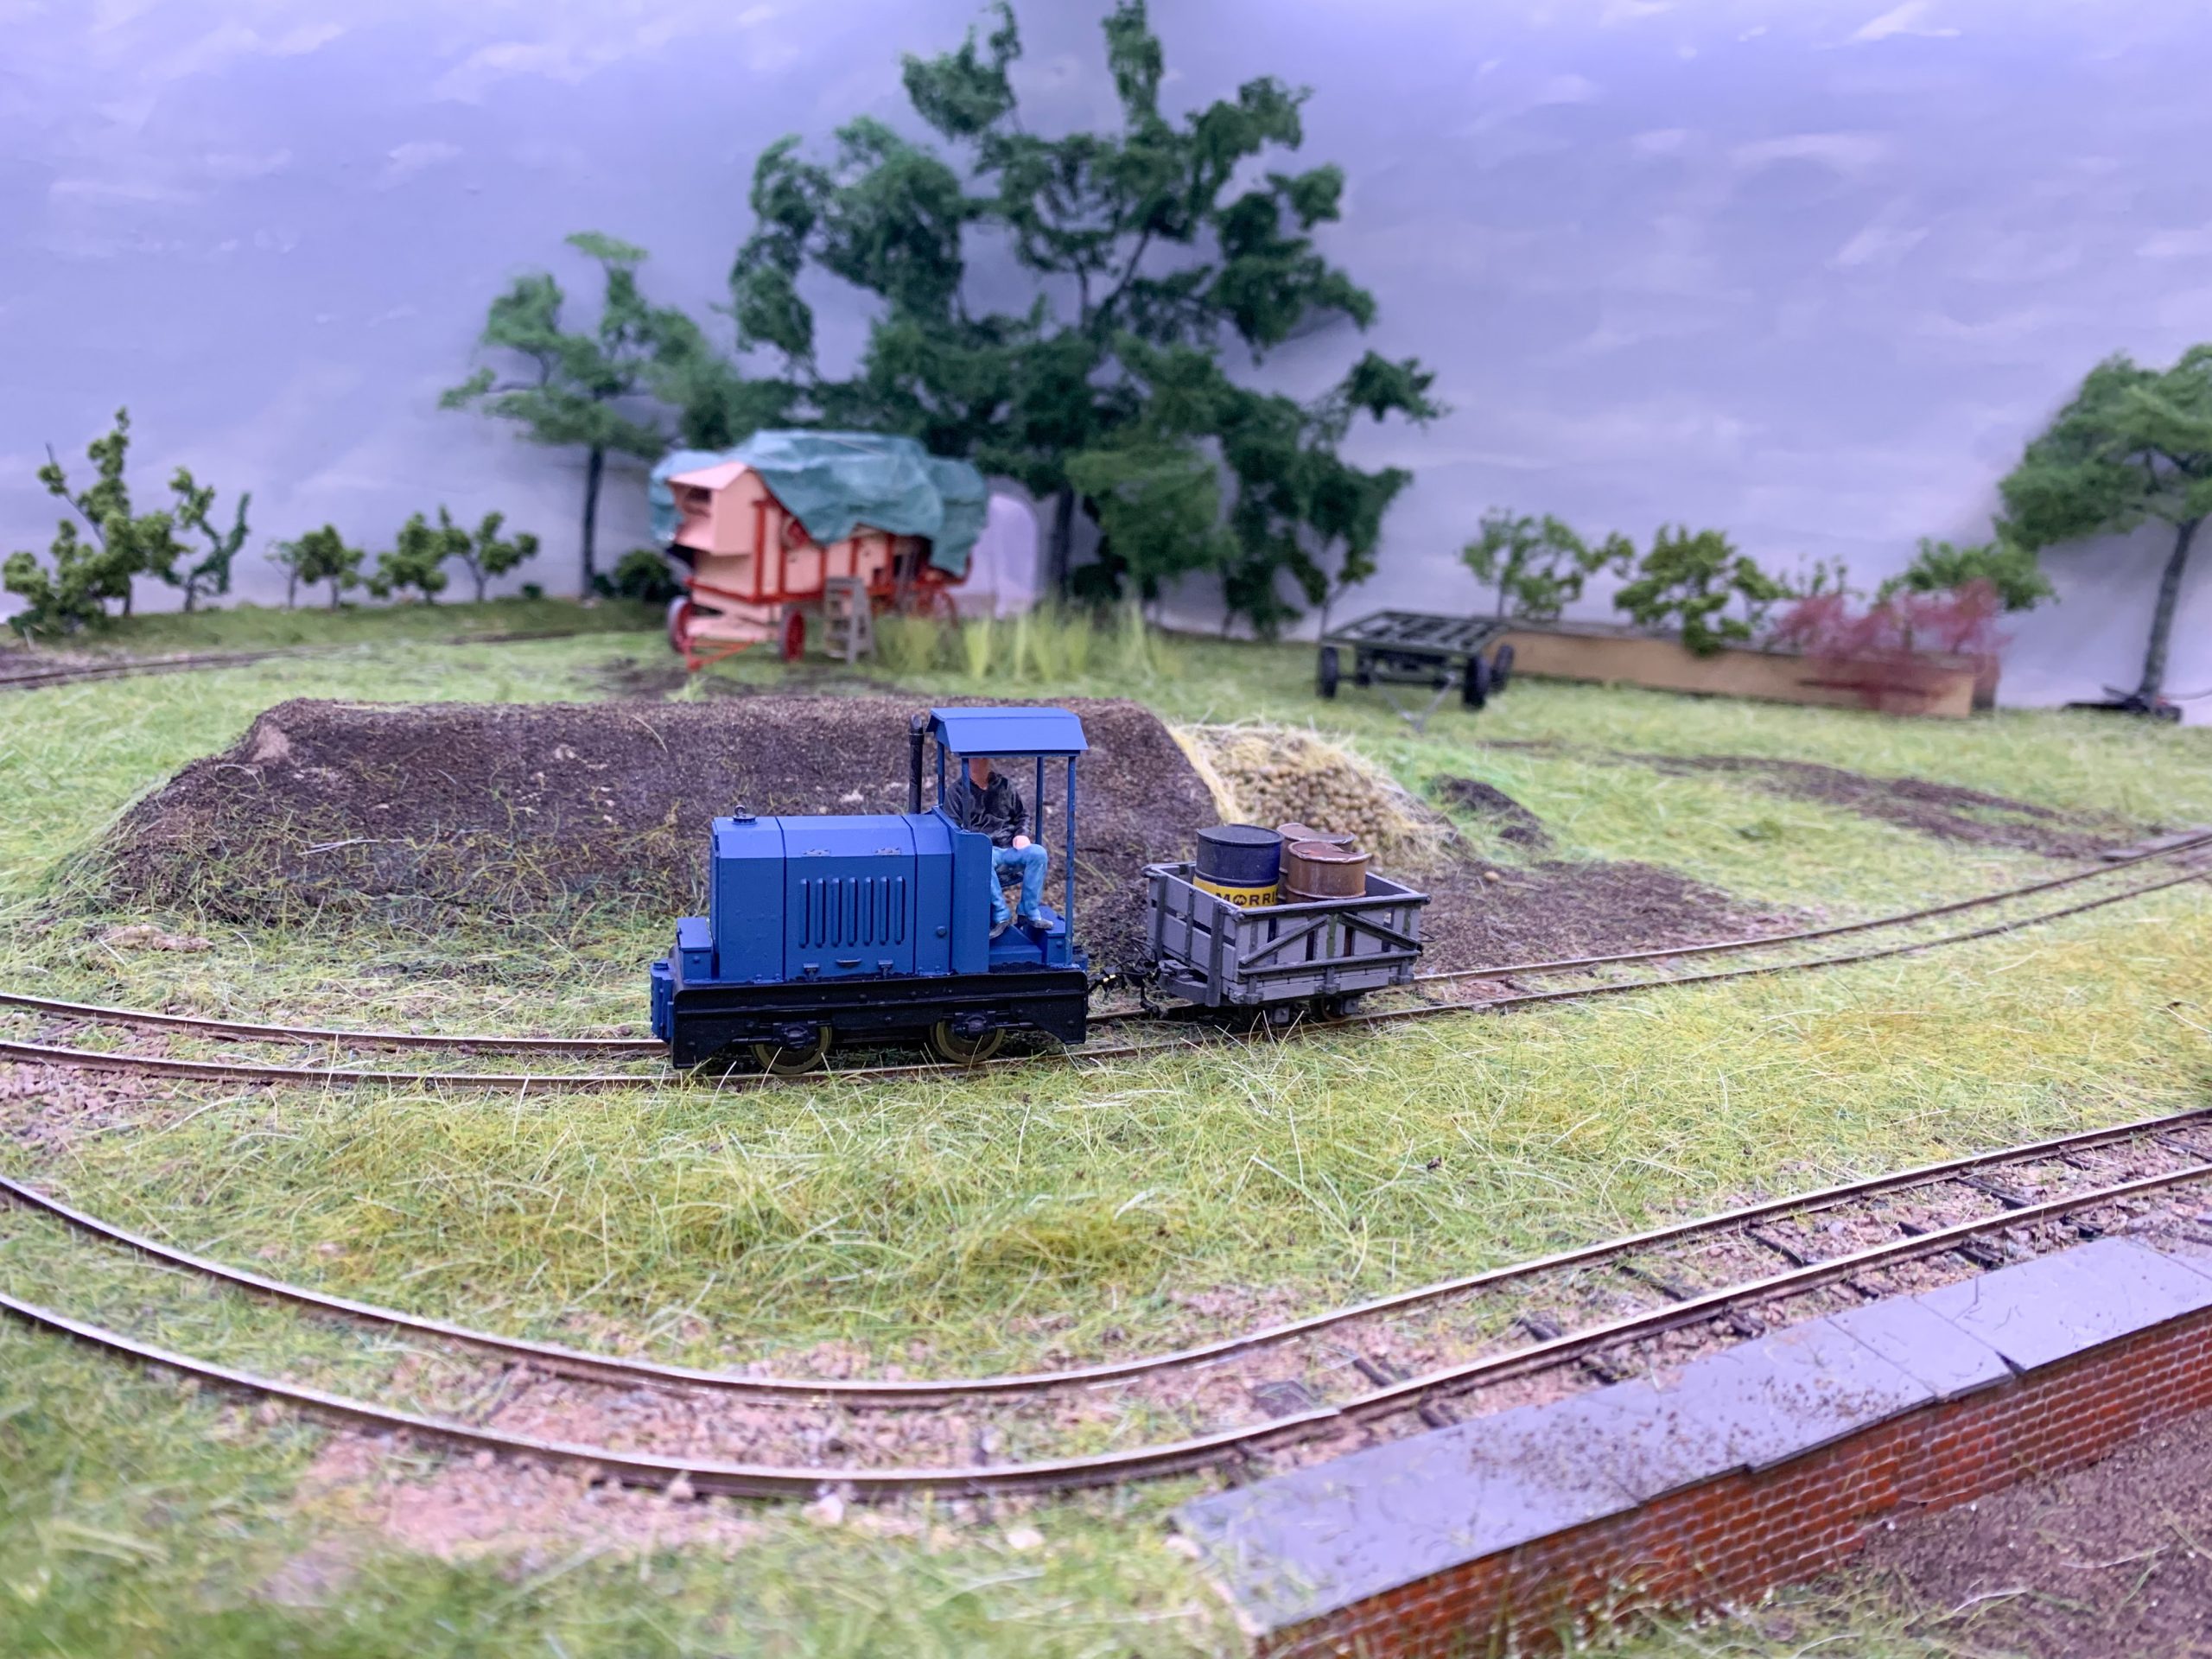
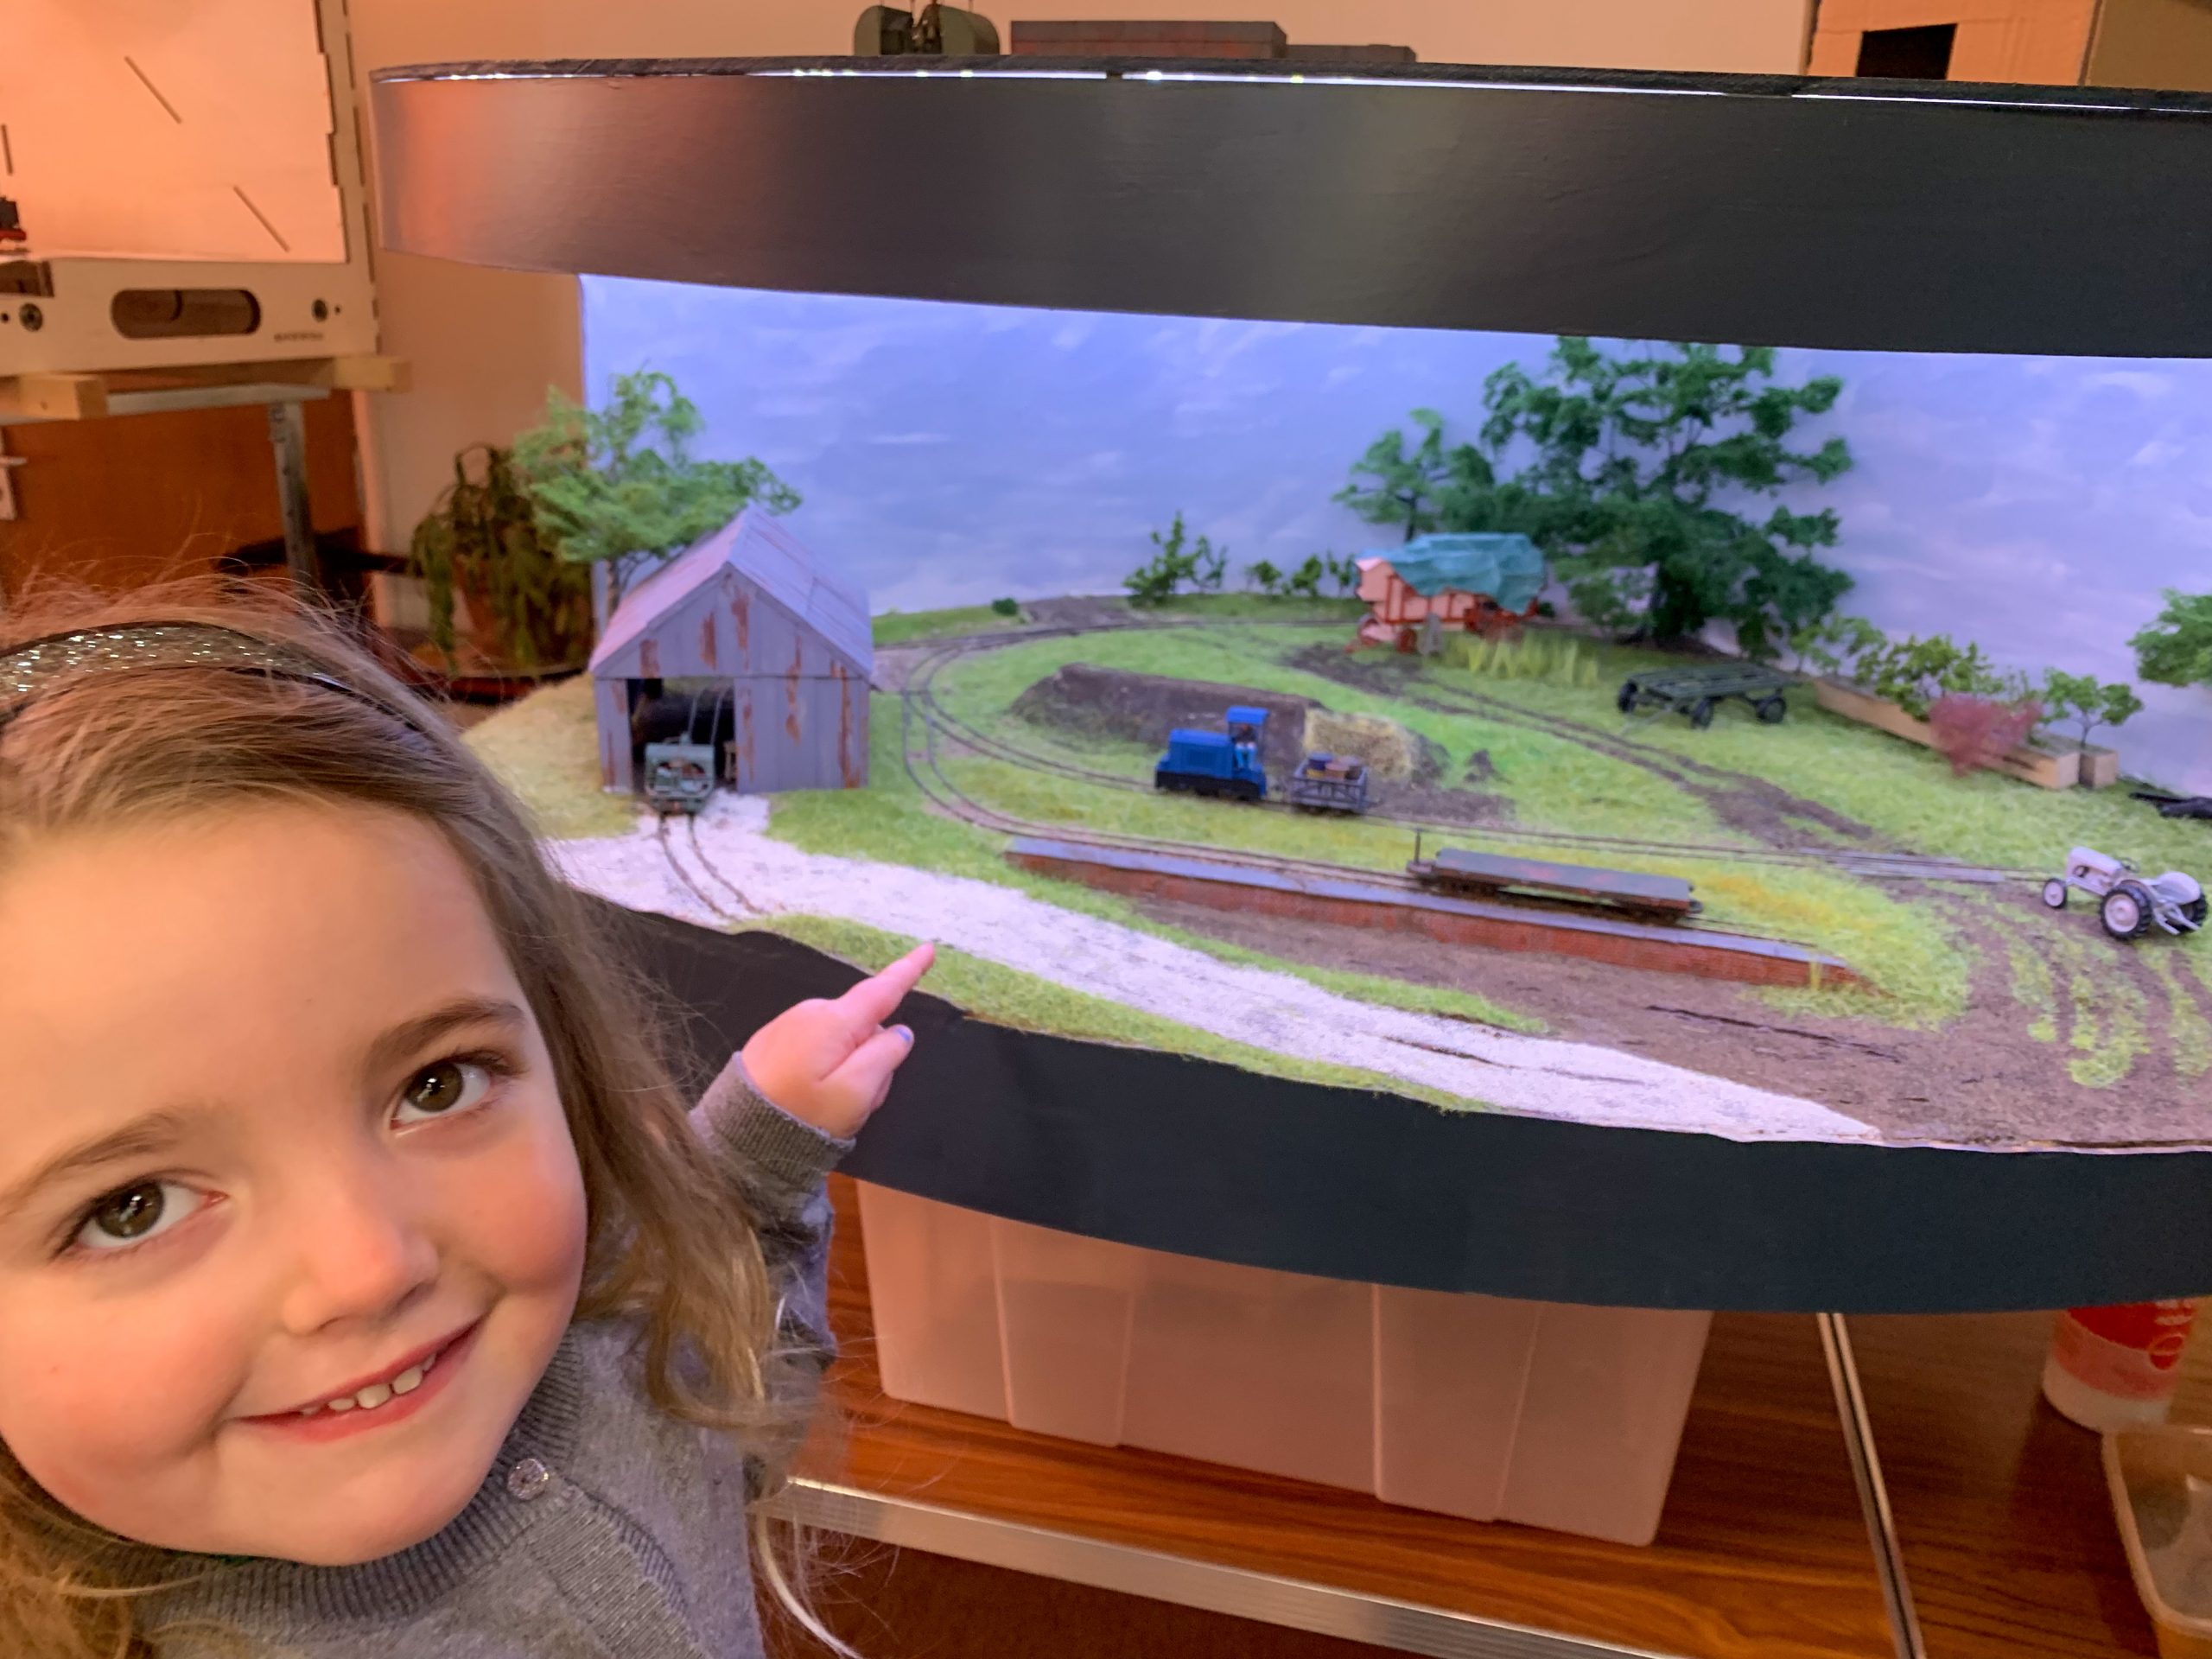
Firstly, here is Simon (on the left) demonstrating one aspect of the day – talking about the displays. In this case its his King Edward Street layout, a model of a potato railway.

The last picture of the spud railway sort of demonstrates that we want all to be involved with Annabel checking out the models.


This layout was 0-14 narrow gauge


Elsbridge is an 7mm scale standard gauge light railway operated, mostly, as a tramway.


Neil with his layout following some midnight oil burning.


Wheal Ponder. A narrow gauge (0-16.5) clay dry by Andy


Conceived as a small portable layout to compliment a permanent loft layout at home.


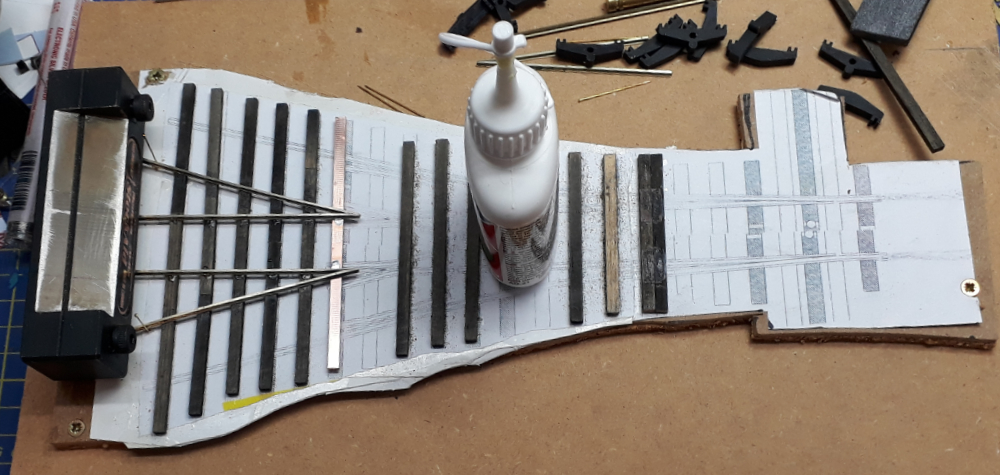
Me with EDM Models, part of my Brymston RR layout and a stub turnout building demo.


Unusually for one of these events I actually got something done

Before


After 


The layouts featured so far are those of the organisers and from our fortnightly zoom sessions and group messenger chats I can vouch for these having been the subject of a lot of midnight oil, deflection of other tasks, leniency by partners etc resulting in more modelling in a few weeks than we usually achieve in years

Also making its first appearance at a show was the start of the next chapter in the Henmore Dale Saga – Hopton (for Carsington)

This is the groups layout and shown were two of the four boards. These didn’t exist at Christmas!

The story of the Henmore Dale Railway is being told in a thread on this blog which starts HERE


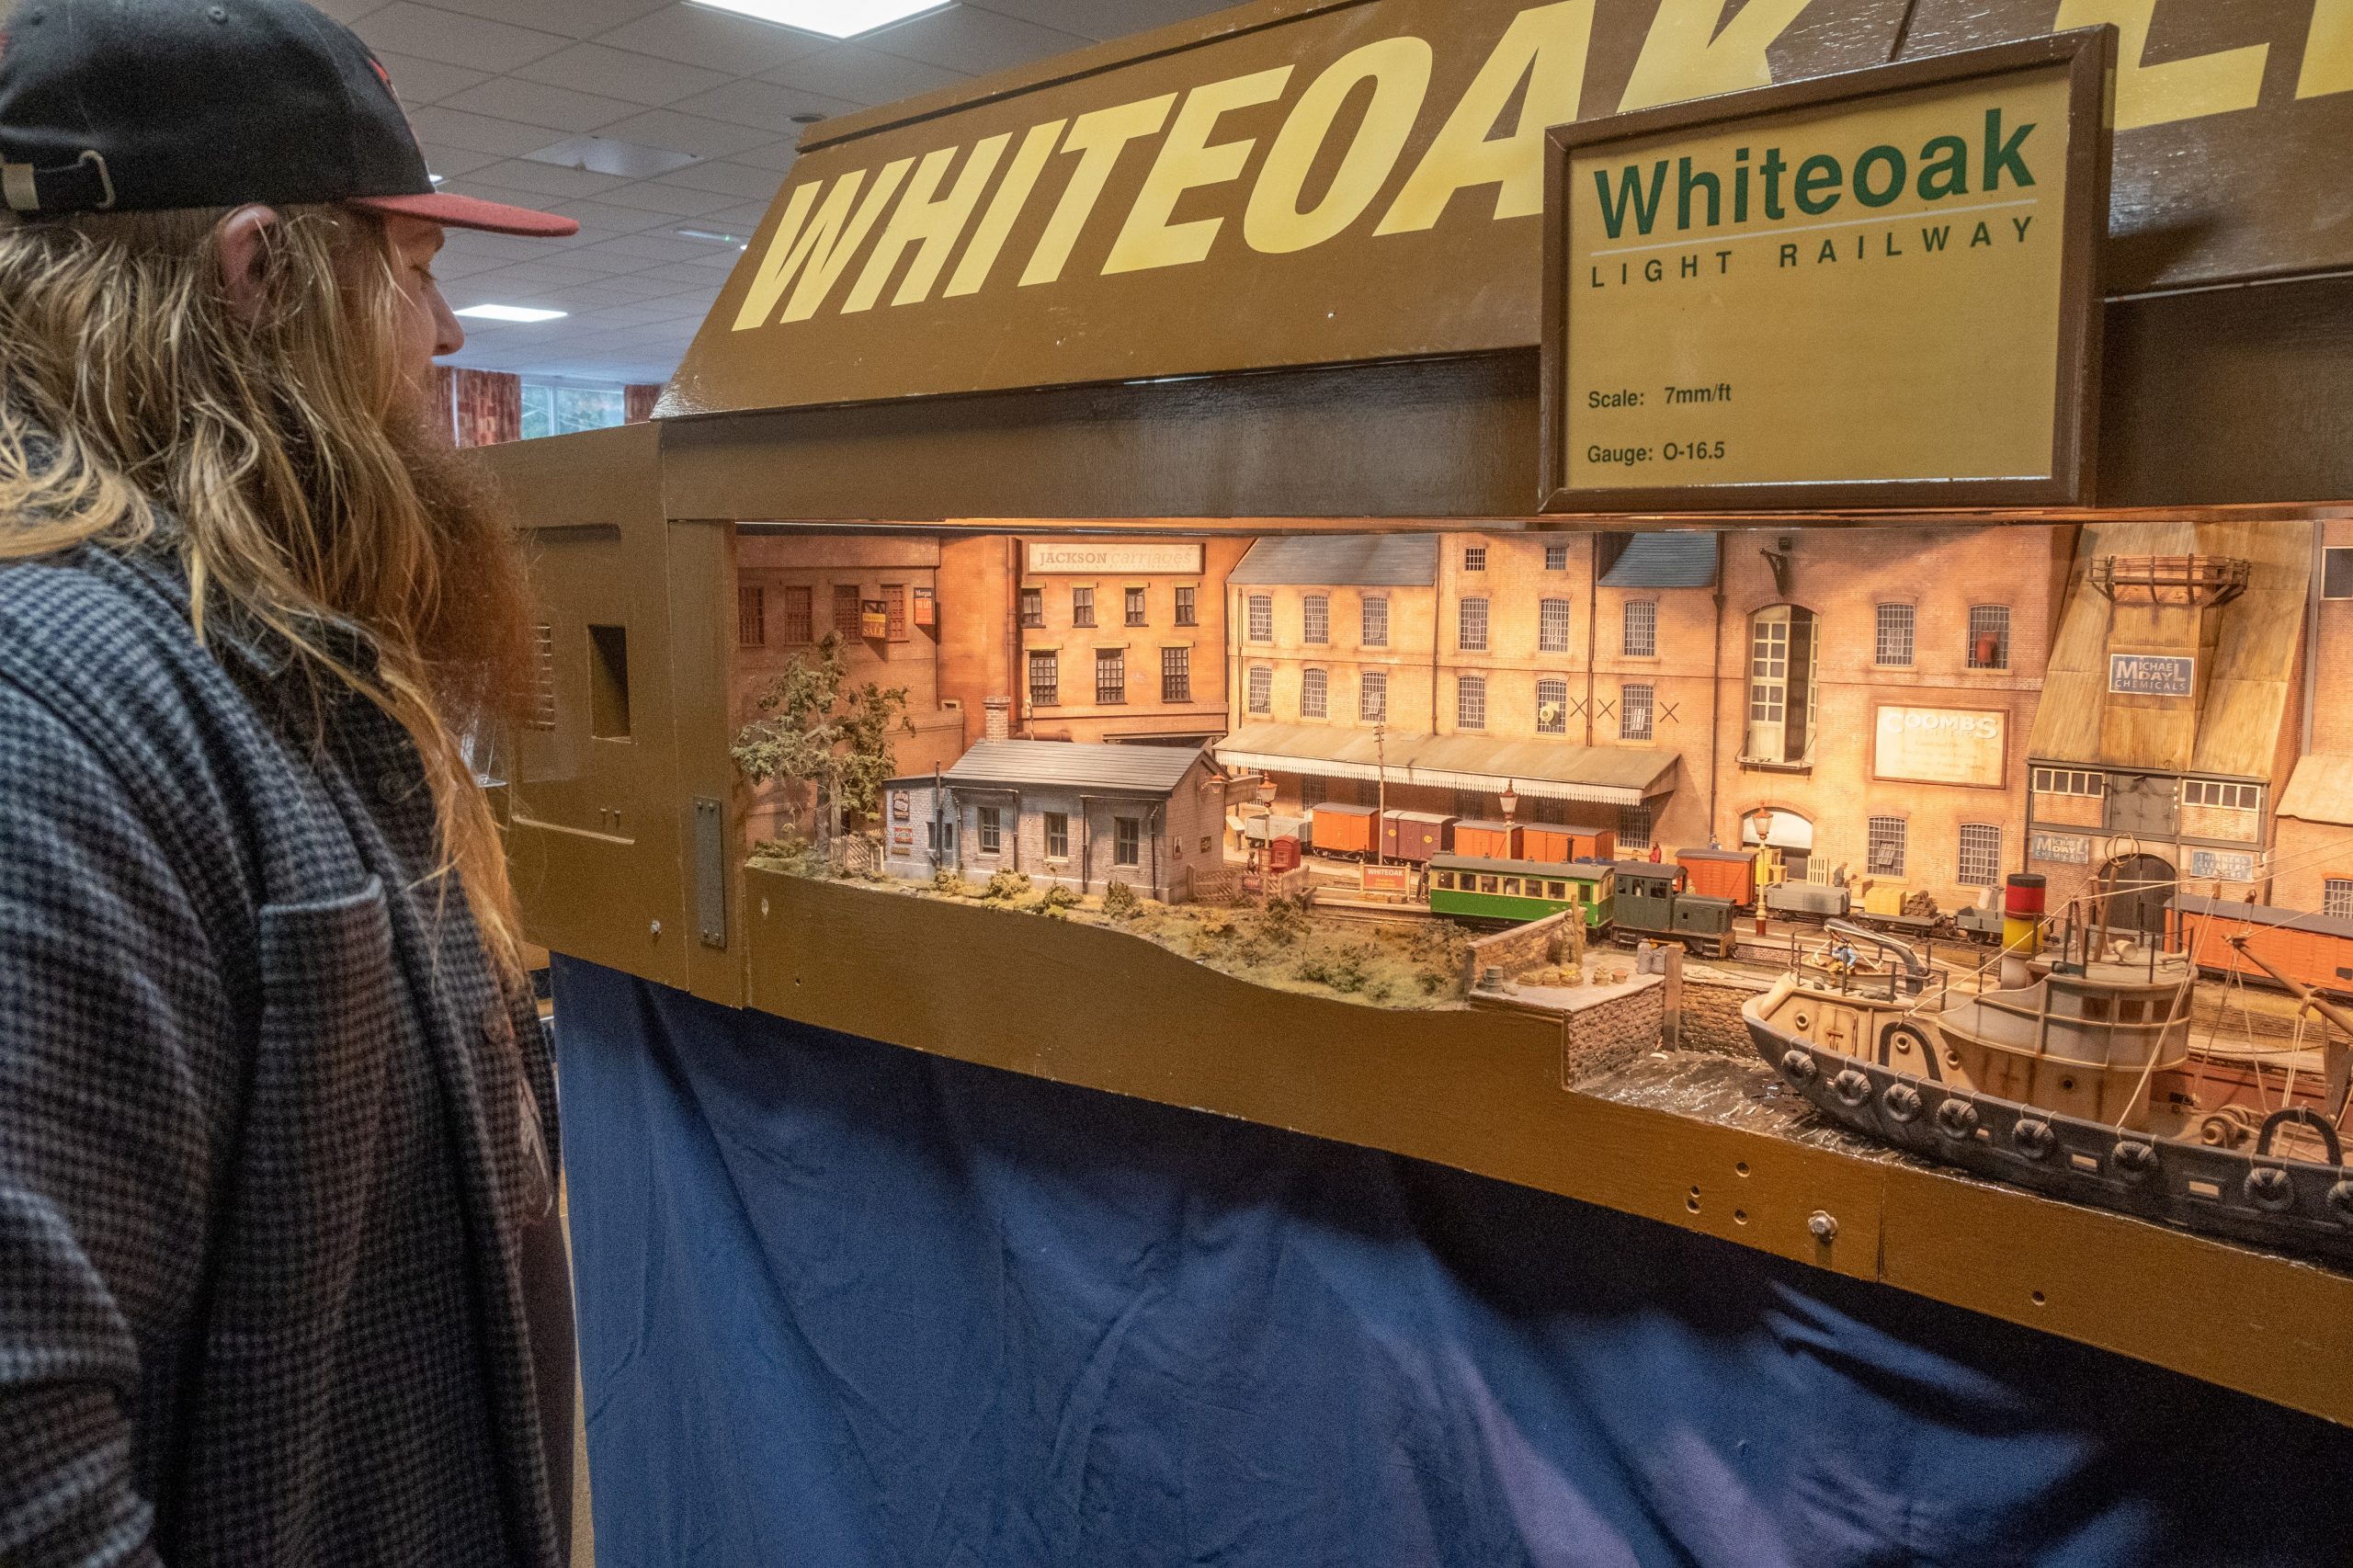
The West Midlands Group brought their recently acquired WhiteOak Light Railway


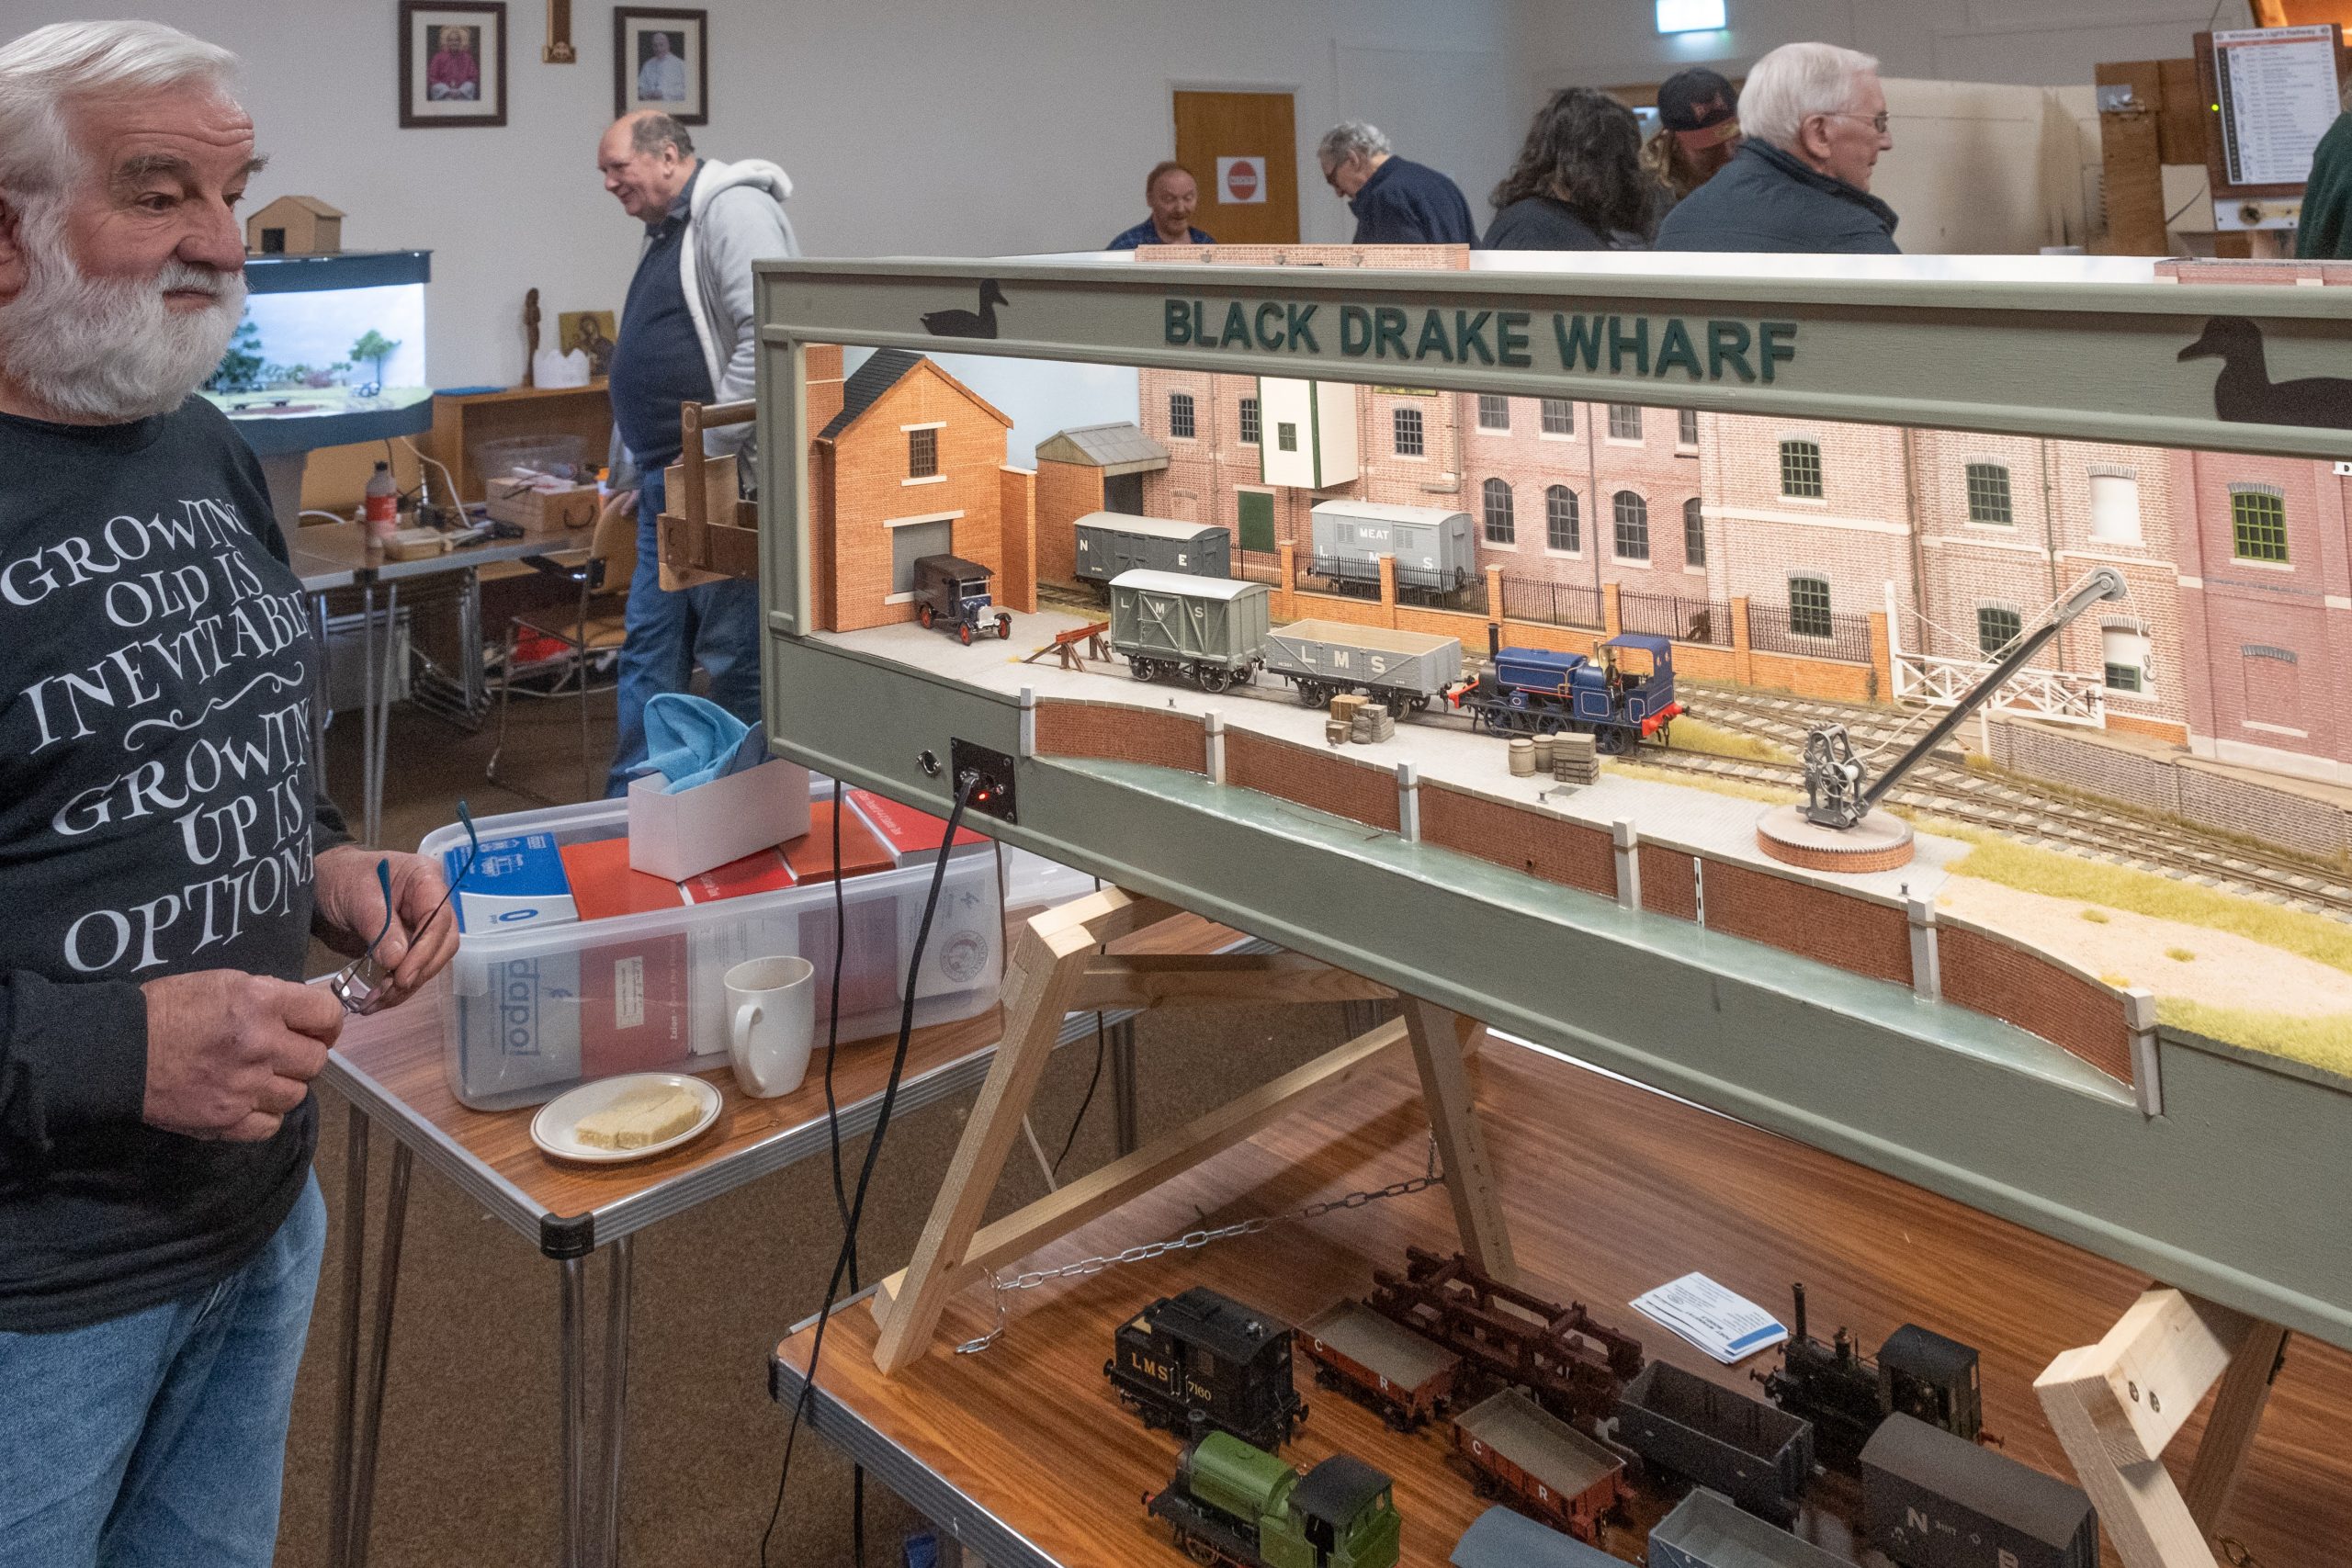
Phil, another original but now distant member of the group brought his standard gauge 7mm Blackdrake Wharf layout


The Basin was another layout new to us and built by the same person that originally built Blackdrake Wharf


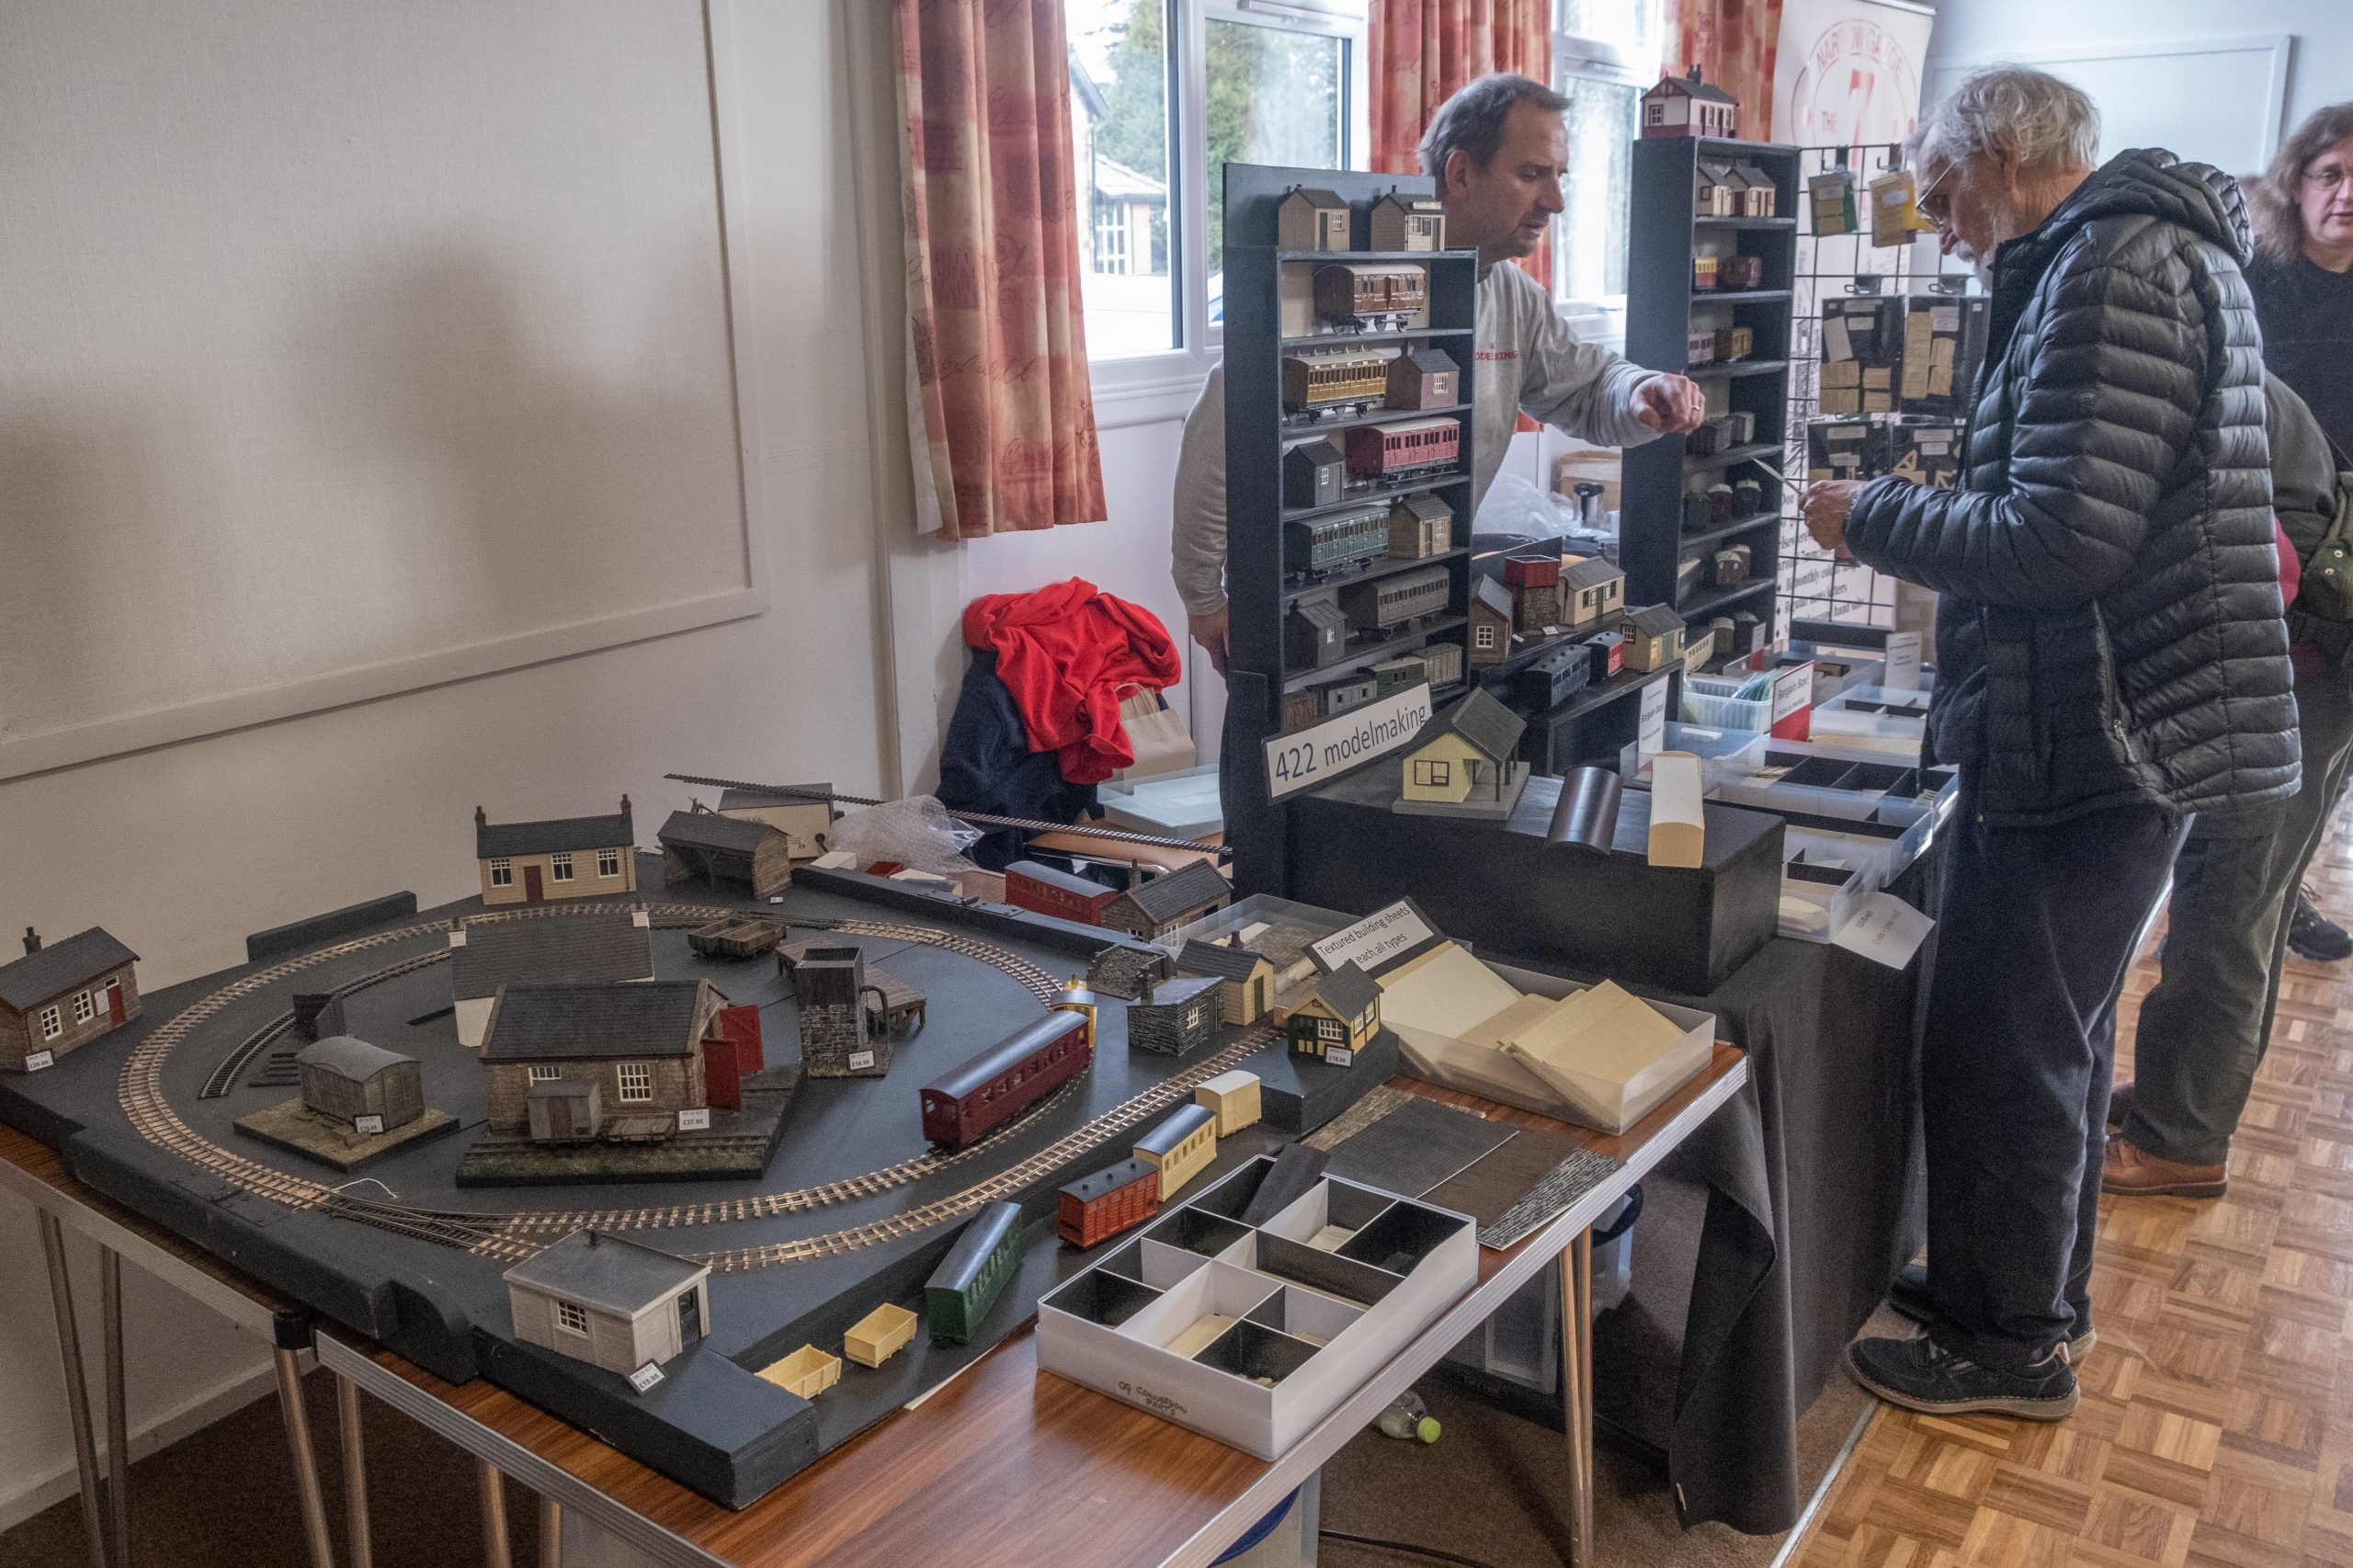
There was a trade presence appropriate to the day too

Iconic Rail and their models

7mm NGA Sakes and Slate Wagon building demo

422 Modellmaking

The genesis of this event was the TVG building a layout that was too big to set up in anyone’s house so to do run it, other than at an exhibition we had to hire a hall. Originally we used the community centre just up the road from the current venue.

Having got the hall we invited others to join us and utilise the space and the modelling day was born. All are there because they want to be and want to join in.

Like a lot of things Covid put a stop to the 2021 event and shunted the 2022 date to April, which didn’t really work. This was the first post Covid event back on the traditional date and we were determined to come back with a bang. A lot of effort was put in within the group to get our exhibits done and to promote the event online. We also introduced our new layout that doesn’t need a hall to be rented but that’s not going to stop us.

Was it a success? You bet. 120 visitors on the day may not sound a lot but the format of the day means a good number of them were there all day – there is a large seating area within reach of the serving hatch. Other stats: –

  • Highest Attendance
  • First one where we’ve reached car park capacity
  • Most bacon butties consumed. Learning from previously we got the emergency extra bacon at the start but still had to send out for more
  • Most brews drunk
  • Most hot air expended (probably)

When we started the TVG was principally a Notts and Derby based group. With time members have spread out so the event has become a bit of a reunion and once the dust had settled on the day there was a rather large gathering in a curry establishment for an enjoyable evening whilst considering the day and planning the next.

On that note the counter has been reset


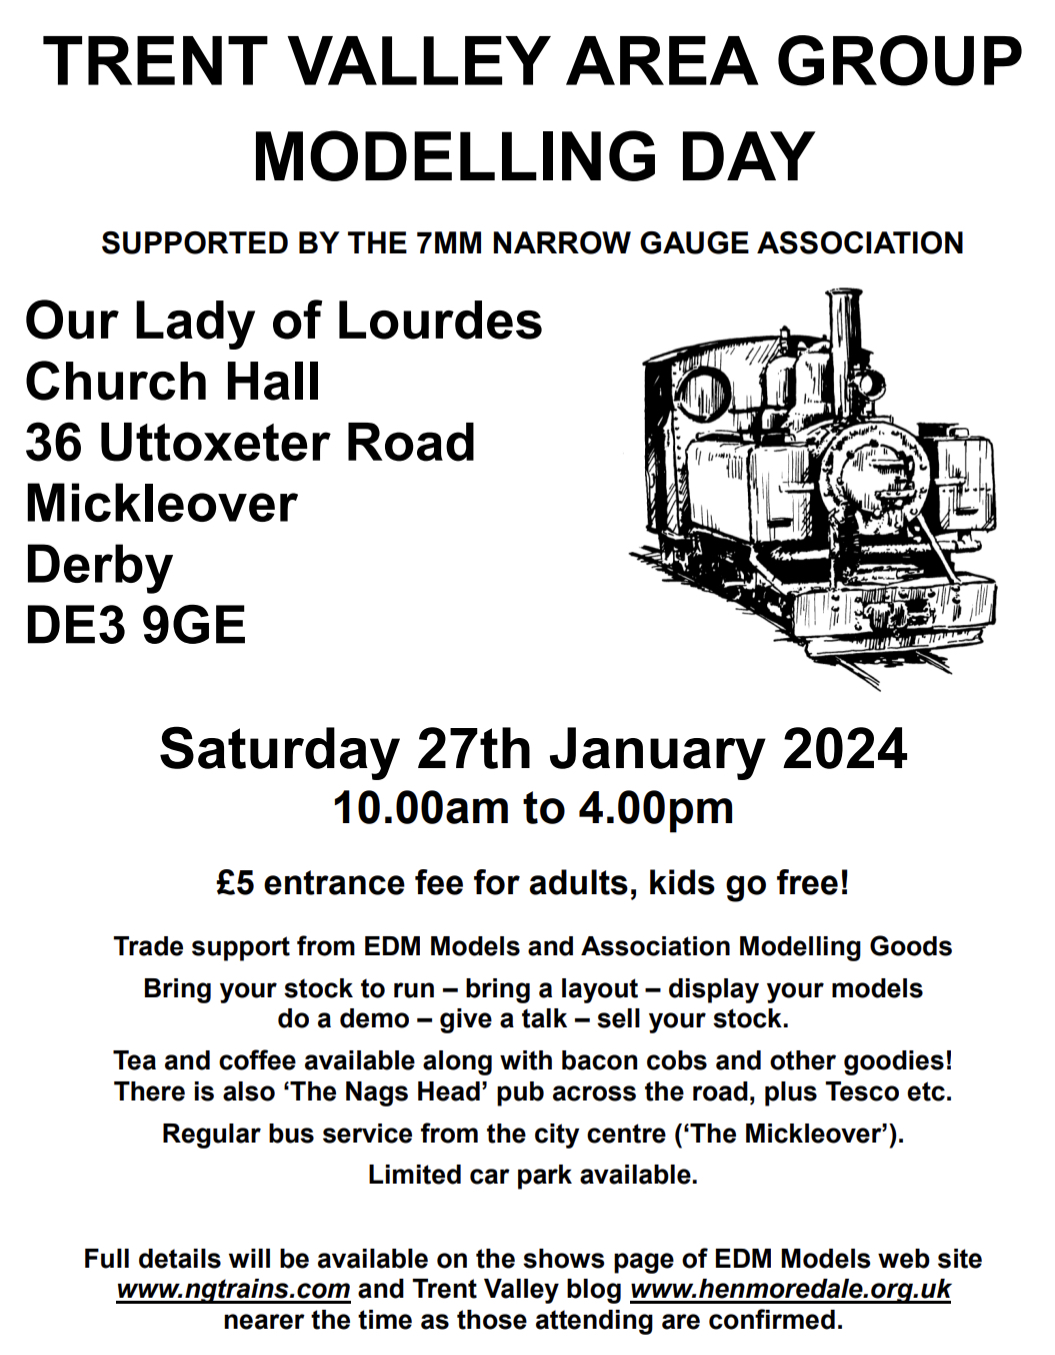
And put the 27th January 2024 in your diary


Loading

Was it Worth It?

As predicted………

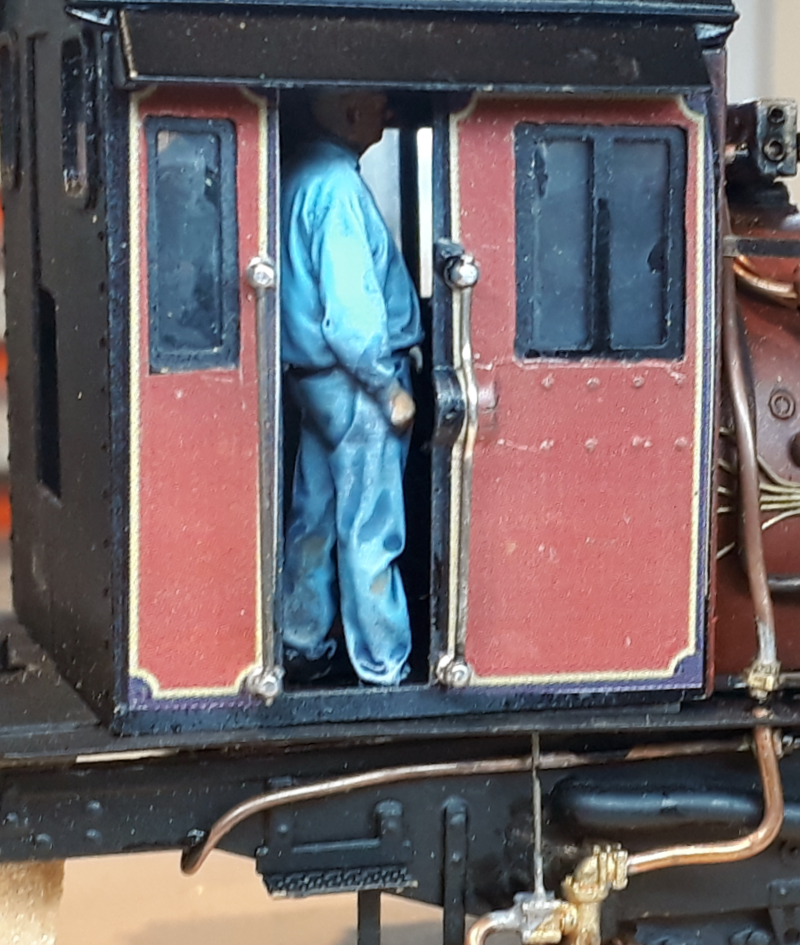
You can hardly see the figures now they are `on the job’ as it were and you have to wonder if it was worth the effort. This is on a model that I am now trying to finish to a deadline.

Given that it took me close to two days to get raw 3D printed figures mounted on rods, painted and installed in their workplace a more slapdash and quicker approach might have done.

I am pleased with the results and am therefore going to come down on the side of it being worth the effort for the following reasons.


  • I know they were done properly
  • I have to push myself with my modelling
  • It’s part of learning to do a better job

The thing is this. Not having painted figures before I think I’m no good at it. Not totally true, I’ve splodged paint on engine crew in the past and from those rubbish efforts I know how bad they were.

I kept putting this off but then decided that it was time to learn to do it properly with base colours and then shading with washes and filters. The figures were primed and than sprayed black from the feet towards the head. The aim there is to get back in the underside of folds and edges where there would be shadow. Next they were sprayed from above lightly with white. This is to get white on the upward facing surfaces where light would shine.

Only now did I add any actual colours and I’ll let you into a secret, the only blue I had was sky blue, way too light & bright for overalls but by spraying it lightly over the pre shading it took on slightly different shades of blue and, done mostly from above it didn’t get on the shadowy undersides of jackets and creases. I finished of with post shading, washes and filters applied to enhance the `lighter’ bits and darken the shadows. Lastly a spray of matt varnish brought a mix of finished together.

Its actually a good thing you can’t see their faces because that is the worst part of the figure painting. Part of the problem is that the facial features on the printed figures is poorly defined but the colours don’t work.

Skin isn’t just pink! This has some carry over into my photography interest where light is everything and you can highlight or shade with light to enhance or hide features.

Do I still not like painting figures?  No, but worryingly I feel a figure painting rabbit hole opening up. Speed wise for the O scale figures rather than doing two chaps at a time I ‘d set up and do the prep and initial spray work on a batch of figures as this will reduce the waiting time for paints drying, Brush works could be done later to customise each figure without the full desk chaos. I am tempted – post deadline -to get some larger `fleshy’ 3D models and practice skin tones on them.


Loading

Well, that figures

I started the day with “I don’t like painting figures”

However the Garratt won’t drive and fire itself and I wanted to do something better than I had previously. The starting point were some 3D printed figures that are OK but the facial features are a bit indistinct. I have been watching a couple of military modellers channels on You Tube and their figures make anything we have on our railway models look pretty rubbish. Then, they’ll spend a week painting one figure.

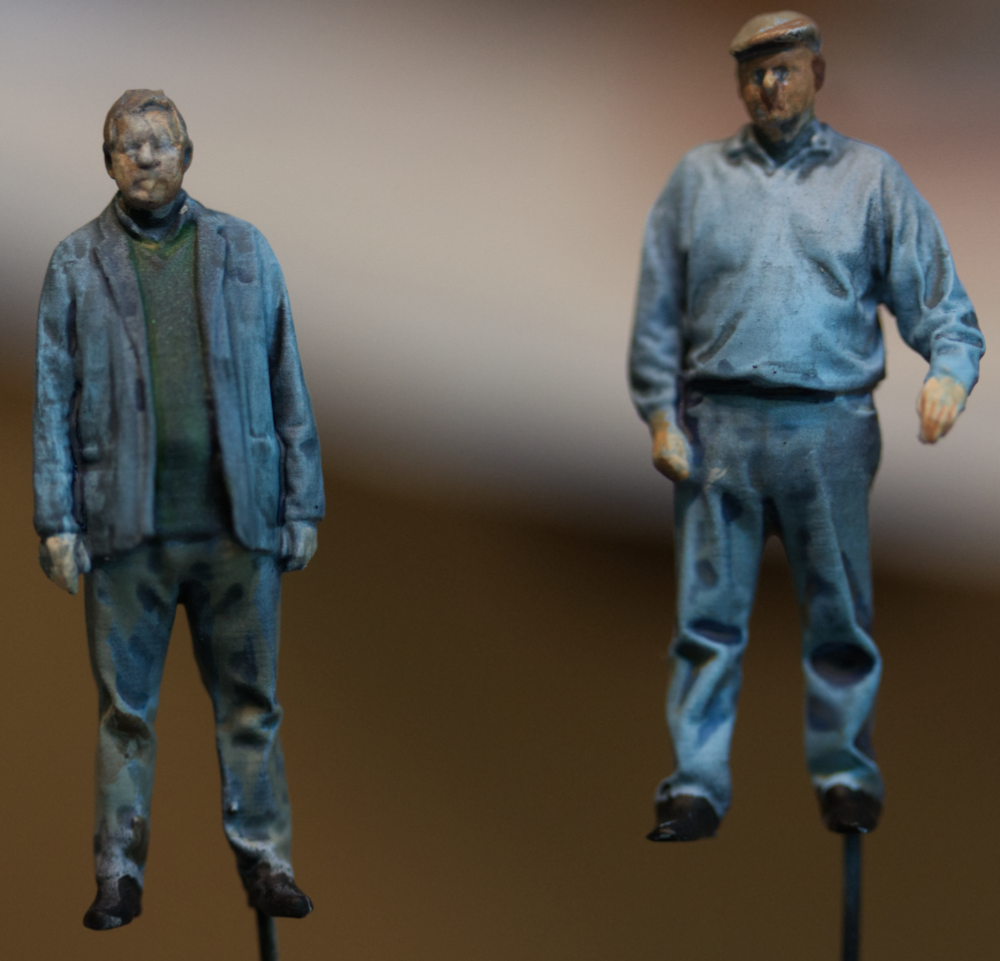
Without the luxury of a week something faster was required. Firstly they were sprayed with black aimed at them feet to head and into all the folds of their clothes. Next was a light spray of white from above aiming to get paint on the high spots where the most like would fall. With those dry the clothing was sprayed with the only blue I had which was a bit too sky blue.

Now it was brush work with flesh picked out with base flesh tone and later highlighted on the upward facing surfaces. Boots, Hat and other Clothes were picked out in colours mixed on a plastic tray starting with a coat of dark and then lightened on the high spots.

When that was dry darker washes were brushed onto the folds in the clothing and allowed to run in to folds and crevices. Up to this point it had all been done in pretty quick drying acrylic paints but the washes are deliberately slow to dry to give you time to work them. You sort of end up flooding it and then dry brushing it off the tops and blending it in.

The last colours were some filters of grime and dust that moderate extreme edges in the colours. These are oil based and take time to dry. Once dry the chaps got a shower in acrylic matt varnish.

My thoughts now? Intrigued, I’d guess. I certainly enjoyed putting into practice what I had watched in the videos. In self critical mode they could be a lot better, starting with better quality figures and more practice. I almost want to do them again to put what I have learnt into play.

In more rational mode I remind myself they’re only about 35mm tall and are going to spend their life driving and firing a Garratt from tomorrow where they will hardly be seen.

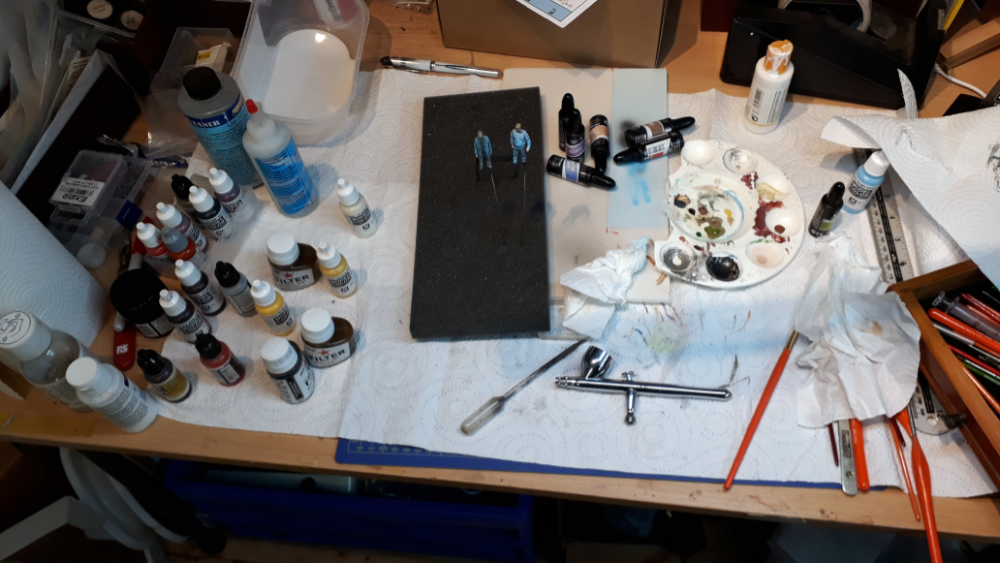
Its taken me much of a day to do these two chaps whilst doing other things in the “drying” interludes and at the end of it what was a clear table looks like this mess. Would I do more? Yes, but I’d do more figures at the same time and I need to expand my acrylic paint colours to be a bit more peoply as palette is all a bit too “train” at the moment.


Loading

Finally……….

Murder  Of  A Garratt – the  coming  together

Finally, its very nearly done. Have to be very careful what I write here as I now the customer reads this blog but if ever there was a model I wish I’d walked away from its this one. It seems to be fighting to the end. Today has been a tale of broken glass.

First, my fancy York Gin glass fell out of the cupboard and smashed. Should have gone back to bed then or chosen to read a book for the day but its been a tale of broken glass model wise too.

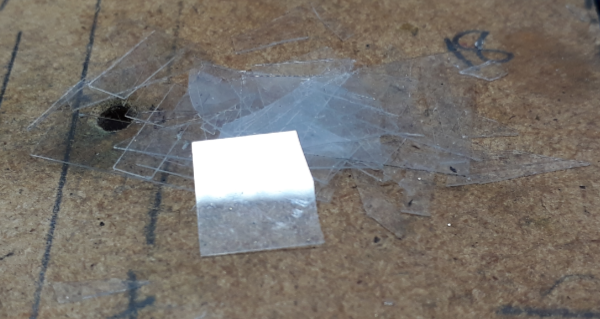
Microscope cover slips to be precise.  They’re only 0.15mm thick optical glass and individual ones will break with a hard stare let alone trying to handle them. Get one out and separated from the pack and you’d better keep an eye on it as, with it being ultra clear glass, if you put it down they tend to disappear.

Cutting them is a whole new ball game. Theoretically its the same as cutting any glass. Scribe a line with a sharp thing and then flex it along the line.  Its not so straightforward when it gets so fiddly. Armed with a carbide scriber the glass slip is placed over a marked sheet or cutting block and a line scribed. The tricky bit is getting the pressure right, somewhere between not touching the glass and the weight of the scriber plus a smidge.

There’s added jeopardy if the slip needs a second cut as the first seems to warn the glass you are coming and it breaks from fright. The worst of these needed four cuts. Best I managed was getting one right at the second slip but the ones needing four cuts took many goes. Luckily they’re only about a fiver for a hundred.

I think its worth the effort though. I know, you’re going to say, “I can’t see the glass” to which my answer would be “precisely!”

This article was written because its ages since I wrote anything about the Garratt and its sort of some enforced patience to not touch it until the glue has dried fully. I have been saving pictures for a larger update but I’ll save that all now for a post entitled “delivered”.

Loading

Hopton (cont’d#1)

Hopton (For Carsington) – Henmore Dale Light Railway.

Having introduced Hopton by describing the previous layouts and, to some extent, what was wrong with them and explained the hiatus and, in my opinion, beneficial pause we come to the new layout and how we arrived at the current cunning plan. I ought to have got Andy to write this bit as after around a year of ZOOM and Messenger chats he put together a document that summarised what we had discussed and laid out some options and I am now going pick and choose from that.

  • A more compact layout which we can erect without needing a large hall.
  • A couple of cars to go to a show rather than a rented van.
  • Skill Building. (Note 1)
  • Manageable Start. If that is a success, then we build something else.
  • Presentation: To include backscene and lighting.
  • Coherent loco and rolling stock policy when exhibiting the layout. (Note 2)

A couple of those bullet points have notes attached as whilst we know what we mean they need a bit of amplification for the wider audience.

(Note 1): One failure of the old layout was in it progressing as our skills developed. Rather than a clean break, or update what we’d done, we’d build a new bit to our current standards/finance and life with the poor bits. Whilst what I call the poor bits were exhibitable there was a lack of consistency across the full layout.

(Note 2): We decided that, when exhibiting, the locomotives and stock on the layout should show some sort of a credible policy. The likes of the Welshpool and Leek and Manifold managed all their lives with two loco’s each and they matched their stock well. As an exhibition layout we’re always going to have more that two loco’s but in the past there was almost a competition to build the most outrageous. Then, on the layout unlikely combinations would run. Things like, for example, the full stone train with a Porter on the front when the last time it appeared in the sequence the same train needed an, equally ridiculous, 0-10-0 to pull it.

This credibility note has the proviso we can run all the silly stuff at home.

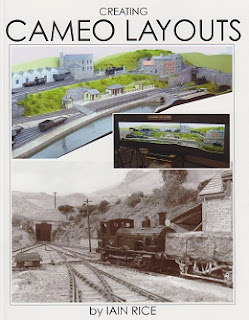
In a parallel universe Andy and I had copies of Creating Cameo Layouts by Iain Rice and had been discussing our own projects using the cameo idea. My own 0n3 layout started out in my head as a room sized project but has, with practicality applied, become a series of connected cameos (Ok, I’m still on the first one and its not connected to anything yet). What appeals is the self-contained nature with the pelmet top with lighting built in completing the presentation.

If, like me, you’ve read a lot of Iain Rice’s articles over the years you’ll have noticed him banging on about the proscenium arch idea stolen from theatre stage sets and used to focus the eye on the stage. The full cameo layout idea, and the book, is really the ultimate development of that theory.

The Route

When the definitive history of the HDLR is written it will surely detail all the considerations, meetings and minutes in account of estimation of traffic along the route but for now here is just a précis of the route and traffic.

Atlow Mill – then

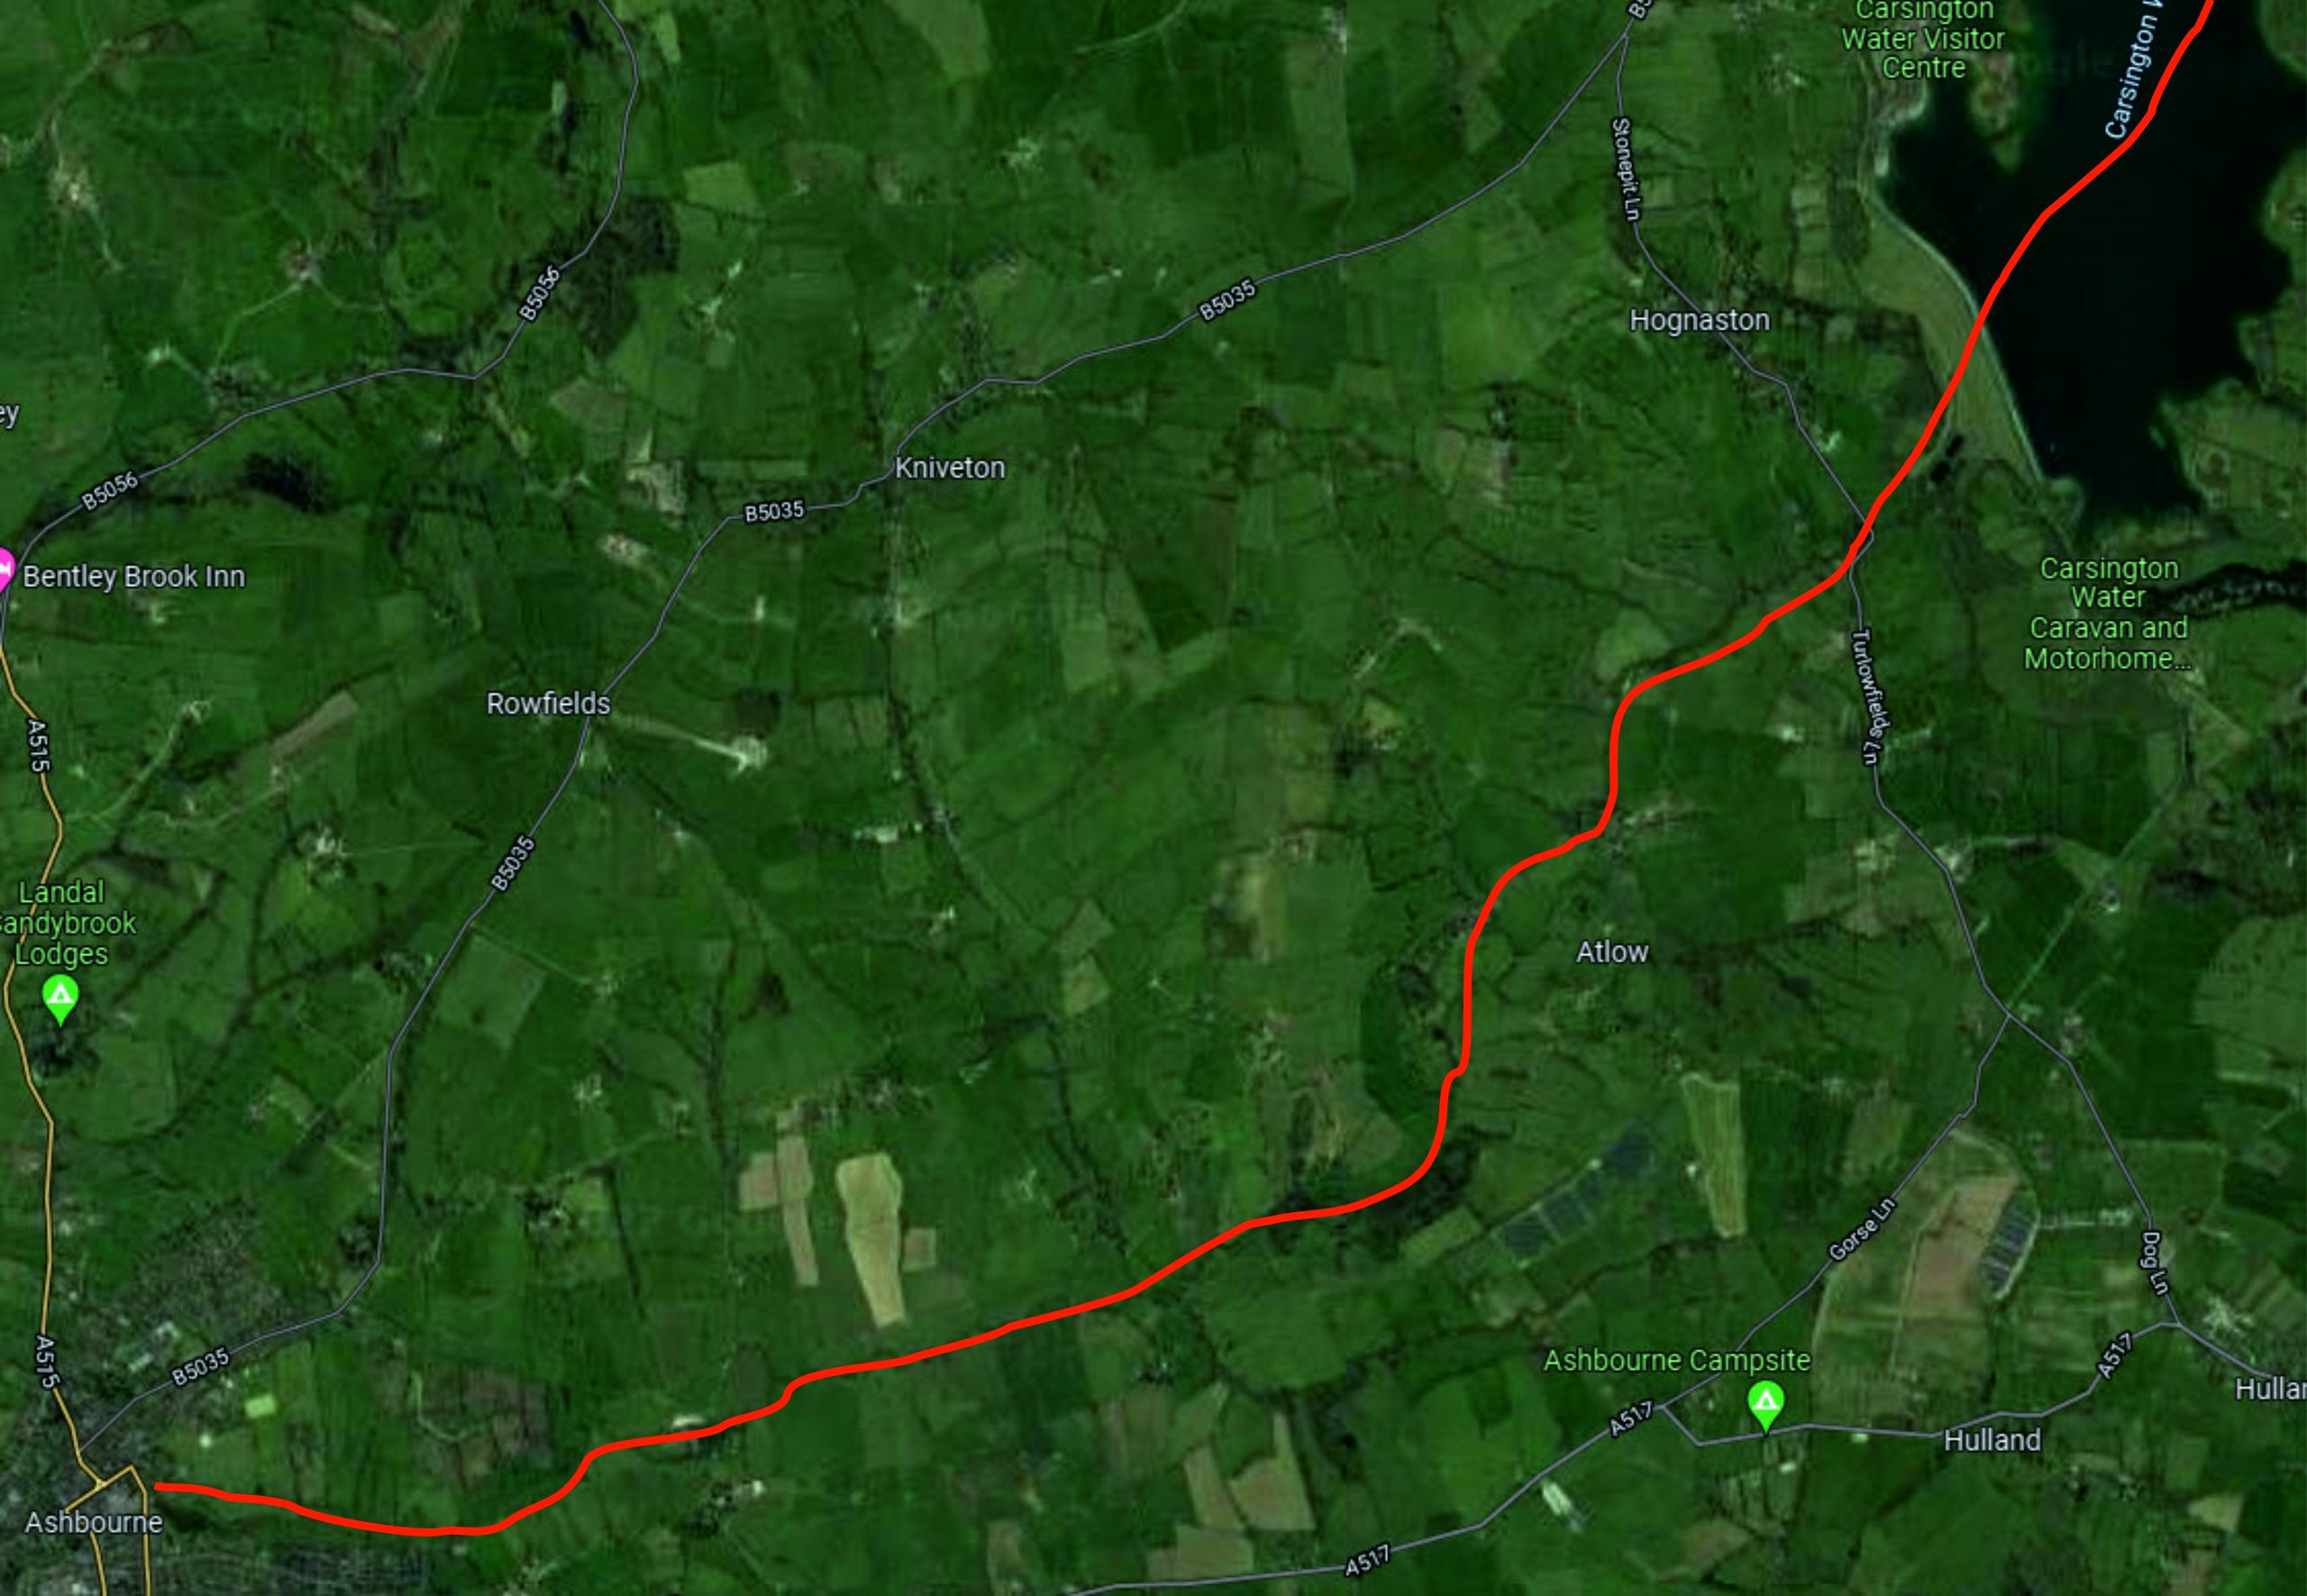
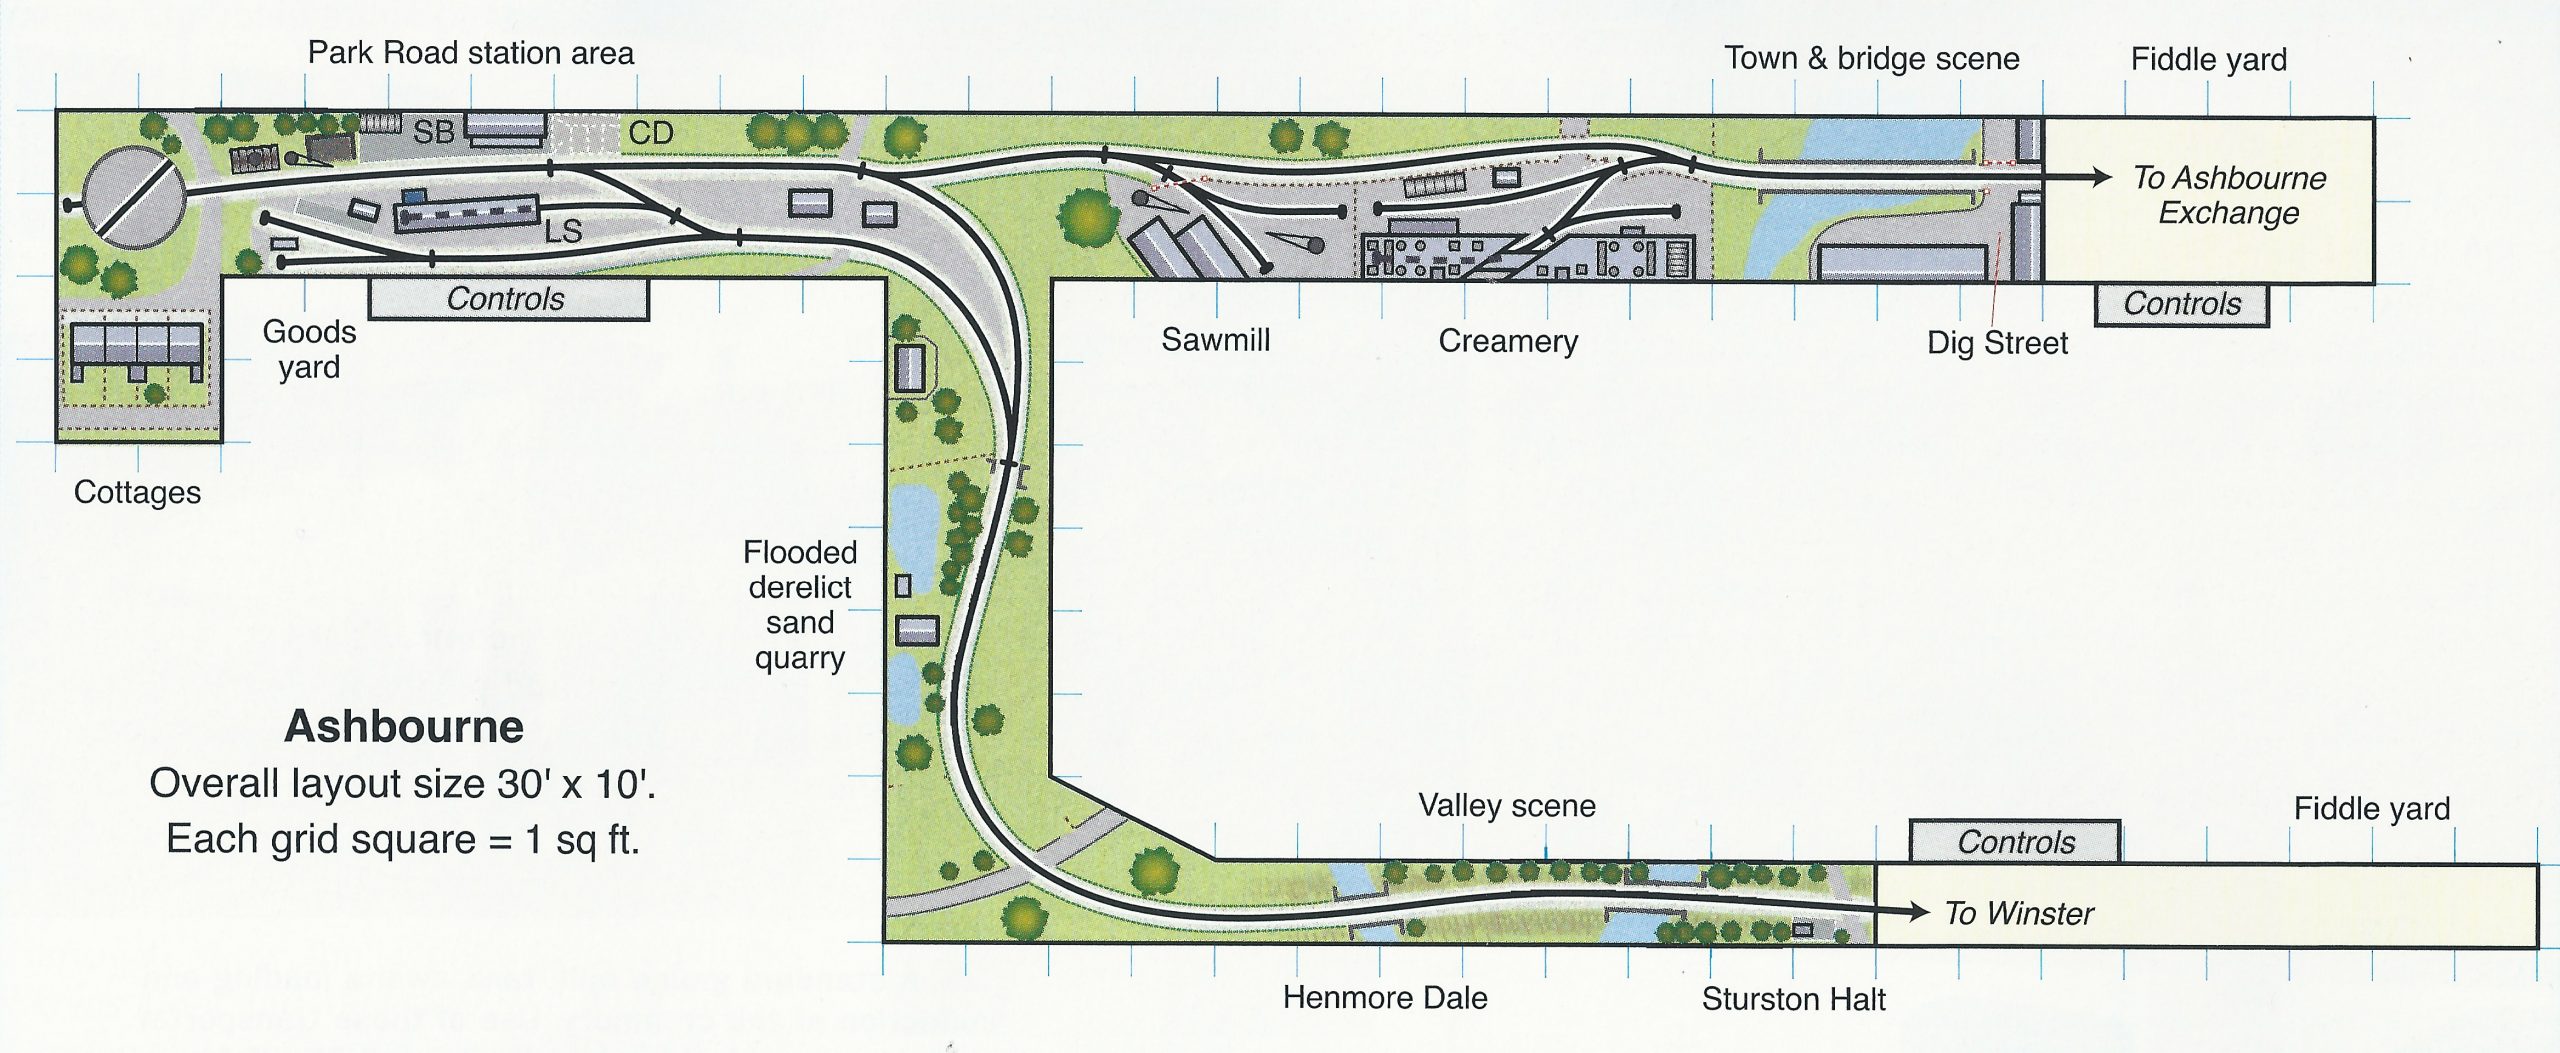
The modern map above shows as well as it can that the line heads east and then north east following the course of the Henmore Brook. In Ashbourne the railway had its own terminus but also squeezed through town to interchange at the North Staffordshire Railway Station. Leaving town past the railways own engineering base the line ran along the river to Hognaston station and thence to Atlow Mill having passed a timber yard and creamery on the way. From there the line climbed another three miles to Hopton and the quarries with some short branches to individual quarries.

Atlow Mill – Now

As you can see from the modern map the top end of the line is now under the Carsington Water reservoir that was built in the 1980’s and completed in 1992. It is now a popular leisure site for walking, cycling, fishing and water sports. If the HDLR Preservation Society ever get their act together a deviation towards the visitor centre would be a must.


Railway Traffic Assessment

Goods Traffic – Ashbourne to Hopton.

  • General Goods.
  • Farming Supplies e.g. fertiliser. Were there private stores for local farmer’s co-operative provided at HDLR stations?
  • Coal to all locations.
  • Empty churns.

Goods Traffic – Hopton to Ashbourne.

  • Full churns.
  • Flour from Sturston & Atlow Mills.
  • Logs to the saw mill at Ashbourne.
  • Stone from the quarries.

Passenger Traffic.

In addition to the daily passenger service. Market Day specials could be run bringing people into Ashbourne and Bank Holiday specials taking the residents of Ashbourne out into the Dale. Plus of course the Shrovetide Football specials.

Back to some modelling.

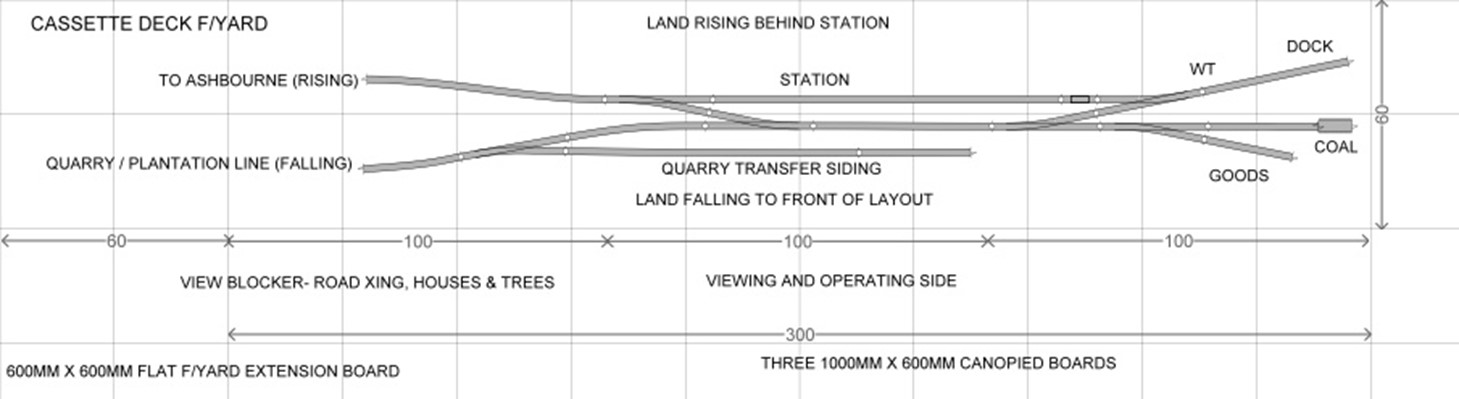
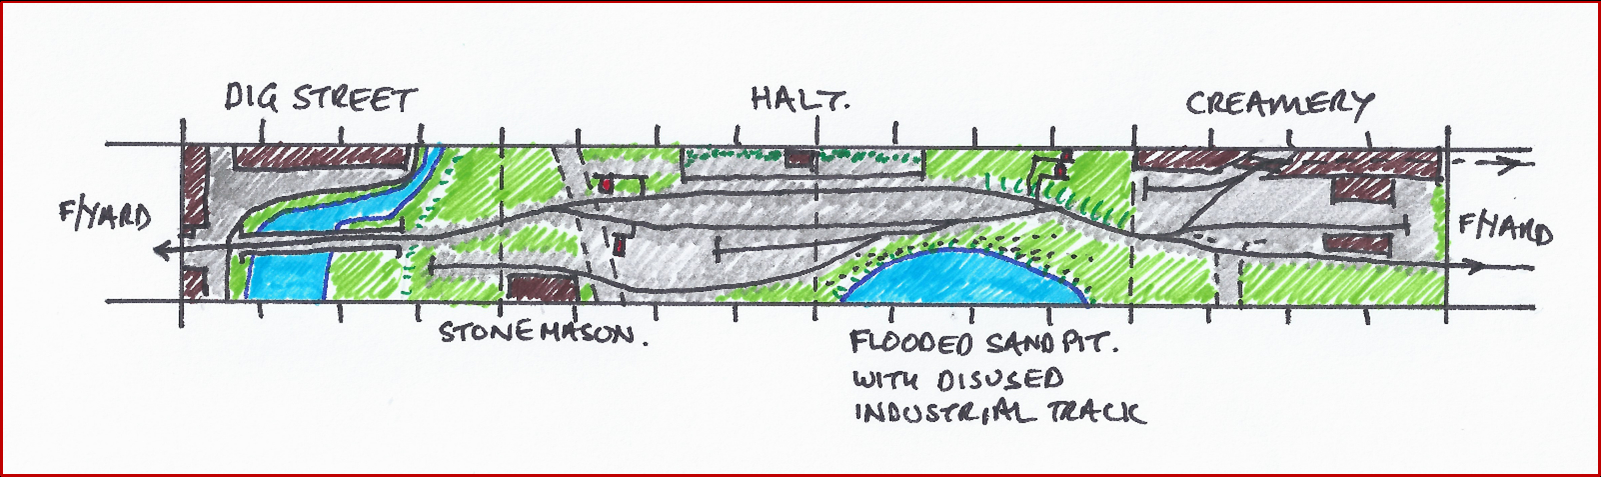
Having read up on the history (aka written it) the potential sites were discussed in the various zoom & messenger meetings and it was decided to model the end of the line at Hopton with a branch, joining at an inconvenient angle (aka operationally interesting) and some back and forth with options arrived at a plan.

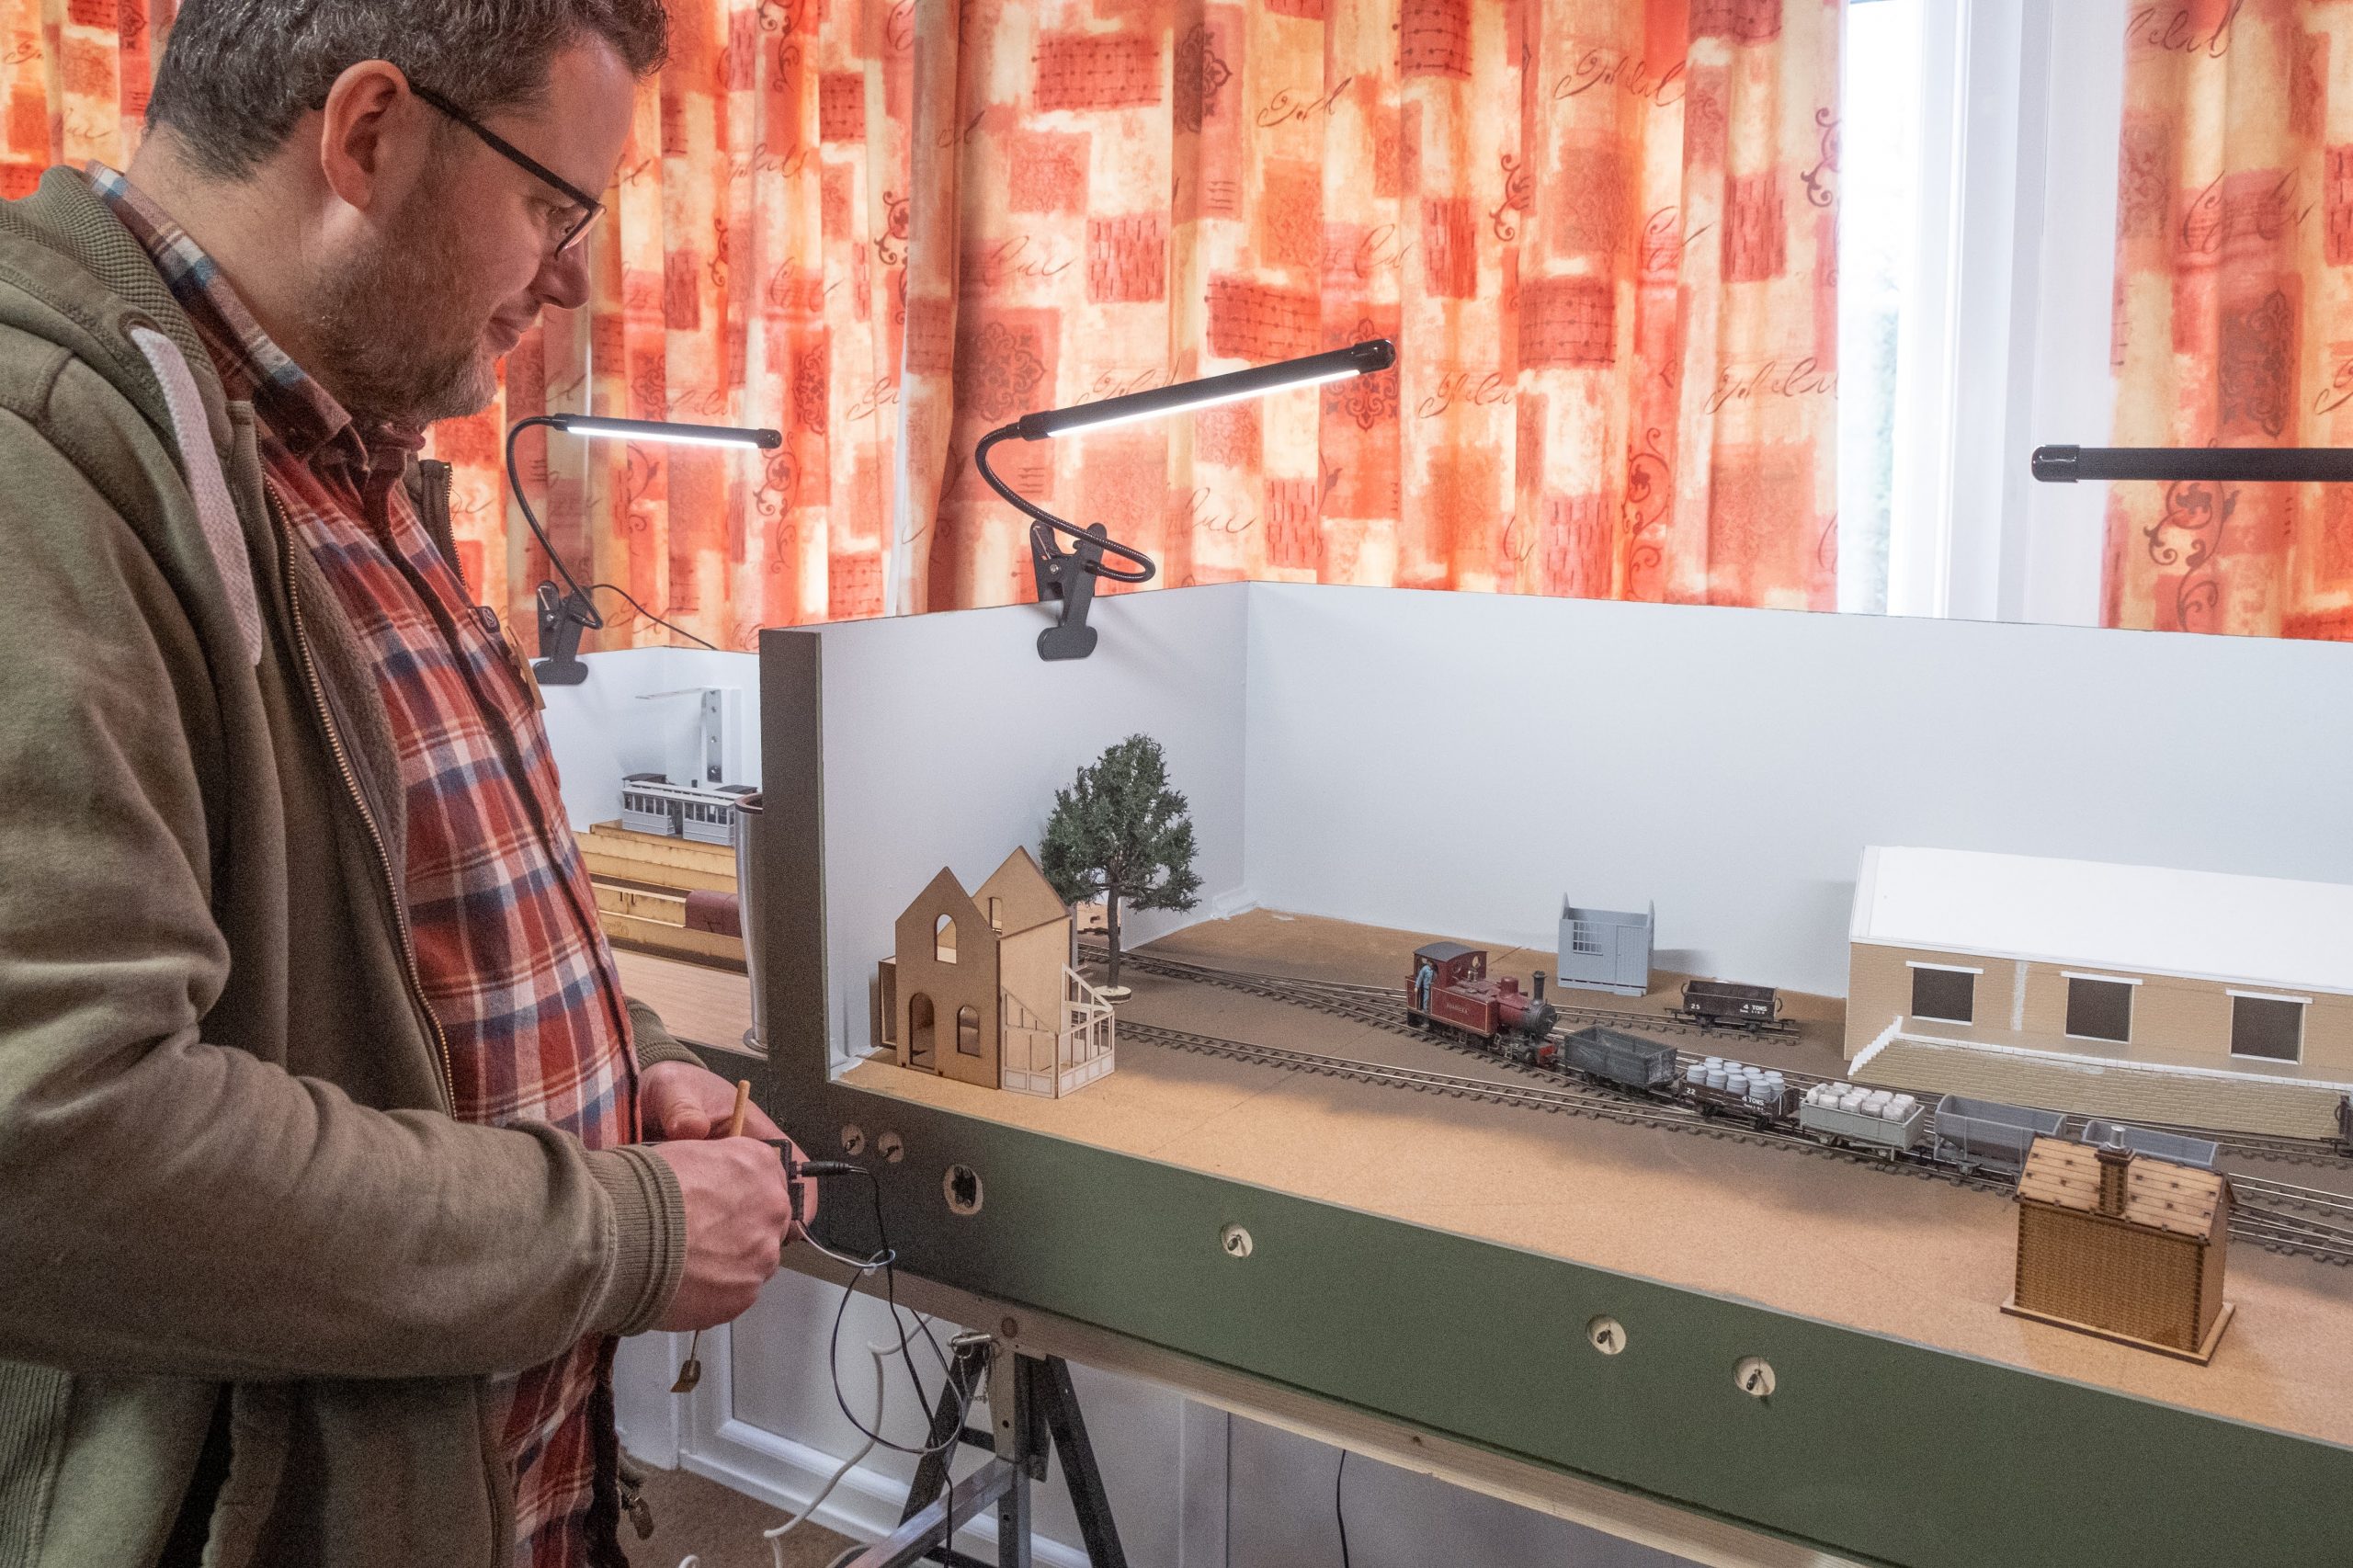
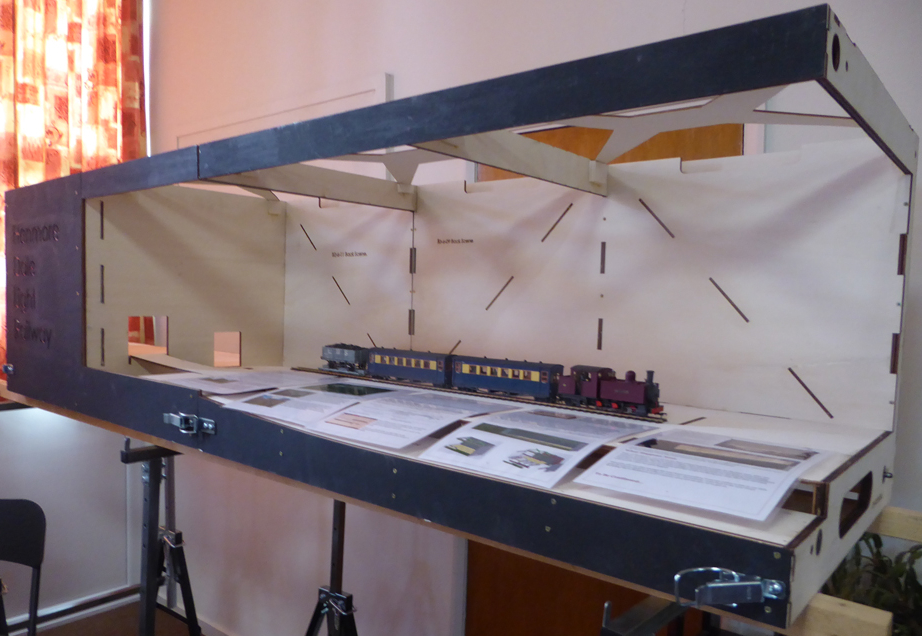
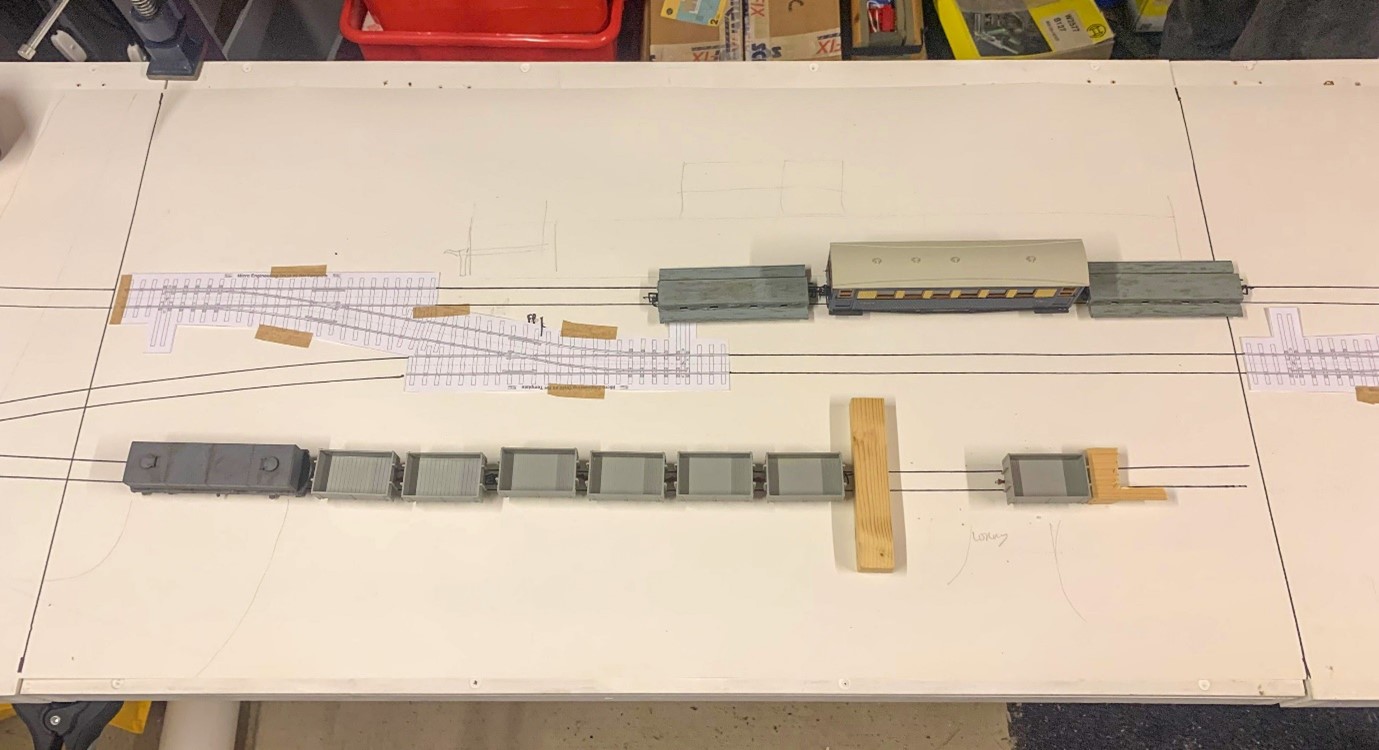
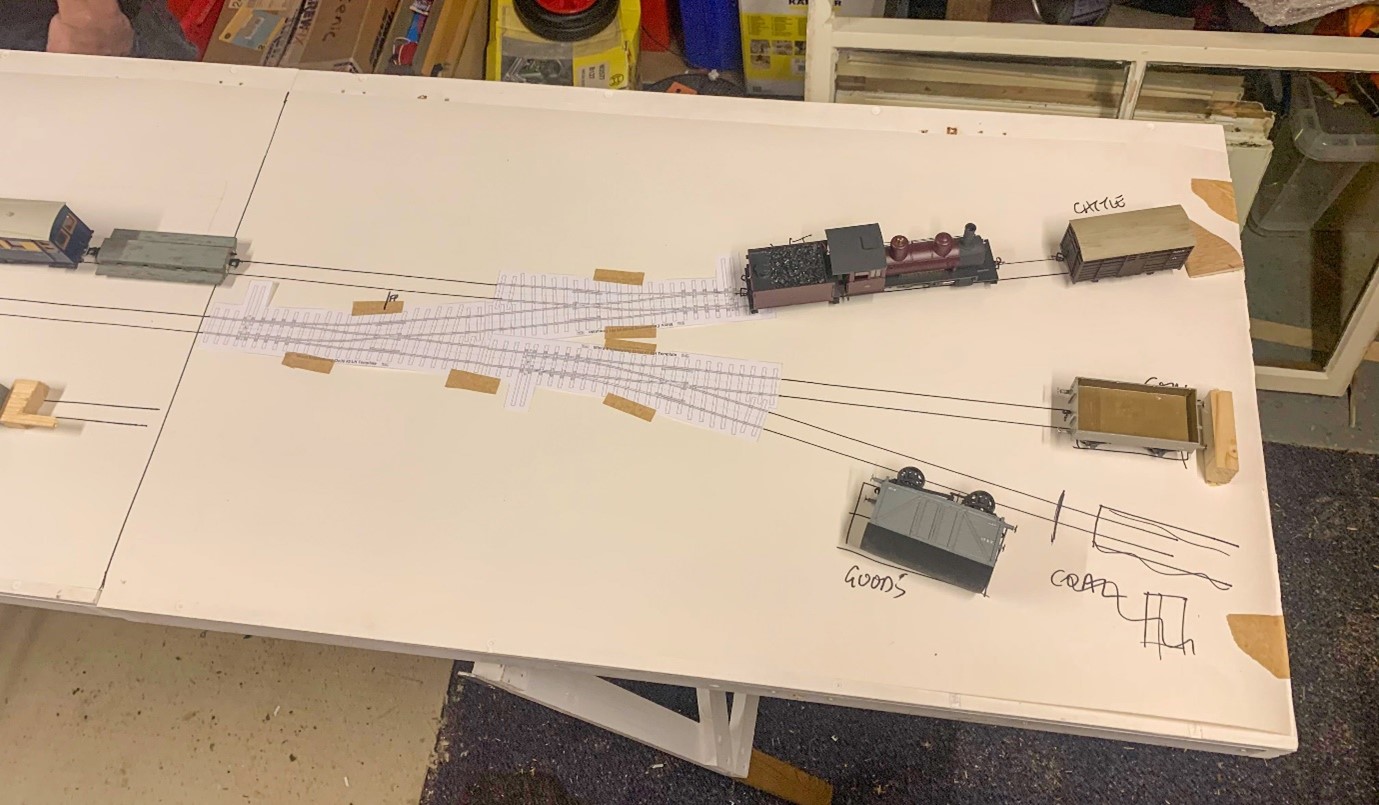
There followed some full size planning with templates and mock ups in the new modelling centre on plain wallpaper and some old boards.

Options were explored  and a few changes made to the plan.

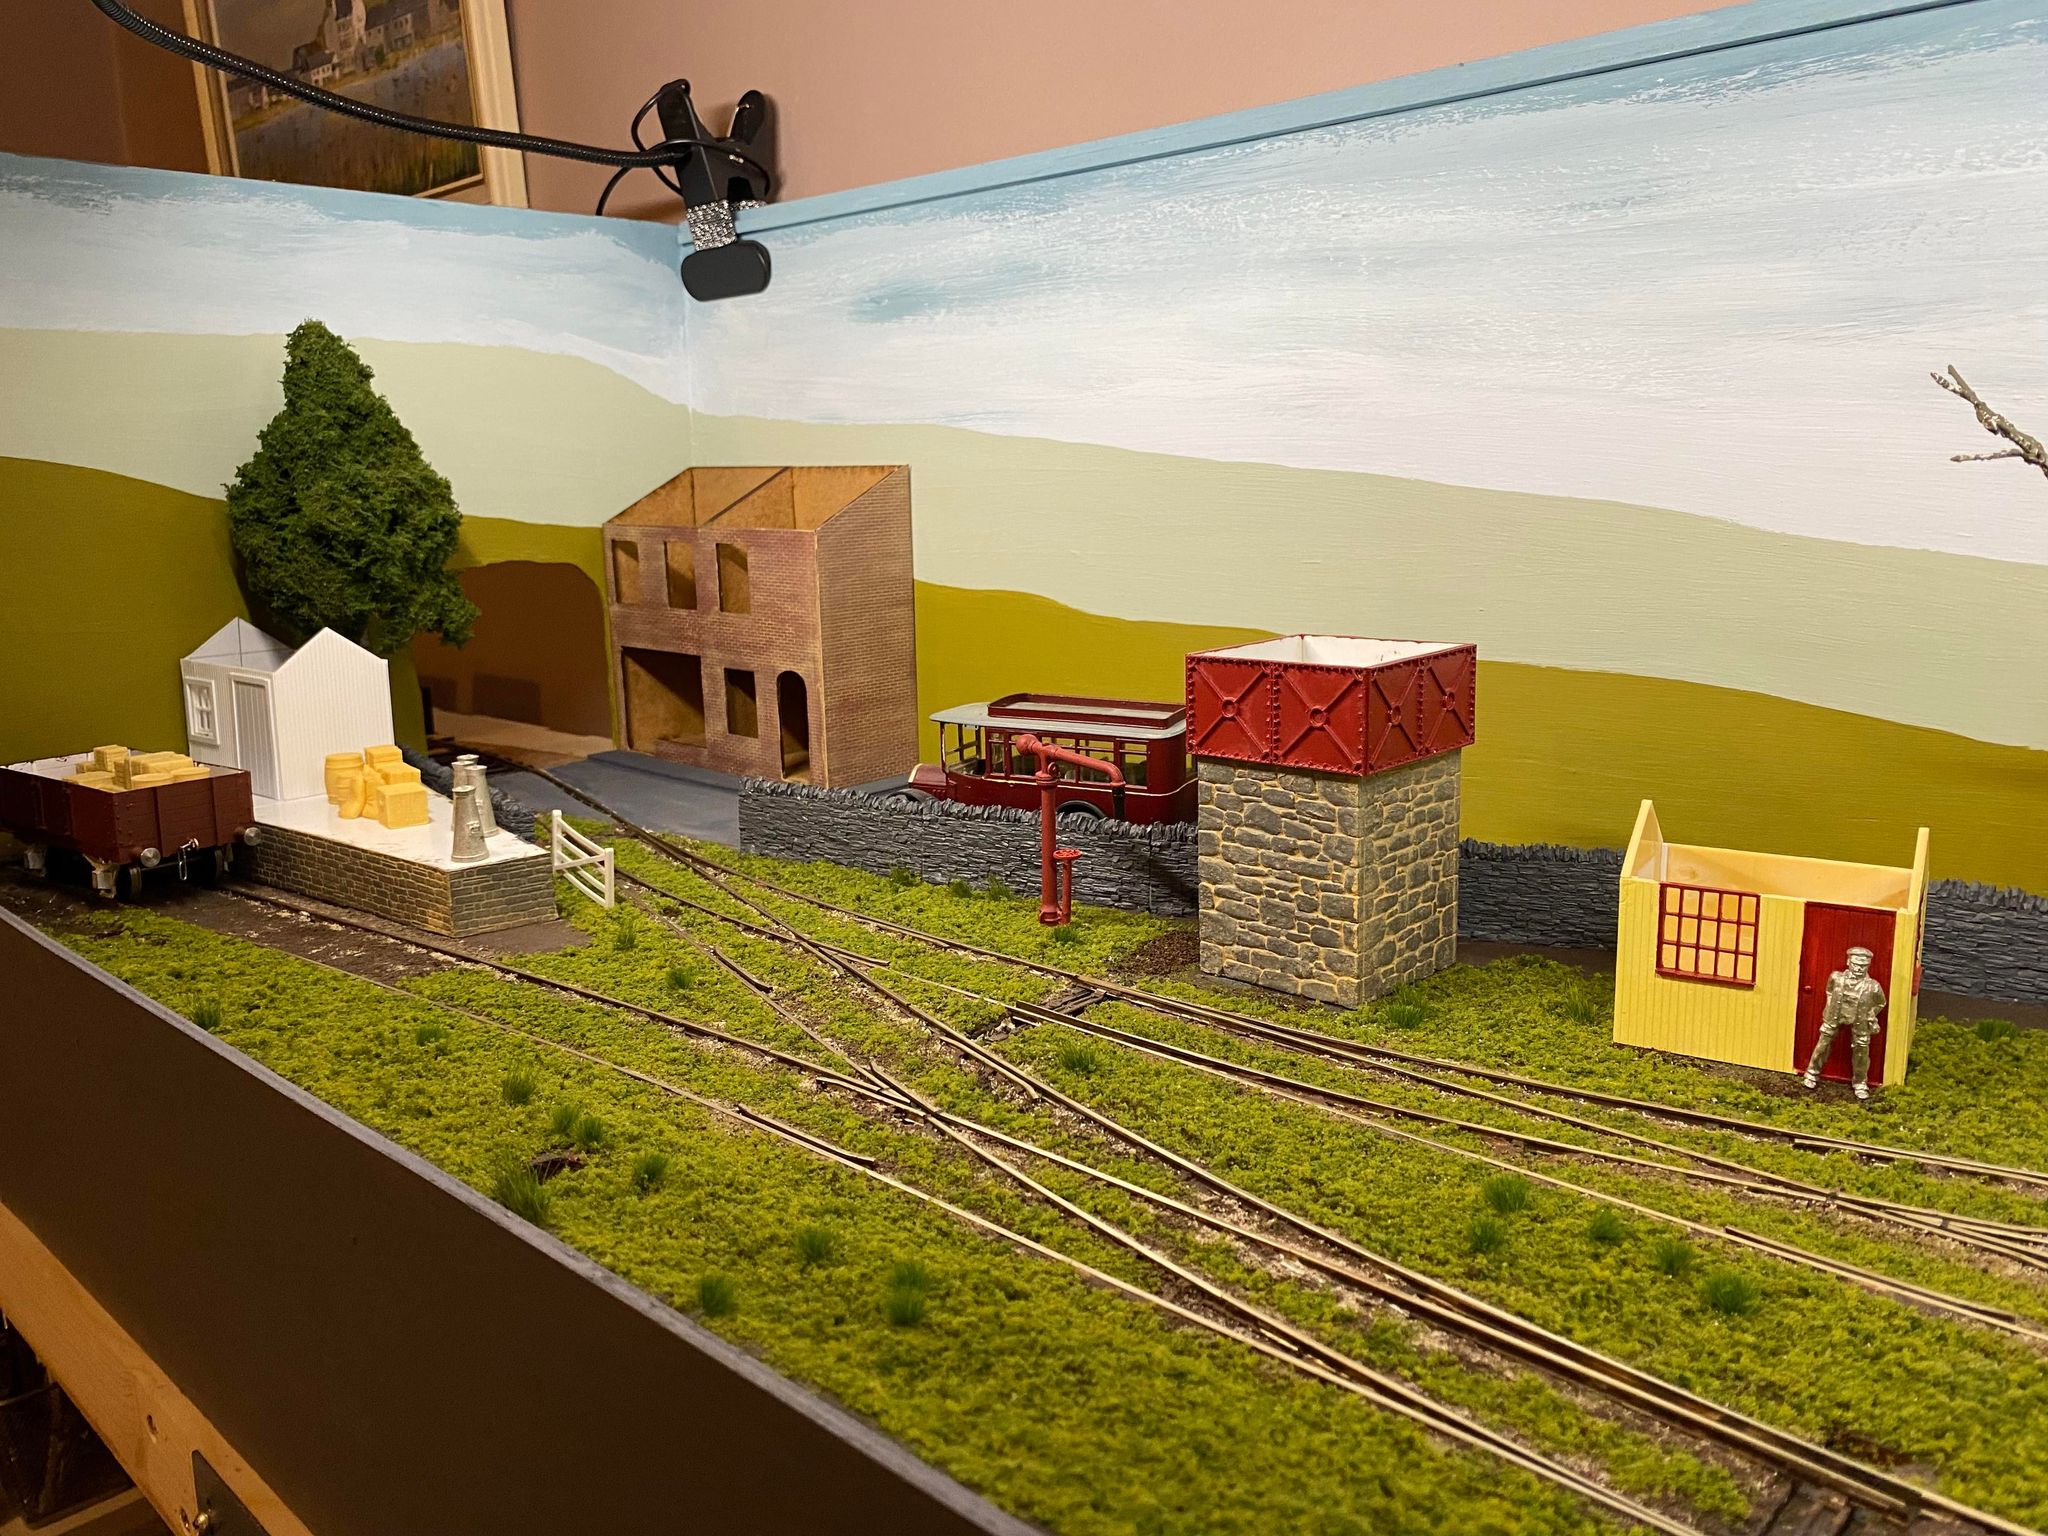
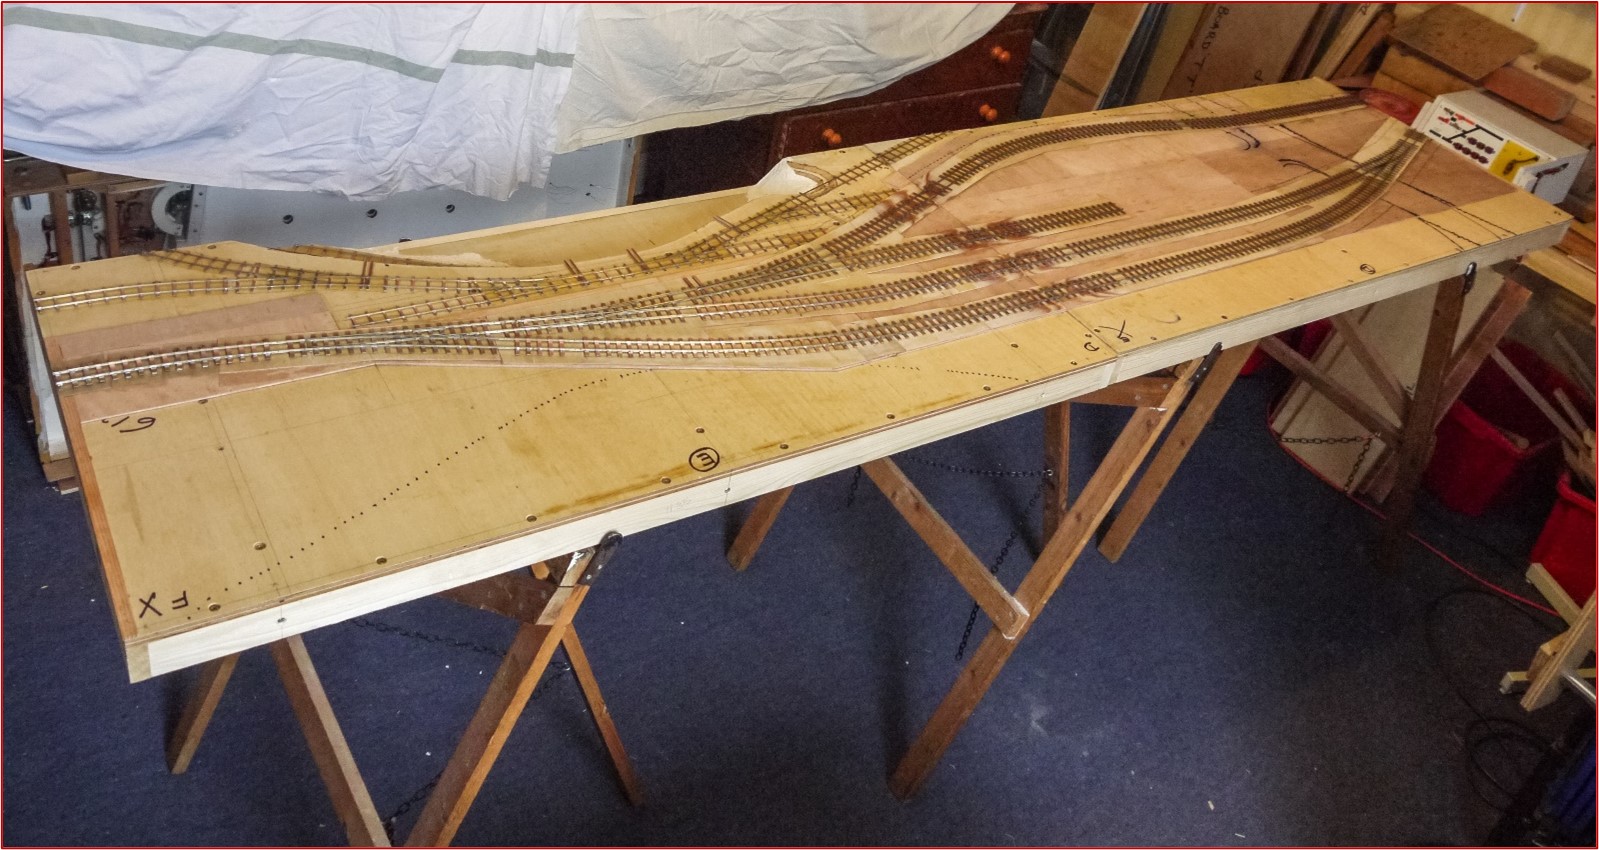
Early on we decided that we didn’t like the flat baseboard layout and wanted some subtle changes in height.

The front edge of the layout will be cut away to give a lower level roadway and to facilitate gravity drops from rail to road. This road slopes up to and then crosses the railway to the left of the station.

The mainline to the rear and quarry line to the fore in the plan had the main line level and the quarry line falling but in planning this was changed to the quarry line climbs whilst the main line falls. Both grades are small but the two being adjacent will emphasise the difference and thus the quarry line helps hide the transition to the fiddle yard of the main line.

With a plan agreed it was time to crack on with some baseboards.

Loading

Hopton (For Carsington)

Hopton (For Carsington) – Henmore Dale Light Railway.

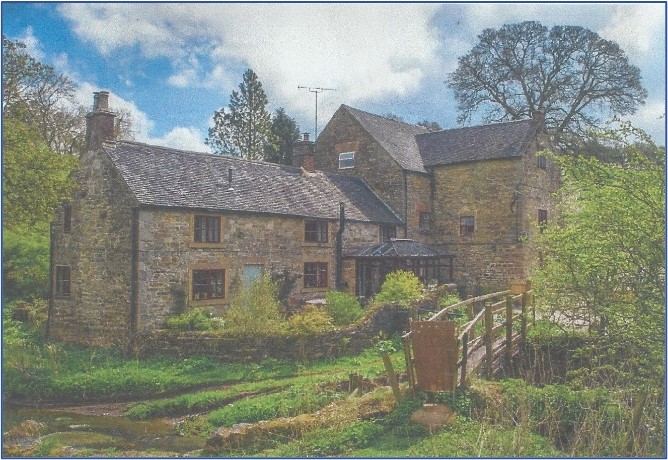
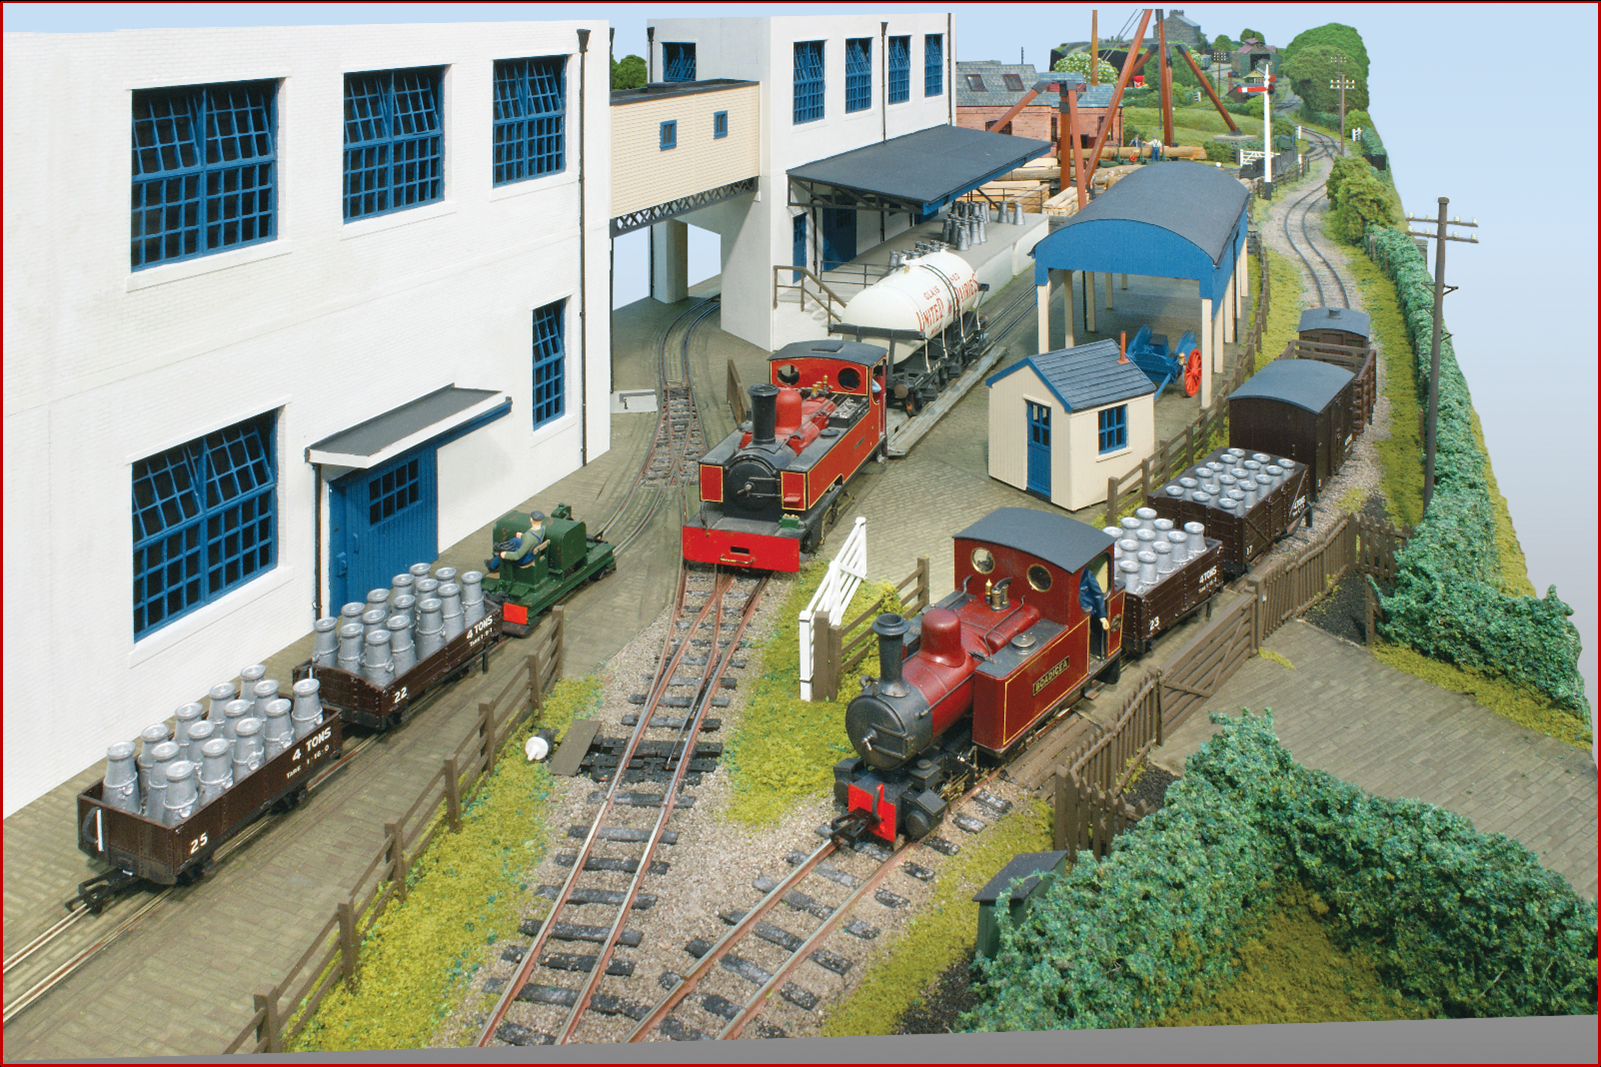
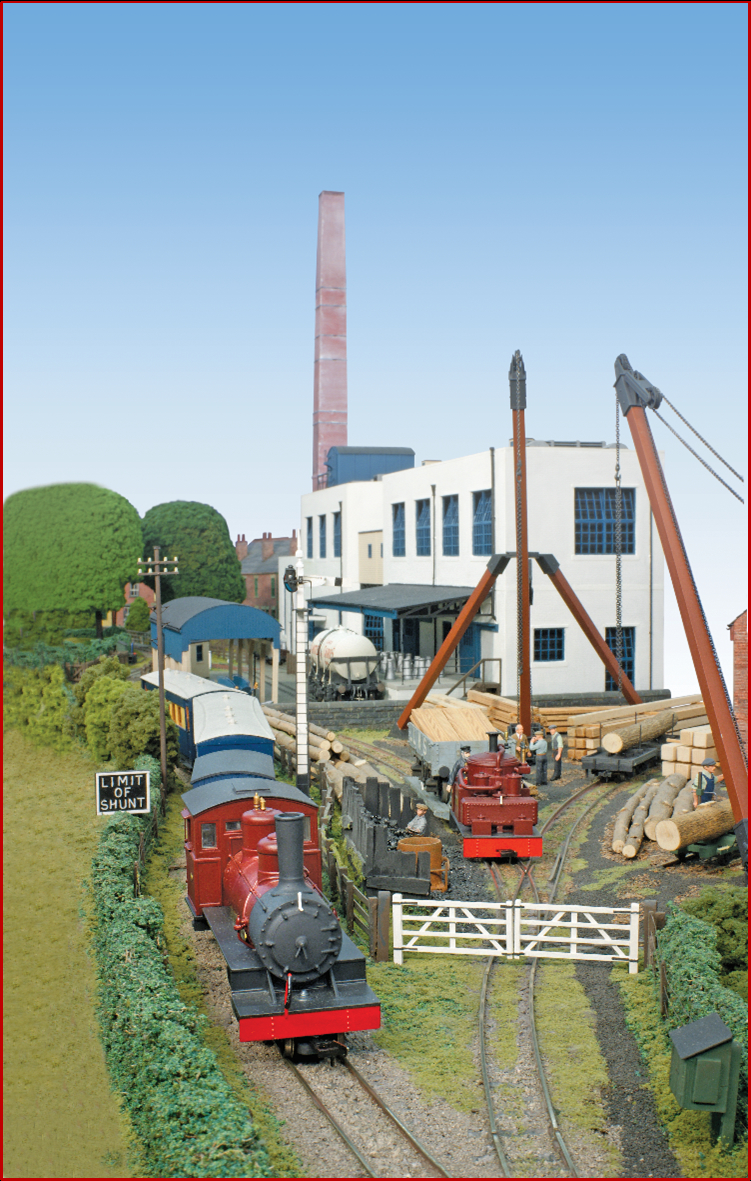
Those with decent memories will remember the Henmore Dale Light Railway of old. The HDLR is a might have been 2ft gauge line that ran from a standard gauge interchange in the town of Ashbourne in a generally easterly direction along the valley of the Henmore Brook towards the same stone quarries that the Cromford & High Peak served. Along the way it served a creamery and a saw mill. Now the top end of the line would be under Carsington Water.

That’s the fiction.

The HDLR was the group layout of the Trent Valley Group of the 7mm NGA and was started, using second hand boards, as focus for the group. It grew a bit like topsy and was the origin of the TVG Open Days as we had to rent a hall to be able to put the whole layout up.

It grew as our standard of modelling improved. The Ashbourne Park Road area used second hand chipboard base boards and reclaimed track. First it extended towards Ashbourne exchange and then the other leg towards Winster by which time it was using lightweight boards and hand laid track.

We last exhibited this layout at York in 2013 (just looking that up and finding how long ago it was came as a shock).

Troubles

I’ve thought a lot about whether to include this next bit or to just gloss over it but in the end I think some understanding of it its required to see the story develop.

So far I mentioned that it all got a bit big and unwieldy. What needs adding to that is a growing dissatisfaction with the layouts mixed standards. The newer bits were fine scale but the stock still had to run over the early bits and the Park Road base boards were showing their age.

Following that show personalities came to the fore and the group dynamic became awkward. One of stalwarts of the group was Tim Allsopp who, unable to work on medical grounds, both stored the layout and did lots to it. I am very wary of writing this as he’s no longer here to defend himself but the layout was more and more becoming Tim’s layout with less and less input from the group. Time would tend to do it his way, If you had a good idea he’d tell you it wouldn’t work and then have the same idea a week later and if he didn’t like your suggestion he’d just ignore it. It was an attitude that risked splitting the group up.

Sandy Lane Halt – Henmore Dale Light Railway

There followed a summit meeting where all expressed their views and a new way of working was agreed and a new layout started. This was to be the next chapter in the Henmore Saga and be a simple model of a halt further up the line.

Sadly, it wasn’t the cure we’d hoped and it wasn’t long before Tim reverted to type and the group just stopped working on it. We still met as a group and Tim was still a great friend, excellent modeller and an inspiration. We all just got on with our own things.

The dynamic really changed in 2018 when Tim was diagnosed with cancer and steadily declined. He was able to see the layout at its one appearance at the group open day in January 2019. Tim passed away in the July.

Much of Tim’s model stuff was left to the group with members acting as joint executors with his brother. The basic deal was take your pick, use what you can, flog what you can. The 2020 Open Day featured a sale of Tim’s stuff and a significant sum was raised which went to a cancer charity.

This all knocked the group for six and there had been no talk of layouts for ages then Covid hit.

Covid & the TVG.

Only a fool would suggest Covid was a good thing but in a world of predominantly unpleasant news there was an unexpected benefit – ZOOM.

The TVG used to meet monthly in the pub. Usually the Brunswick by Derby station. We used to have use of the boardroom so could bring and play with models whilst having a decent beer. The boardroom was redeveloped and whilst we’d kid ourselves it was a group meeting it was no different to meeting your mates down the pub with Tim in his usual spot leaning on the bar. It wasn’t convenient for the shift workers and the more distant members.

What happened with Covid was that the TVG met online using Zoom once a fortnight and we have continued to do that to this day. The format is much the same as a face to face meeting as we all get a beer and take the mick unmercifully but a bit of modelling gets done too. We’ve only missed something like three meets and those were when we were all doing something different on the zoom night. One member tried to restart the pub nights but it didn’t catch on.

As part of clearing all the stuff from Tim’s a members garage became the store and has now developed into a modelling space (albeit a bit too chilly just now). As the covid thing eased a few practical working meetings have been held that have further sorted the Tim’s stuff archive and to strip some of the remaining bits of the old layout for usable parts before consigning it to the tip.

On zoom the group discussed what a new layout would be like if we built one and this refined itself to when we built one and now we’ve started.

Hopton (For Carsington) – Henmore Dale Light Railway is born.

With bucket loads of hindsight Tim’s demise was a shock that hit us all. Dealing with that and the interlude forced by Covid provided the break the group needed to put the old aside and come back with fresh ideas. Without it, we’d probably not have got round to doing anything.

The first bits of the new layout will be at the TVG Members Day in Mickleover, Derby on the 28th of January 2023.

The next instalment will, finally, get on to the new layout.


Loading

The Brymston RR #25- Vandalism?

CONSIDERING AN ACT OF VANDALISM!

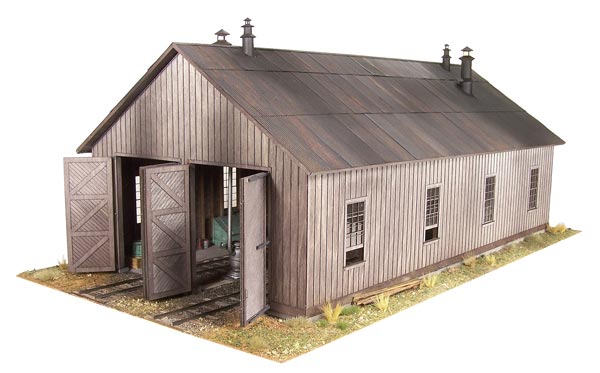
Earlier we were discussing the loco shed for the Brymston RR and I made a mock up of something in card. It’s gone not further than that until just now….

I was sat in the stores packing customers orders and having a moment of idly staring in to space waiting for the printer to get its act together when I spied a box on the top shelf. Intrigued I got it down.

It was a kit for a loco shed. Not quite what I want but it could work with mods

OUEOMain.jpg

The act of vandalism?

It’s a Raggs to Riches kit for Ouray Engine House.  Raggs kits are the mutts nuts both in terms of buildability and accuracy and they’re no longer available Raggs having retired.

Modifying this kit would probably be the model equivalent of putting a UPVC conservatory on a grade 1 listed building.

Loading

Brymston RR– #24–Bendy Engine Progress

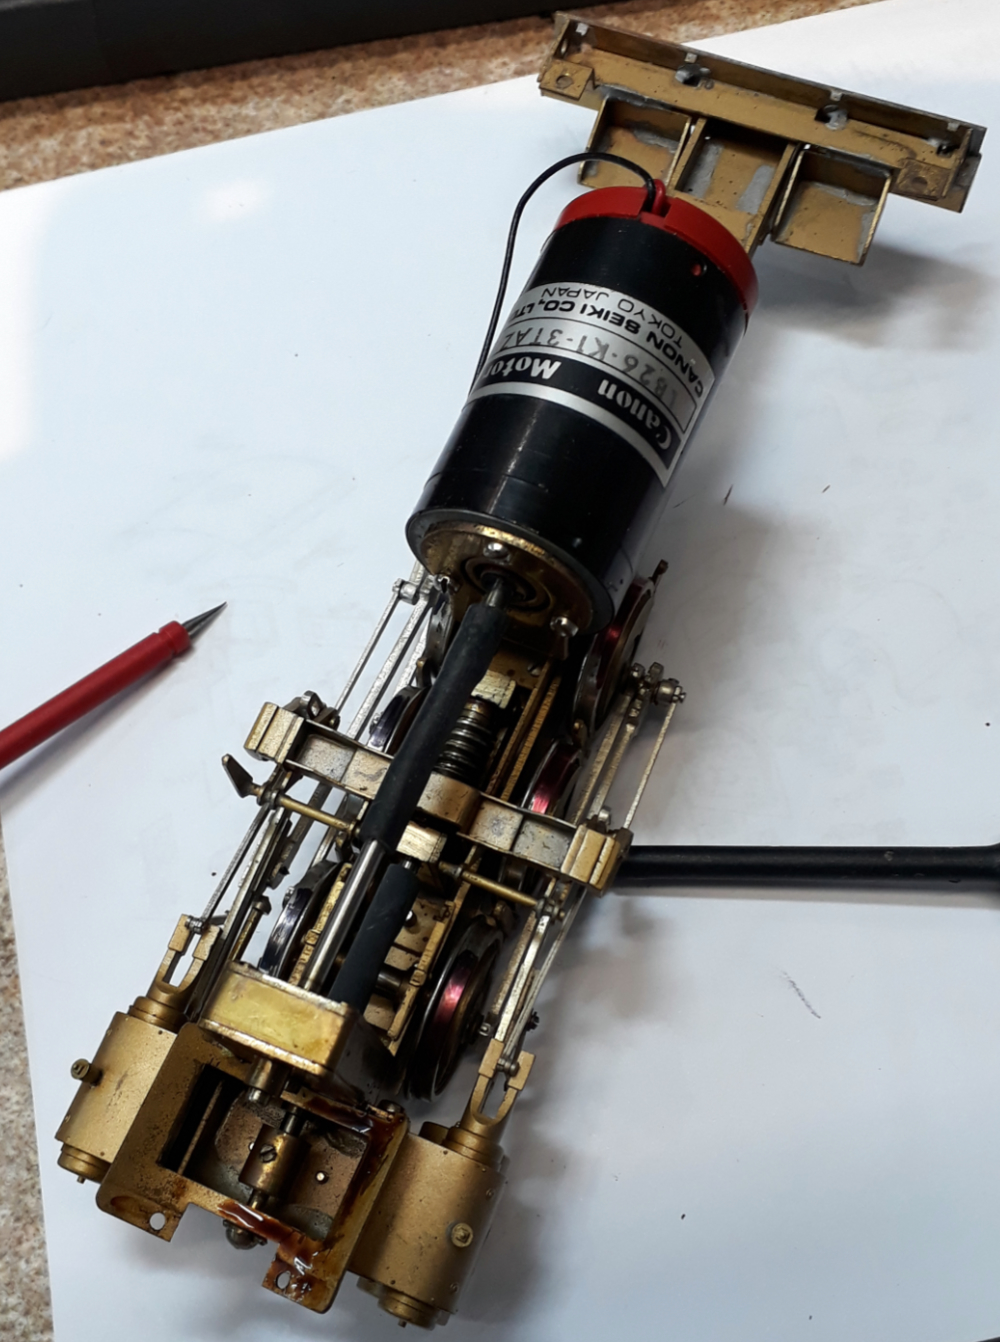
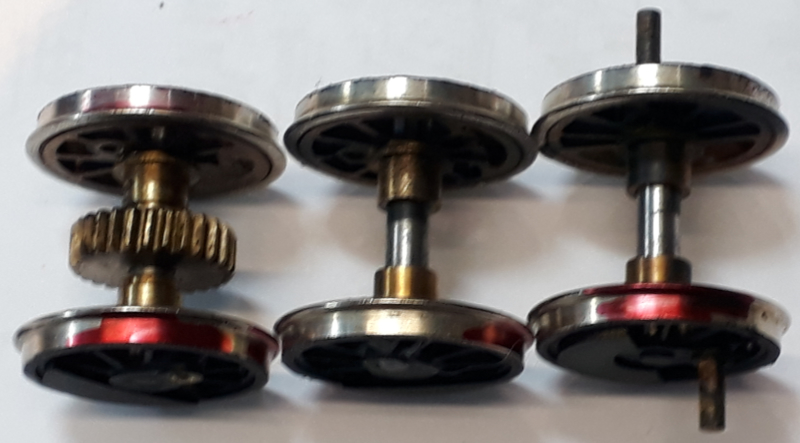
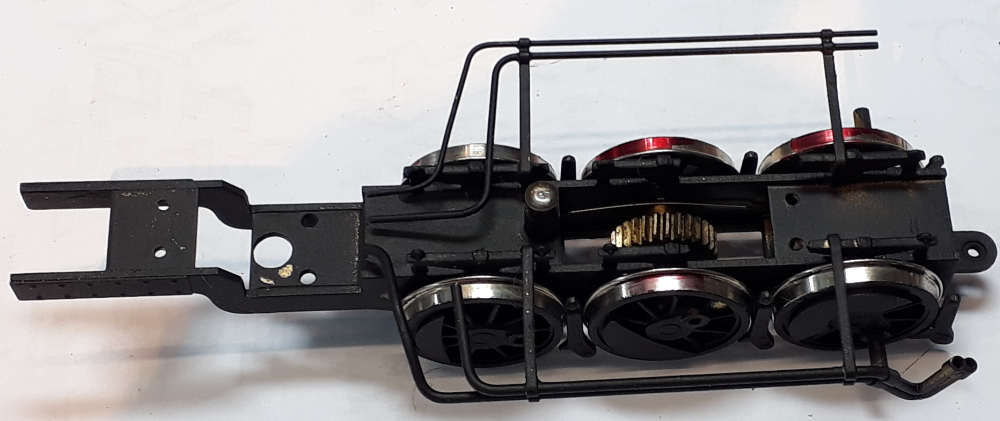
In odd moments I have been progressing the sorting out of one of the bendy engines. In the first episode about this bendy engine I dismantled the front truck and reduced it to it component parts. “Off Camera” as it were, the parts have been cleaned and sprayed with an etching primer ready for reassembly.

First move was to establish some polarities to be sure I put the wheels in the right way round. Tradition on American brass models is to have wheelsets insulated on one side only so the other side conducts to the frame. Then, on a tender engine, the tender is live to one rail and the loco to the other. You can see the problem here – no tender.

On this loco, being a Mallet there is a fixed power unit and an articulated one. The fixed unit has one side live to the frame and wiper pickups to the insulated side and then on the articulated truck just one side live to the rail. So its got 3 wheel pickup to one rail and six wheel pickup to the other rail. I intend to add wipers to the articulated end but for now I just need to make sure the wheels live to the frame on both are on the same side.
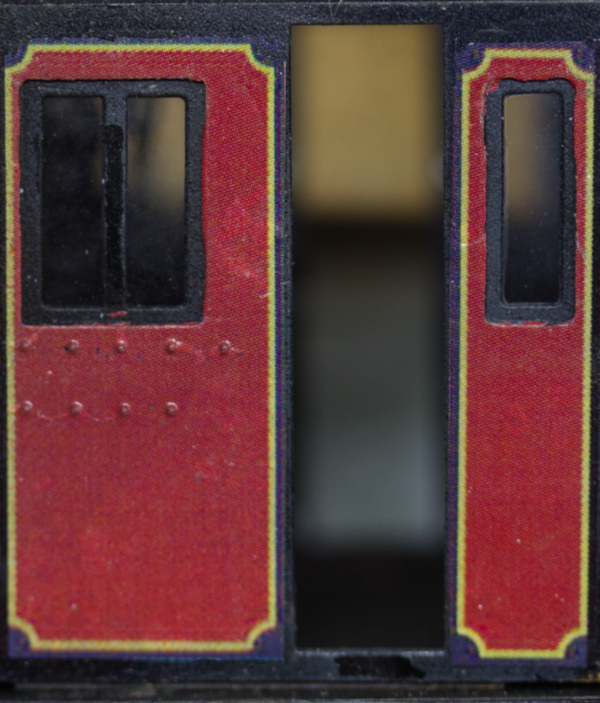
This was done with a multi-meter on its continuity (beep) setting. PANIC. It beeped to both sides! For now I went with the wipers as a clue and resolved to sort the potential issue out when it was the rear bits turn for overhaul.

Using the beep test the live wheel was identified with red marker pen and then assembled into the frame. I WISH IT HAD BEEN THAT EASY!  The driving wheels are sprung and, unusually for American brass they actually work. Usually you’ll see a coil spring above each axle box that is so strong it does nothing other than press the wheel hard against the keep. This has wire longitudinal springs that hook behind two pins on each side and then bear against the axle bearings. Neat when together but I used up a lot of fitters language getting them in.
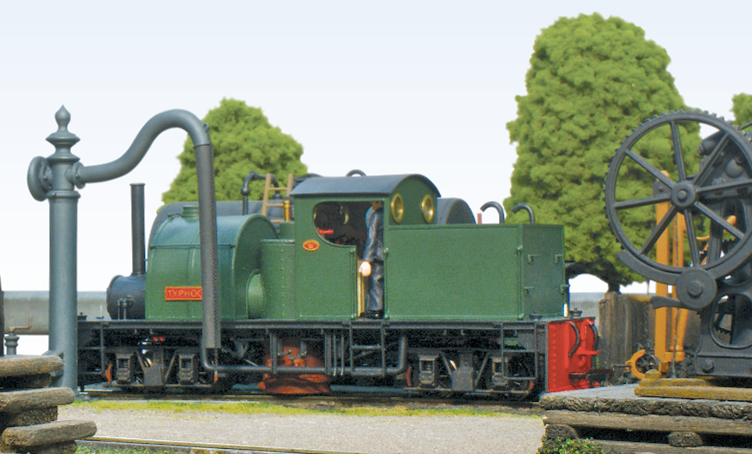
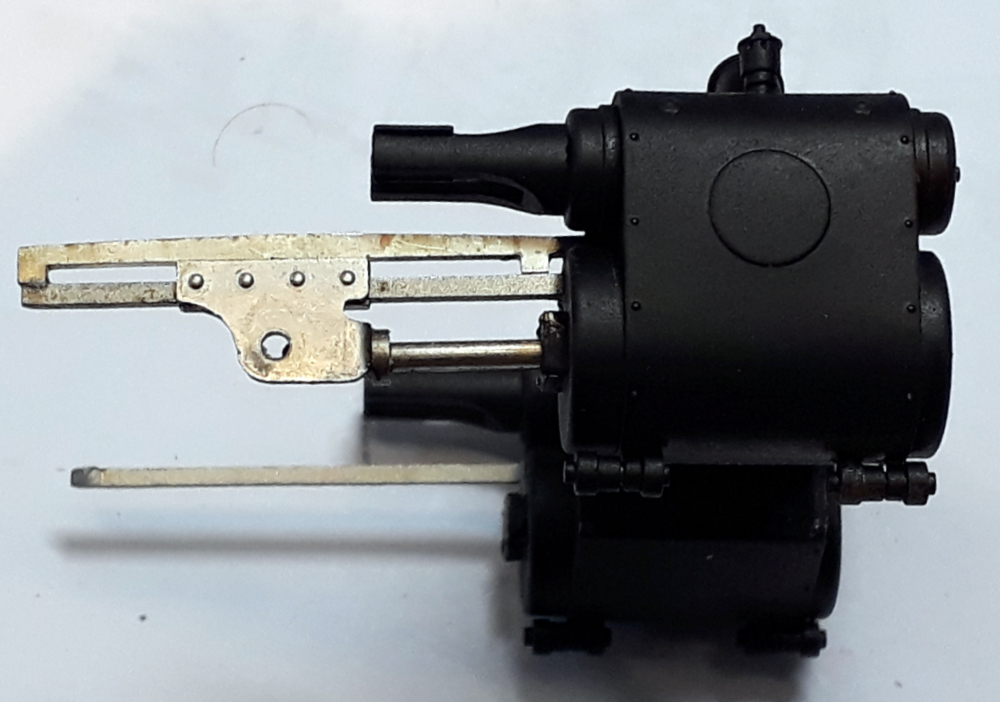
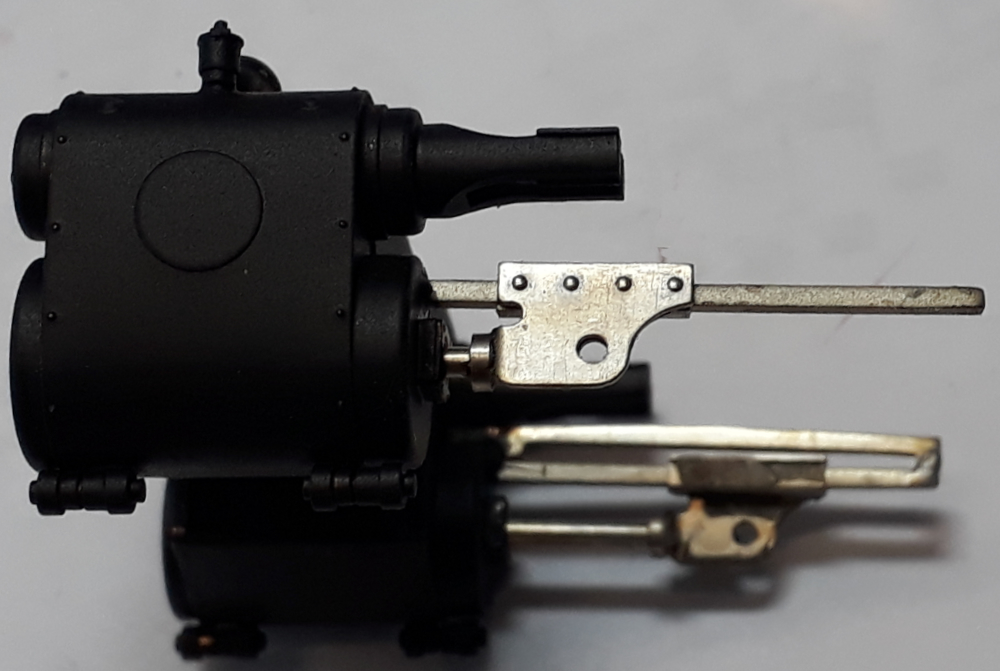
Next to add would have been the cylinders but here I found a problem. This first picture is how they should look with the guide bar above the slidebar and with the rear end keeping the crosshead captive.

The clue that something was amiss was the crosshead falling out of the other side. Looks like tomorrow mornings task involves whittling some nickel silver fret offcuts to shape.

Finally for this small work session I decided to have a look at the fixed power unit and disconnected the motor. A retest of the wheel insulation revealed there to be no problem. The beep to both sides was because the fancy Canon motor is such low resistance that there was a path through the motor from the insulated wheels.  Some power to the motor wires had it all running. It has a small squeak once per revolution and its seems tight. There’s some dubious looking oil oozing out of the spur gear box but that will all get cleaned out when this bit get overhauled

Coming soon


Loading