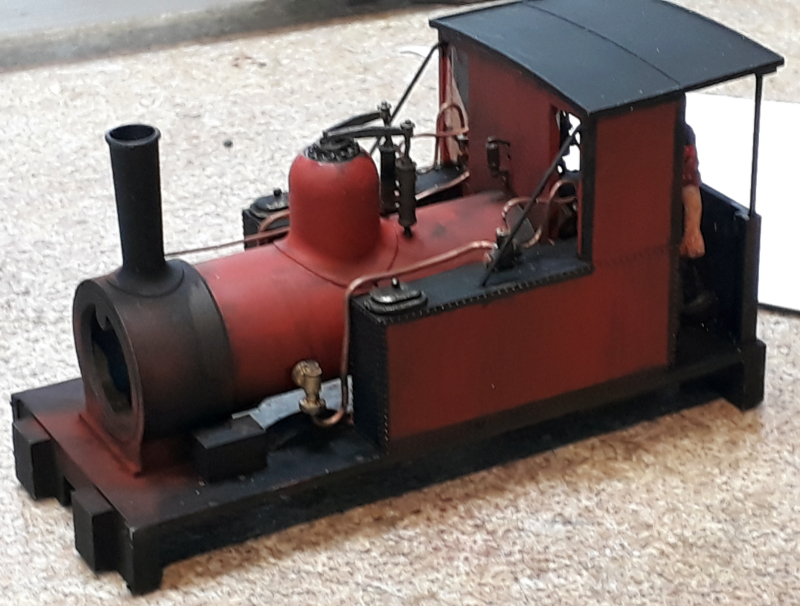
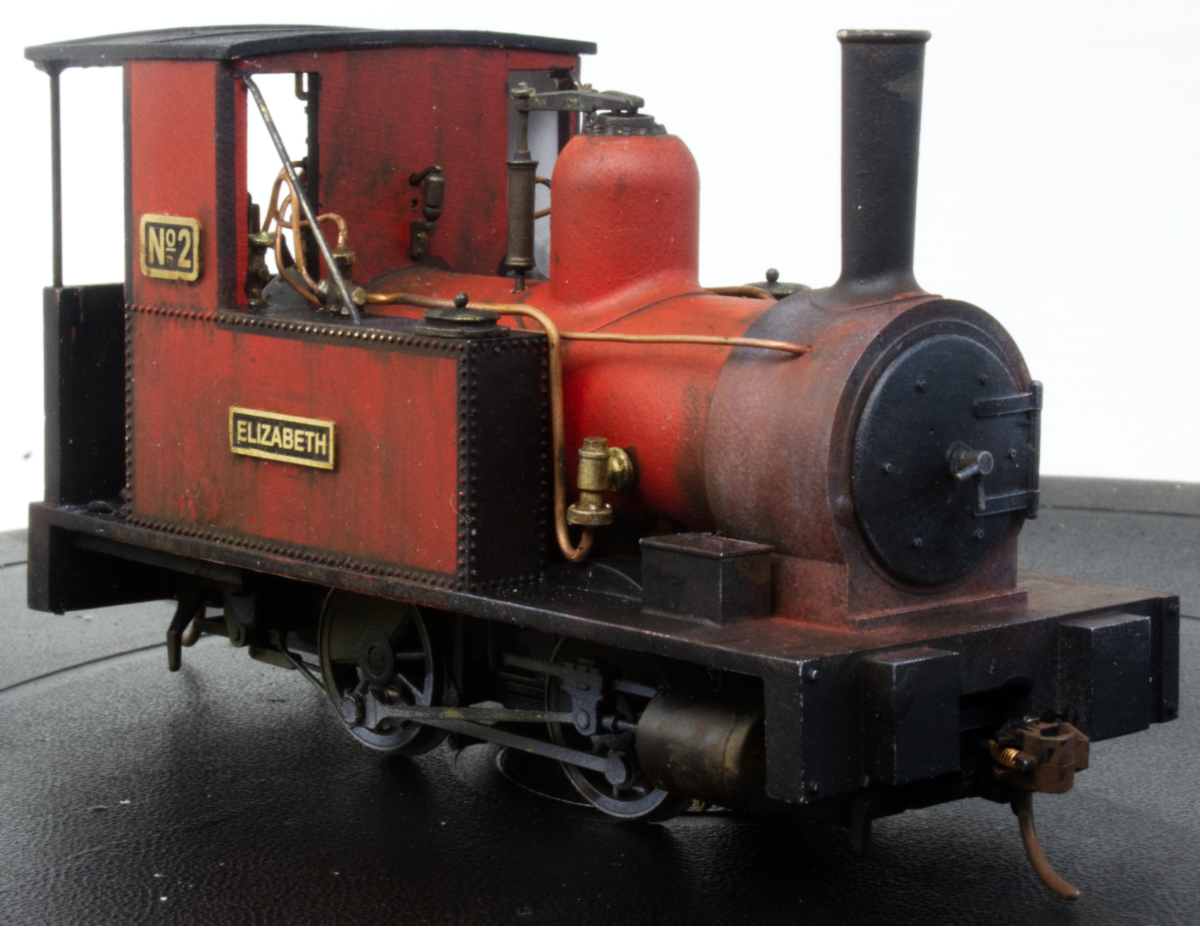
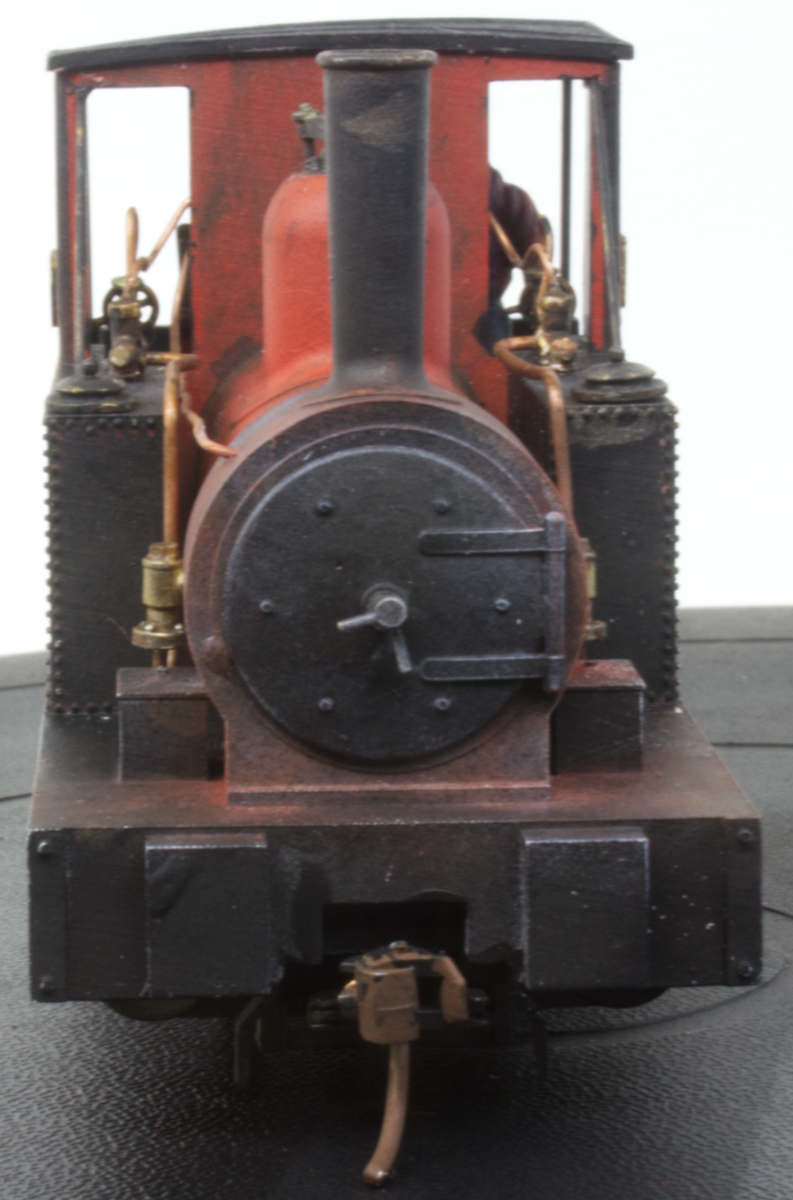
Meet Elizabeth. No longer an anonymous model the engine has a name and number. With the exception of two small jobs I’ll mention at the end she’s done.
These pictures are about the fifth set I have taken in the last two days. Why? I’m sure you’ve all done the thing where you finish a model, post a picture of it and as soon as you see the picture you see some glaring mistake? Here I’ve tried to get ahead of that game by regularly photographing the model and studying the picture, which end up larger than life on screen, to inform any further works.
Hopefully, each round refines the model so that there is less to do in the next iteration. Whilst I can see some things I’d do a bit different or change I think I’ve reached the stage where I am calling this one done. All the work today has been small refinements to the finish.
All the initial painting was doing by spraying acrylics with a lot of masking to get the borders and panels done. The detail parts were then added along with the driver. After that it was down to weathering, washes and powders. Having done the base colours in acrylic and having allowed it to harden fully the weathering has mostly been done with enamels.
Ihave been using some products by MIG called oil brushers. They’re a bit like eyelash makeup in that they come in a thin tube with a brush fastened to the lid. The brush is used to dot the paint on the model, lightly, typically around raised details. Its then left to dry for a bit and then is drawn down the model using a brush with white spirit on it. You can make it look like the grime has been washed down the sides by rain. There are lots of variables to play with here. You can vary the time you allow it to dry before working it and then you can remove more or less of it with the spirit. For an all over grime you can flood it with spirit to create an all over wash, draw it with a brush to streak it or by brushing spirit on and the wiping the brush on a tissue repeatedly remove it.
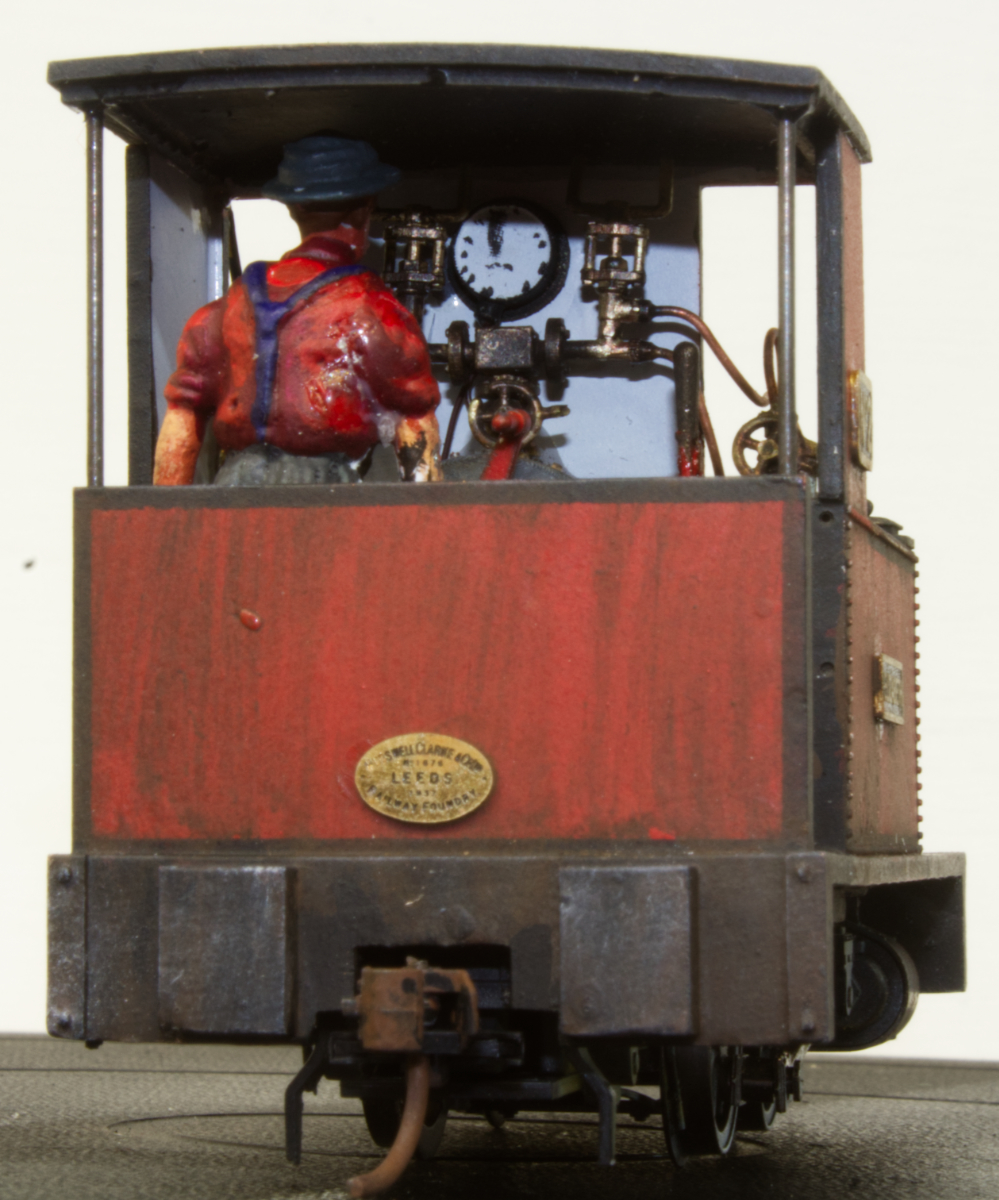
This was followed up with pin washes. Here some mucky colour is added to a mixing tray and a mixed with spirit to form thin washes of different colour density. A fine brush then adds this to the model along join lines and seams. Being thin it runs into the joins highlighting them. Again, leave it to dry for awhile and then tidy it up with spirit on a brush.
The final touch was to use some weathering powders. If you want to stick with the makeup analogy these are the blushers. With a fairly big bristly brush these are mixed on the pigment pot lid and then the brush is worked on an edge to removes most of the pigment before brushing it on to the model. The rusts and browns blend the earlier weathering whilst the white, used very sparingly, is flicked along edges to highlight them.
The trick is knowing when to stop. I can see more that I would do to this but at the risk of it all going horribly wrong. The final thing was to give it a very light coat of Dullcote wafted on from a distance to seal it all.
I mentioned things still to do. This is another advantage of photographing your own work as I noticed it needs it wheels cleaning after the painting and the trip arms of the Kadee couplings need setting up.
With that done its time for an orgy of bubble wrap and it can go off to its new home and I can have a major work bench tidy. It starts a job clear but rapidly fills with stuff until I’m working in a six inch square!
Since the last episode the ZIMO sound decoder has had its software updated to the latest version and a more appropriate sound file loaded. With the wires tidied, the decoder and keep alive mounted it was on to the rolling road and a link to DecoderPro for programming. The speaker is just lodged on a blob of blue tack for now and will be mounted properly once the body goes on to the chassis. I use DecoderPro to set the decoders up because it presents the information in a useable way and keeps a record of what I am doing.
The setup is the loco sits on the rolling road which is connected to my NCE PowerCab DCC set. On the NCE bus is a DCC/USB interface and a USB lead goes to my laptop which has DecoderPro on it. The video is of the chassis running whilst its being programmed.
Now it’s time to finish the painting. First job is to add some tones to the chassis whilst it’s still separate. This was done with a matt white and a brown called brake dust applied via the airbrush with it on a low air pressure.
On the loco some rust and dirt were applied to the body around the smokebox to represent the rust that heat causes and the mess that handling smokebox ash leaves. I used weathering pigment powders for this. This was done before the smokebox door was added to maintain a contrast between it and the smokebox. The first layers of some dirt were added to the loco at this time too. Having painted it all in acrylic the muck was added using MIG oil brushers and then drawn out with a brush that had thinners on it. The brush is nearly dried on tissue to limit the thinners applied to the model.
Things slow down a bit at this point because whilst acrylics dry very quickly the oil based colours need to be left a lot longer before you can do the next bit. Some metallic black was added to the cab floor. This is a black with a metallic pigment in it that once dry polishes to give a used steel sort of look.
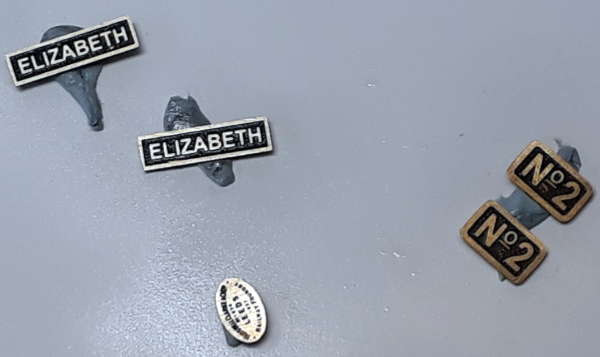
Ihave done some more jobs with the parts all separate. Nameplates have been blacked, polished and sprayed with an acrylic gloss varnish. This now needs to harden. Some more weathering has been done to the body and that will need time to harden now. At the moment some of it looks a bit garish but the final stages will tone this down.
I’ve been working on this and other things at really odd times of the day and night as I try to catch up with things. It seems a side effect of having the leg strapped up for fifteen weeks and then, just as I was escaping that, having a reaction to my Covid booster there have been two casualties. Firstly, my body clock seems to have died. I can be wide awake and working on models at four in the morning as there is no point lying in bed wide awake staring at the ceiling. The second things is endurance or lack of it. I am like a knackered rechargeable battery. Sat on the charger its green lights and raring to go, twenty minutes later flat as a pancake and needing another hour in the charger.
Whatever time it is now that’s it for this episode. The next one should see the model complete and ready to go to its new home.
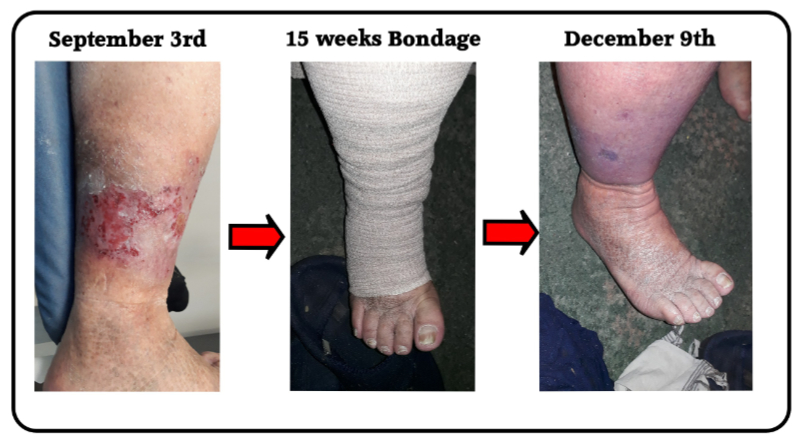
The last fifteen weeks have been a complete pain in the leg (and elsewhere).
In short my already wonky right leg decided to get even more wonky and started with an outbreak of cellulitis but not satisfied with that amount of pain added a couple of abscesses for effect. Those abscesses leaked goo, added massive pain and defied attempts to get them to heal. The result was fifteen weeks in compression bandages that were really uncomfortable and came with instructions to rest with the leg elevated. Practically, everything became harder and took longer to do, all with added pain. Just sitting at a desk became something that hurt and couldn’t be done for more than half an hour or so. It took ages for the wounds to start to heal. With dressings to be changed two or three times a week we seemed to be constantly at the doctors!
In an odd twist having a reaction to my Covid booster, spending two days shivering under the duvet followed by two days of absolutely no energy probably helped as it was four days of rest and inactivity for the leg.
At last, whilst still with some healing to do, I have escaped the compression bandages. There has to be easier ways to meet lots of nurses!
What this has meant for most of the fifteen weeks is NO MODELLING! With everything taking so long and with being self employed it has taken all my time and effort to keep the retail side of the business going with any spare effort spent on packing kits or parts. A little design with CAD has happened as the leg allowed but no actual building stuff – until now!
Time to build two of my own kits for the Townsend Hook loco. Typically, for a kit of my own production I don’t have one so I am doing two, one for a customer and one for me.
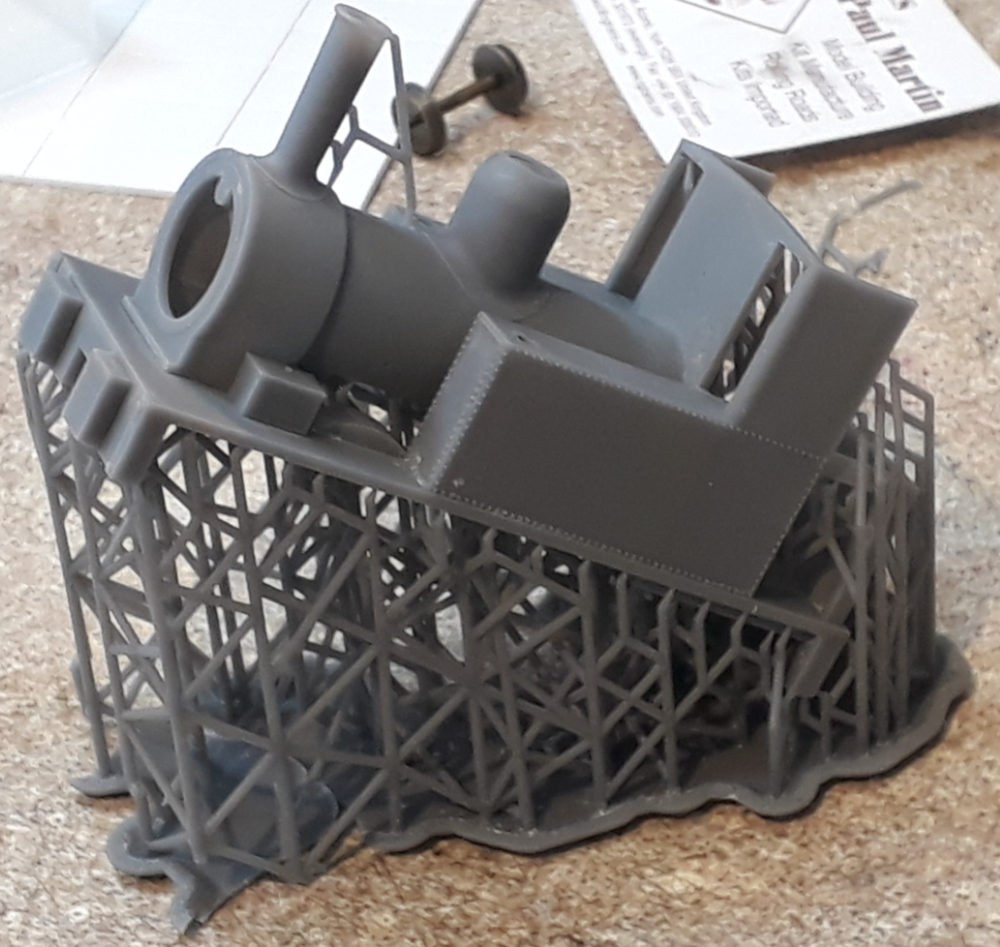
It starts life as a 3D print off my own printer and appears at this jaunty angle and on a lattice of supports. It actually prints upside down hanging from the build platform. The angle is all to do with getting the prints with as little striation of layers showing as possible. After a lot of experimenting the prints now have virtually no lines on them.
Typically though, I am using up a couple of seconds.
These do need just a small amount of treatment.
They have had a little bit of filler on top of a spray with a primer. The trick with, and why fillers come in different colours, is to use a contrasting colour so that you can see when you get the edges feathering in as you get it flat.
The other trick is to have some wet and dry paper glued to a rigid surface so you are sanding it flat. Here I have made some small T pieces out of some offcuts of scale lumber. The sanding is done wet and then rinsed off.
The main body colours were then spray painted using acrylic paints. I made some T shaped sticks to hold the models whilst they were sprayed. Those sticks were held in my coils of copper wire when I hadn’t got hold of them.
Spraying does give a superb finish but the spraying is over in moments and all the time is spent either cleaning the airbrush or masking the model. It makes sense to save up the spraying because you can flush the airbrush between colours and then only give it the full strip down clean at the end of the session.
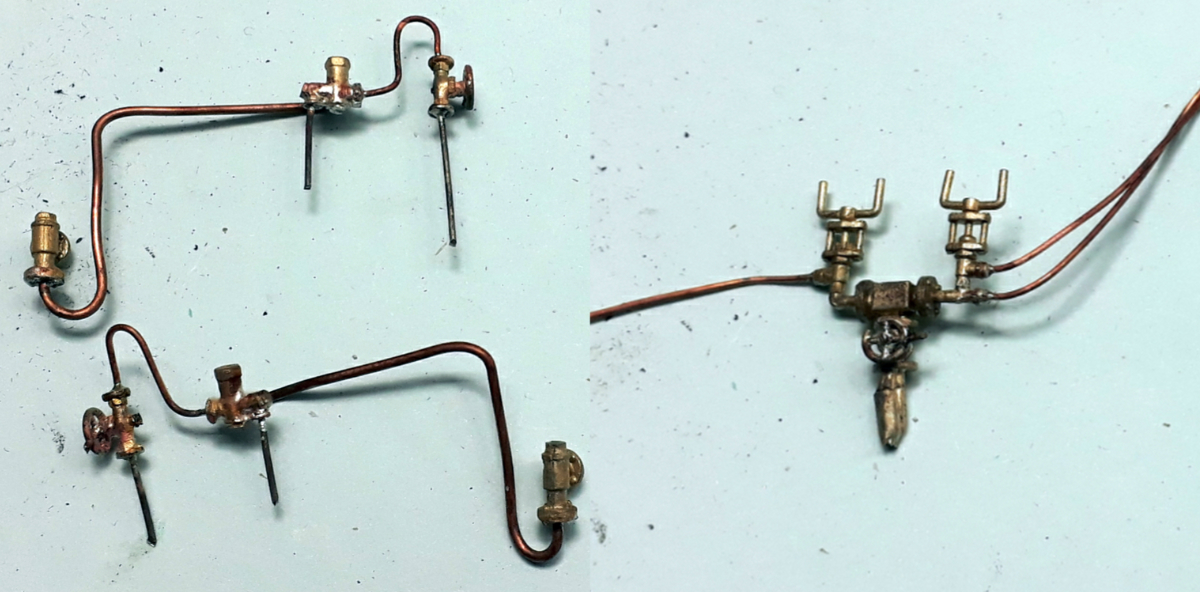
Next job was to make up the pipework from the last wax brass castings and copper wire. The castings were fitted with brass spigots to go into holes in the body and, as much as possible, the copper pipes bent to shape.
All the parts were silver soldered together. Harder to do but it gives a stronger joint than soft solder and is less likely to come apart with the bending and tweaking of the pipe runs needed to get it all into place on the model.
When done all the brass and copper were given a dip in acid dip to clean them before they were brushed with metal black. Once the metal black had dried they were given a little polish. The aim being to remove the metal black where access was easy leaving the black in the hard to get to bits as if its been half heartedly cleaned.
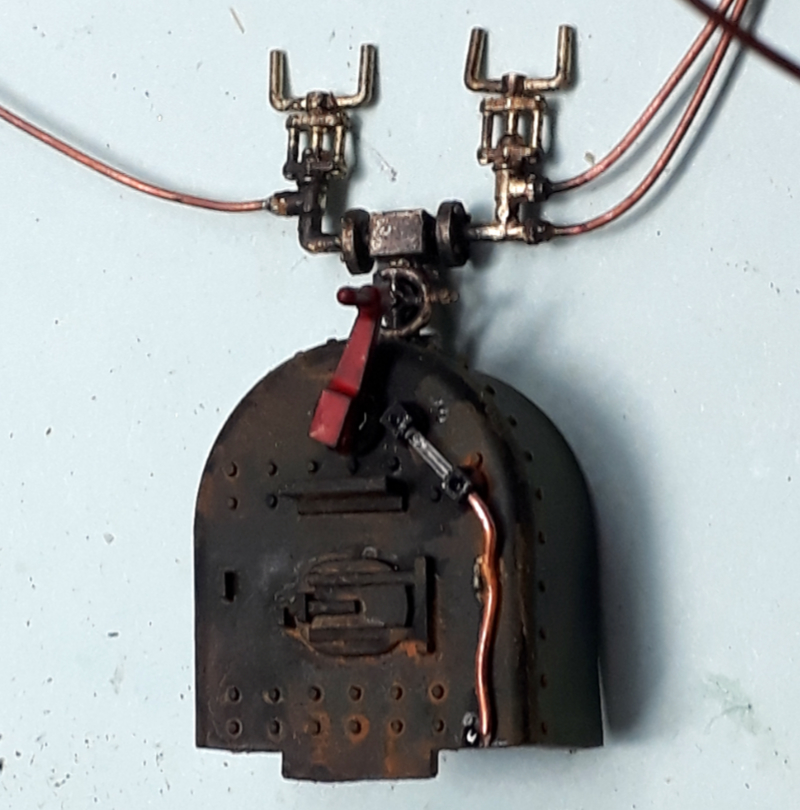
The resin firebox was then assembled with the resin regulator handle, a piece of fibre optic as the gauge glass and a copper wire drain pipe.
The turret was then glued in place and the plain black of the firebox was weathered with a rust wash and then some white highlights to bring out the detail. Once dried the firebox was glued in place on the loco.
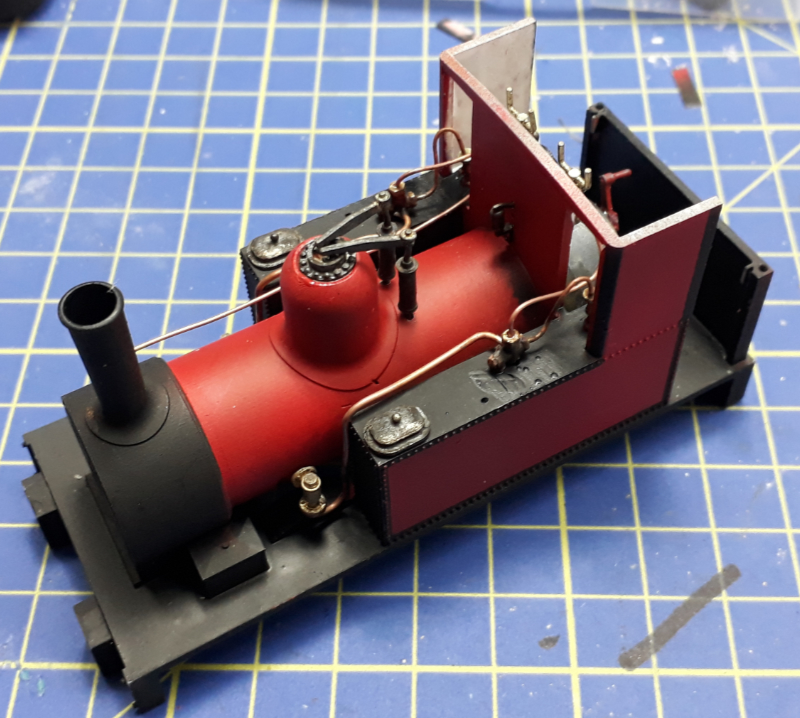
The plumbing was then assembled on the outside of the loco and the cab pipework formed to shape and connected to it.
Other bits of detail such as the safety valves, whistle and tank fillers has already been chemically blackened and fitted to the loco.
Also being prepared at this stage were the cab roof, roof stays and supports and the smokebox door and dart. Here I encountered some brass rod that for some reason wouldn’t chemically blacken despite several cleans and abrading.
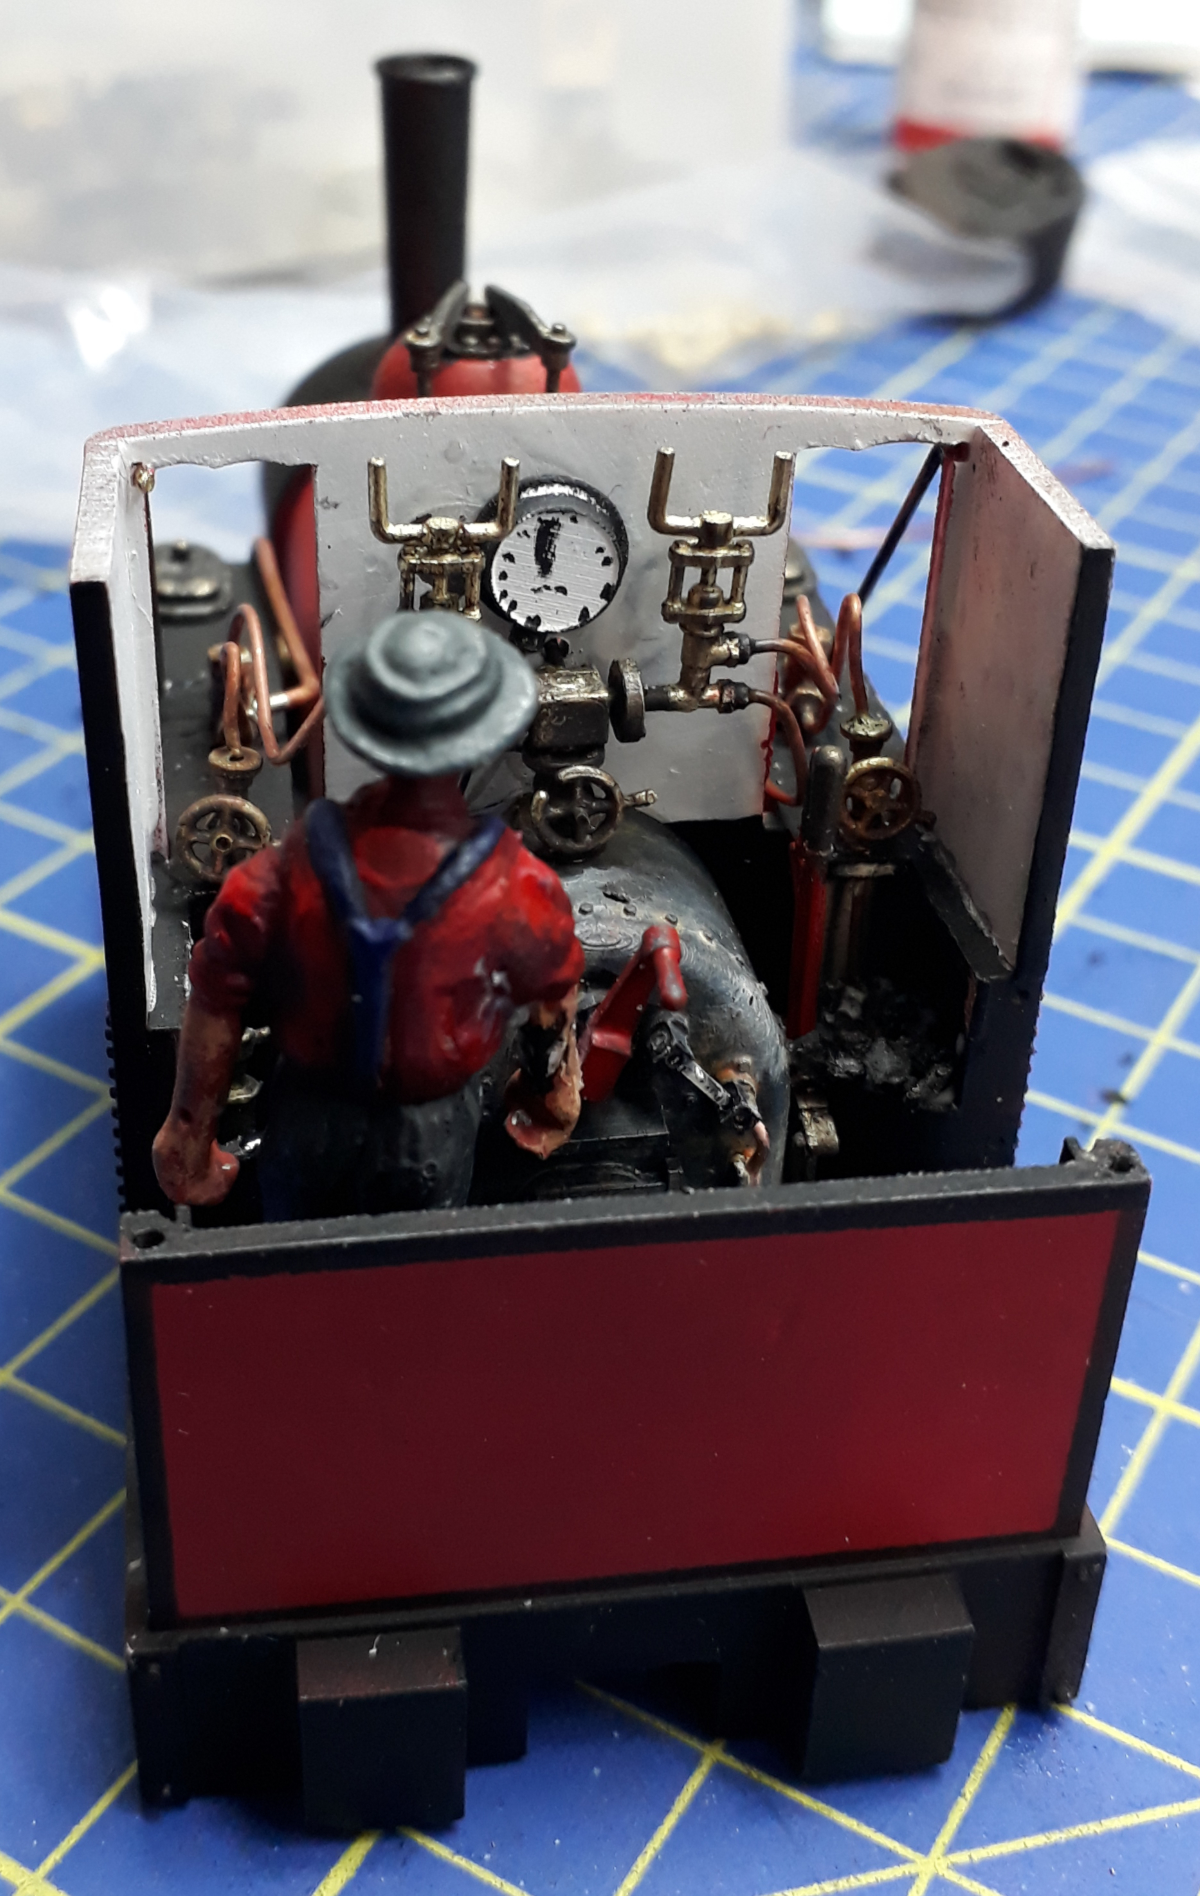
A bunch of additional detailing in the cab was done at this time. The reverser and brake handle were blackened and then painted as required before being stuck in place. A pressure gauge and tail pipe were added as was a pipe to the whistle. Some foam was stuffed in the bunkers to fill them before PVA glue was painted on an sprinkled with coal.
The driver was added at this point with a wire through his foot and the floor to reinforce the joint. A little bit of touching up in the cab was done whilst it was still accessible.
The roof was then added, first glued to the cab and then the rear support rods slid into place and glued. At this point it was time to set it aside for the night to give all the various bits time to dry. Next will be to sort its chassis and electronics out before weathering it all as an assembled unit.
For my first days proper modelling for a long while I found it both satisfying and tiring but time has flown past with constant podcasts for entertainment.
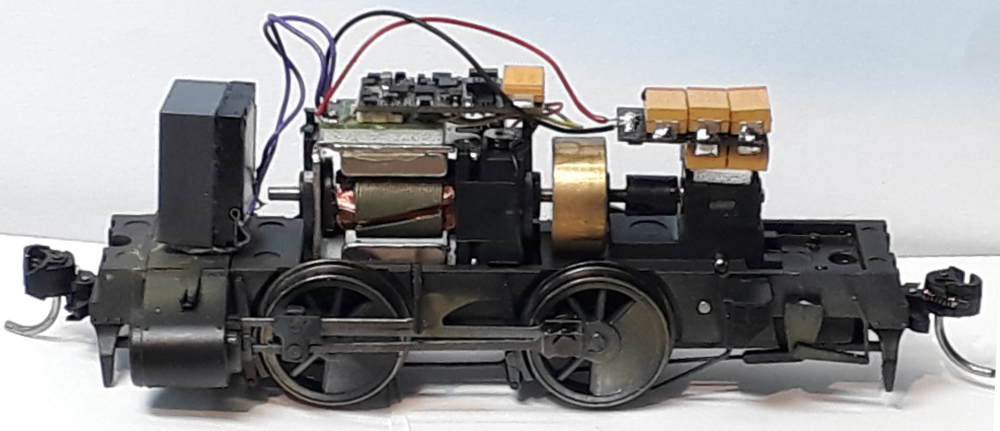
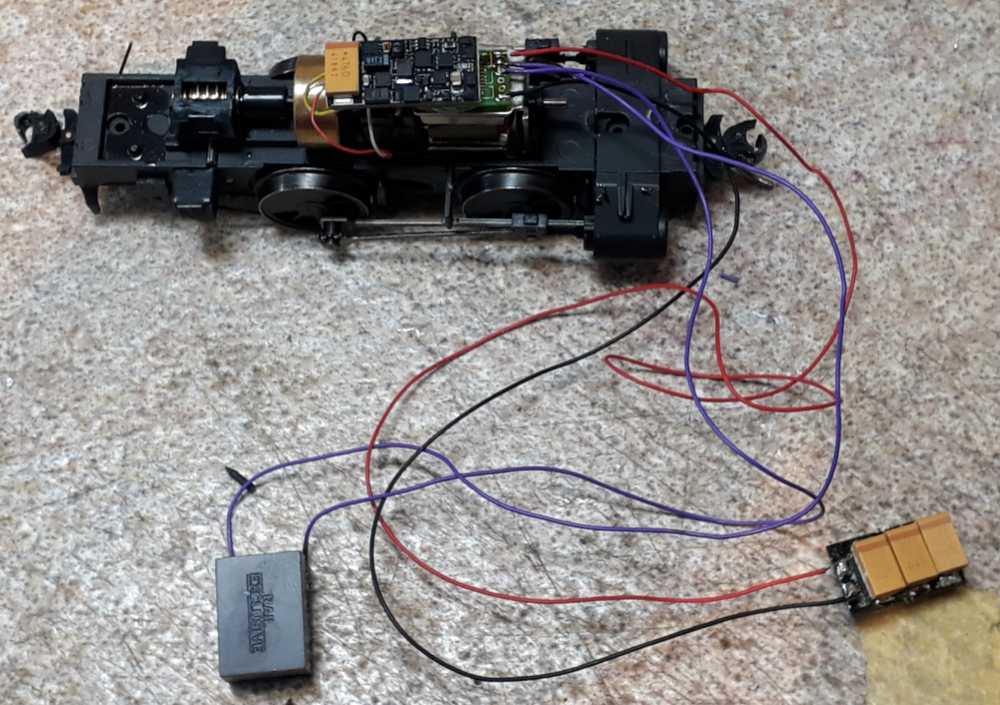
So the fiddly electronics start. The chassis as it comes has a 6 pin socket for a decoder but this points into the smokebox, doesn’t have keep alive or speaker connection whilst taking up too much space.
Instead, I’ve gone for an installation from scratch using a Next 18 decoder and a keep alive unit. It has a ZIMP decoder in it which at the moment thinks its Lyd.
I hope to fit a larger speaker but won’t know for sure if this is possible until I try to put it all together.
The next job is to tidy and shorten the wiring to make it all tidier and then try and fit it all in the body now that I have proved it all works as it should. At the moment it hasn’t got very much keep alive but it has enough to prevent any stuttering and misbehaving from the sound. Here is a test run of it on the rolling road. The chuff rate and so on haven’t been set yet so it does sound like its going like the clappers.
That will do for this blog instalment. I’ll make the next one about putting it all together and finishing the weathering to bring it all together. I’m aiming to have that done in a couple of days as I want to get on to the next job to write about which is a return to the Garratt.
 Meet Elizabeth. No longer an anonymous model the engine has a name and number. With the exception of two small jobs I’ll mention at the end she’s done.
 These pictures are about the fifth set I have taken in the last two days. Why? I’m sure you’ve all done the thing where you finish a model, post a picture of it and as soon as you see the picture you see some glaring mistake? Here I’ve tried to get ahead of that game by regularly photographing the model and studying the picture, which end up larger than life on screen, to inform any further works.
 All the initial painting was doing by spraying acrylics with a lot of masking to get the borders and panels done. The detail parts were then added along with the driver. After that it was down to weathering, washes and powders. Having done the base colours in acrylic and having allowed it to harden fully the weathering has mostly been done with enamels.
 This was followed up with pin washes. Here some mucky colour is added to a mixing tray and a mixed with spirit to form thin washes of different colour density. A fine brush then adds this to the model along join lines and seams. Being thin it runs into the joins highlighting them. Again, leave it to dry for awhile and then tidy it up with spirit on a brush.
 The trick is knowing when to stop. I can see more that I would do to this but at the risk of it all going horribly wrong. The final thing was to give it a very light coat of Dullcote wafted on from a distance to seal it all.