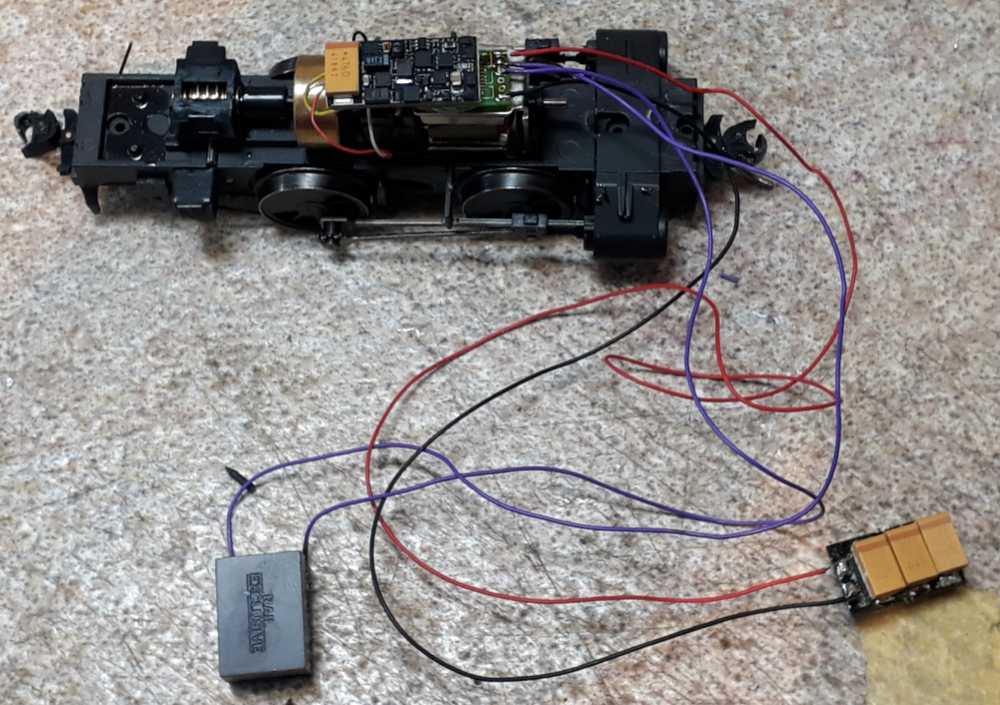
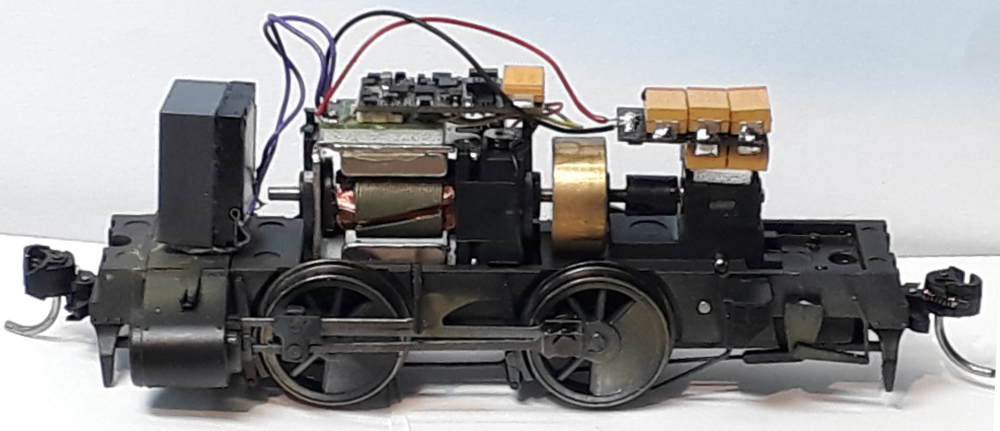
Since the last episode the ZIMO sound decoder has had its software updated to the latest version and a more appropriate sound file loaded. With the wires tidied, the decoder and keep alive mounted it was on to the rolling road and a link to DecoderPro for programming. The speaker is just lodged on a blob of blue tack for now and will be mounted properly once the body goes on to the chassis. I use DecoderPro to set the decoders up because it presents the information in a useable way and keeps a record of what I am doing.
The setup is the loco sits on the rolling road which is connected to my NCE PowerCab DCC set. On the NCE bus is a DCC/USB interface and a USB lead goes to my laptop which has DecoderPro on it. The video is of the chassis running whilst its being programmed.
Now it’s time to finish the painting. First job is to add some tones to the chassis whilst it’s still separate. This was done with a matt white and a brown called brake dust applied via the airbrush with it on a low air pressure.
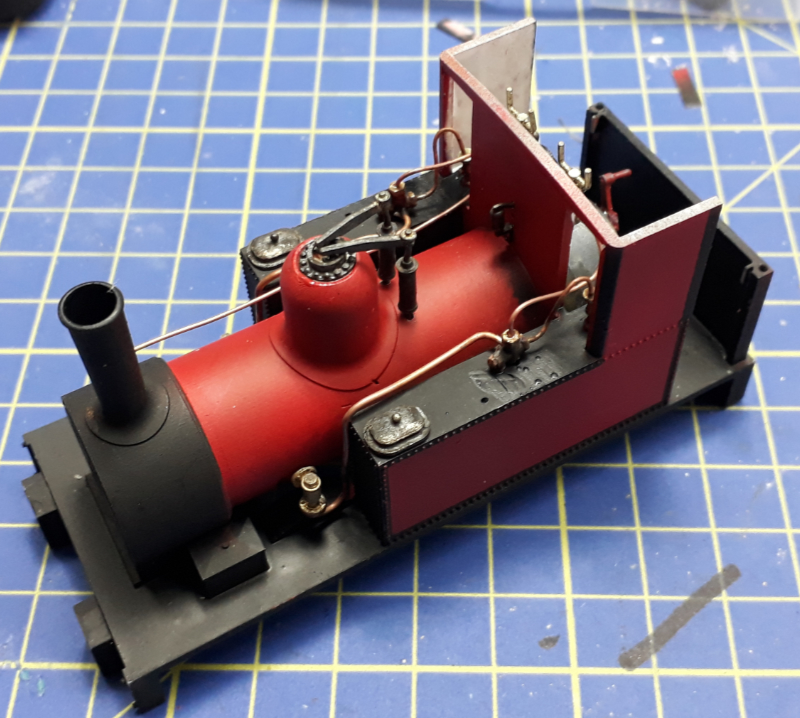
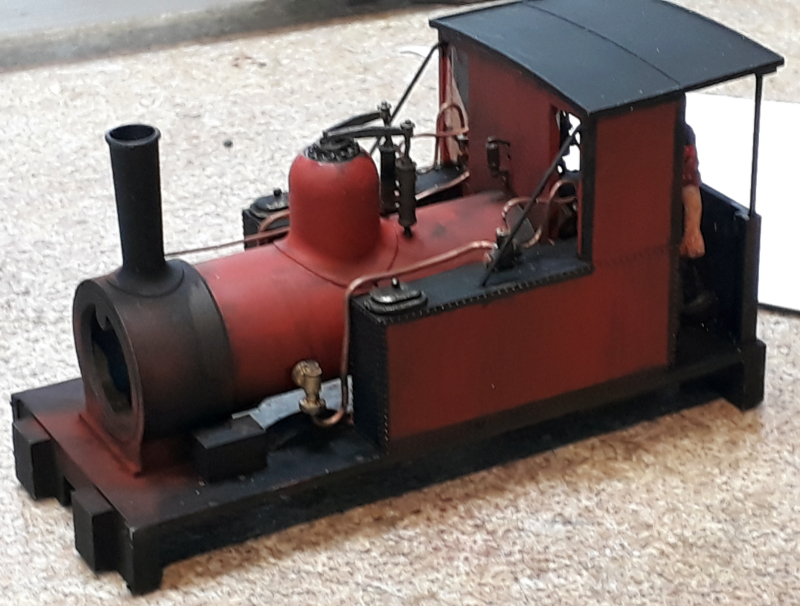
On the loco some rust and dirt were applied to the body around the smokebox to represent the rust that heat causes and the mess that handling smokebox ash leaves. I used weathering pigment powders for this. This was done before the smokebox door was added to maintain a contrast between it and the smokebox. The first layers of some dirt were added to the loco at this time too. Having painted it all in acrylic the muck was added using MIG oil brushers and then drawn out with a brush that had thinners on it. The brush is nearly dried on tissue to limit the thinners applied to the model.
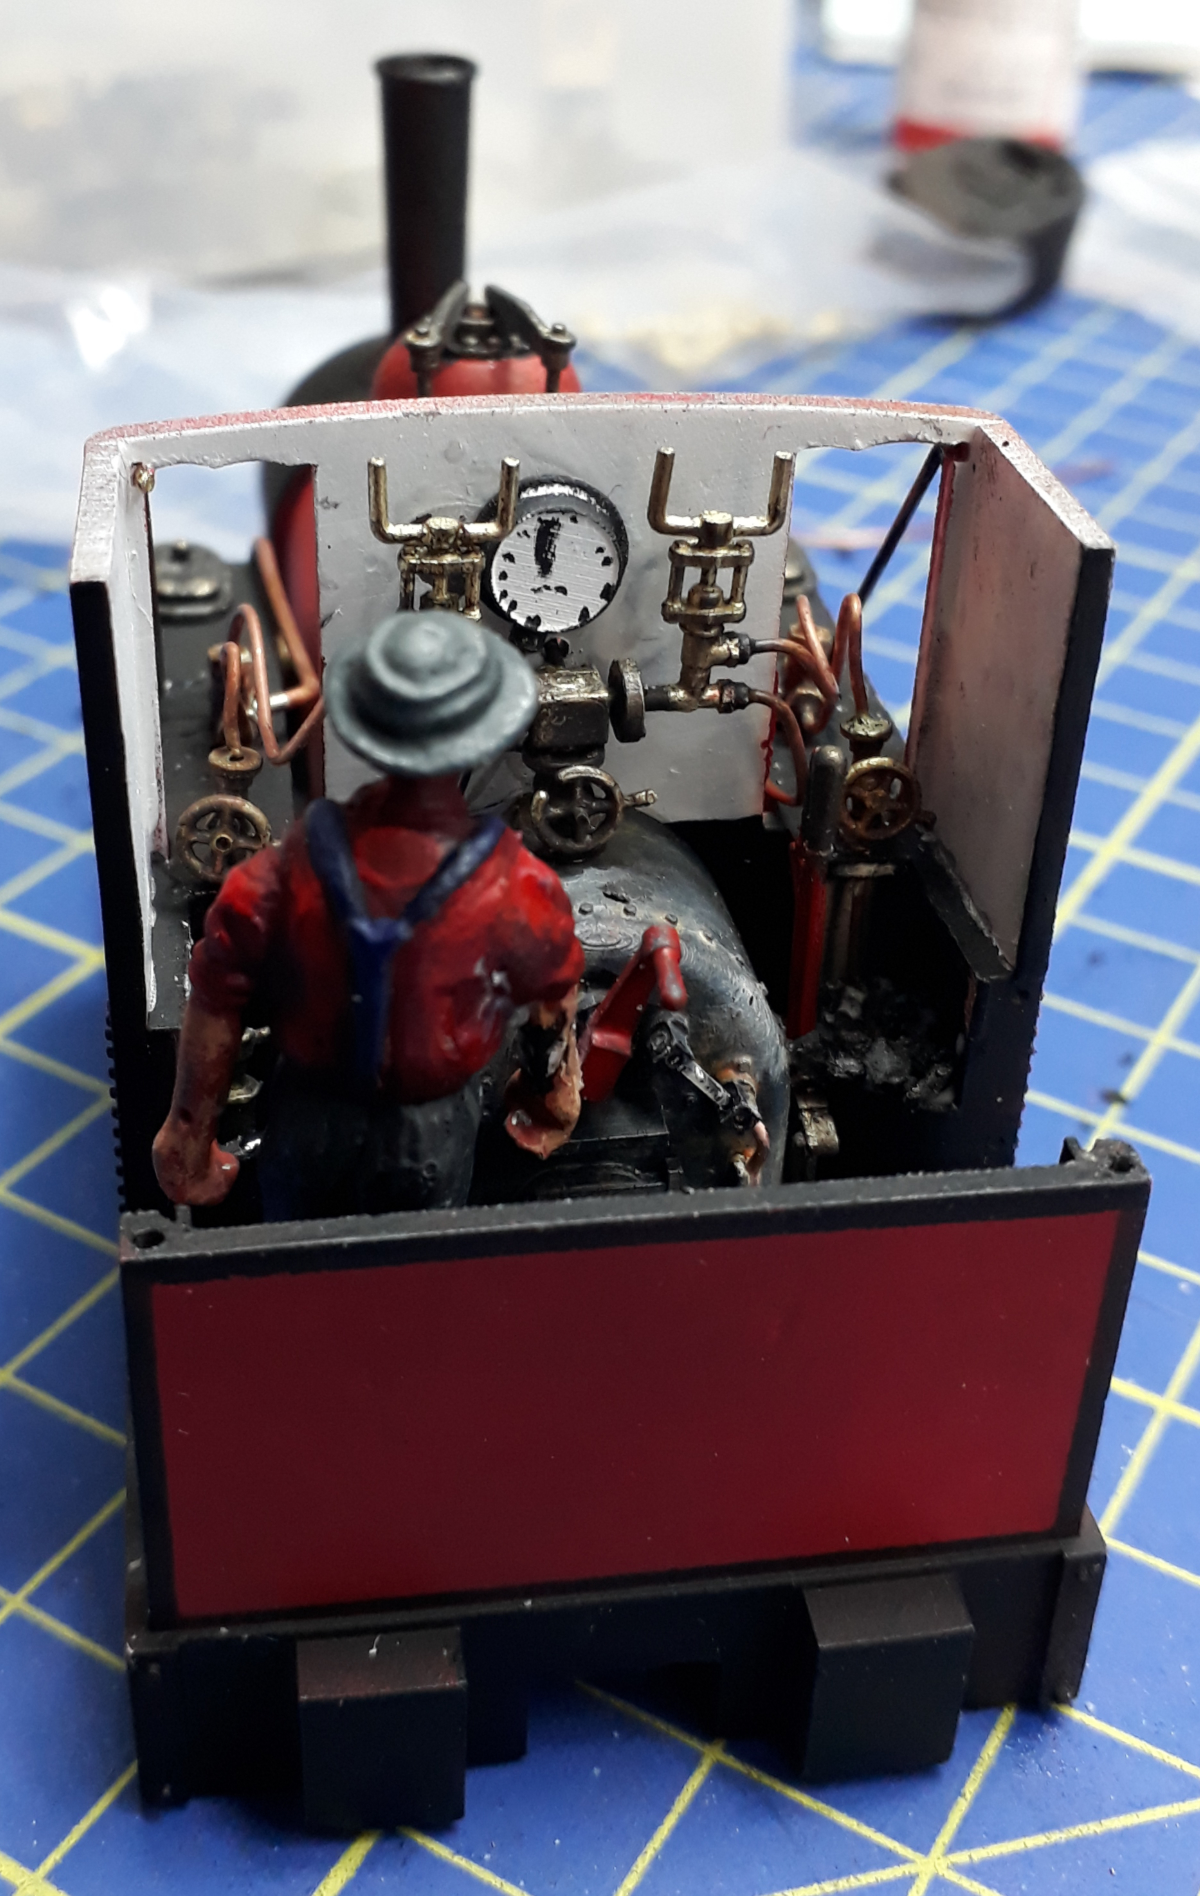
Things slow down a bit at this point because whilst acrylics dry very quickly the oil based colours need to be left a lot longer before you can do the next bit. Some metallic black was added to the cab floor. This is a black with a metallic pigment in it that once dry polishes to give a used steel sort of look.
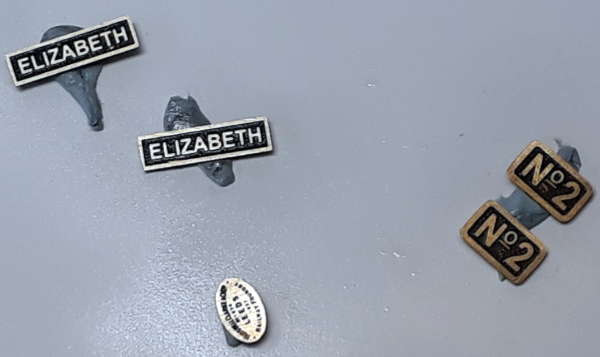
Ihave done some more jobs with the parts all separate. Nameplates have been blacked, polished and sprayed with an acrylic gloss varnish. This now needs to harden. Some more weathering has been done to the body and that will need time to harden now. At the moment some of it looks a bit garish but the final stages will tone this down.
I’ve been working on this and other things at really odd times of the day and night as I try to catch up with things. It seems a side effect of having the leg strapped up for fifteen weeks and then, just as I was escaping that, having a reaction to my Covid booster there have been two casualties. Firstly, my body clock seems to have died. I can be wide awake and working on models at four in the morning as there is no point lying in bed wide awake staring at the ceiling. The second things is endurance or lack of it. I am like a knackered rechargeable battery. Sat on the charger its green lights and raring to go, twenty minutes later flat as a pancake and needing another hour in the charger.
Whatever time it is now that’s it for this episode. The next one should see the model complete and ready to go to its new home.
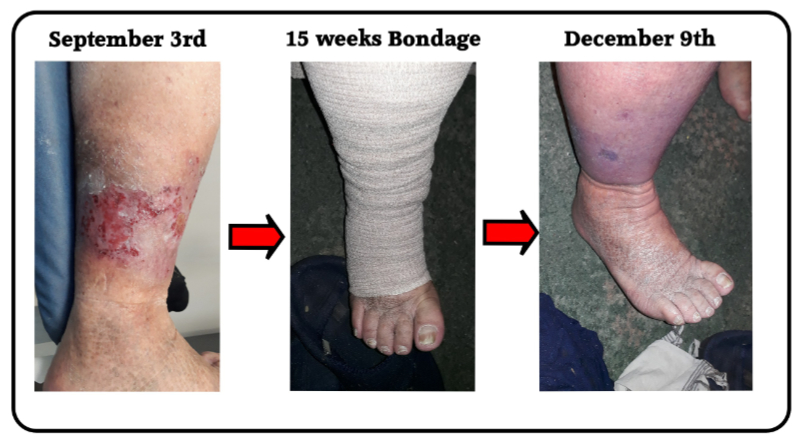
The last fifteen weeks have been a complete pain in the leg (and elsewhere).
In short my already wonky right leg decided to get even more wonky and started with an outbreak of cellulitis but not satisfied with that amount of pain added a couple of abscesses for effect. Those abscesses leaked goo, added massive pain and defied attempts to get them to heal. The result was fifteen weeks in compression bandages that were really uncomfortable and came with instructions to rest with the leg elevated. Practically, everything became harder and took longer to do, all with added pain. Just sitting at a desk became something that hurt and couldn’t be done for more than half an hour or so. It took ages for the wounds to start to heal. With dressings to be changed two or three times a week we seemed to be constantly at the doctors!
In an odd twist having a reaction to my Covid booster, spending two days shivering under the duvet followed by two days of absolutely no energy probably helped as it was four days of rest and inactivity for the leg.
At last, whilst still with some healing to do, I have escaped the compression bandages. There has to be easier ways to meet lots of nurses!
What this has meant for most of the fifteen weeks is NO MODELLING! With everything taking so long and with being self employed it has taken all my time and effort to keep the retail side of the business going with any spare effort spent on packing kits or parts. A little design with CAD has happened as the leg allowed but no actual building stuff – until now!
Time to build two of my own kits for the Townsend Hook loco. Typically, for a kit of my own production I don’t have one so I am doing two, one for a customer and one for me.
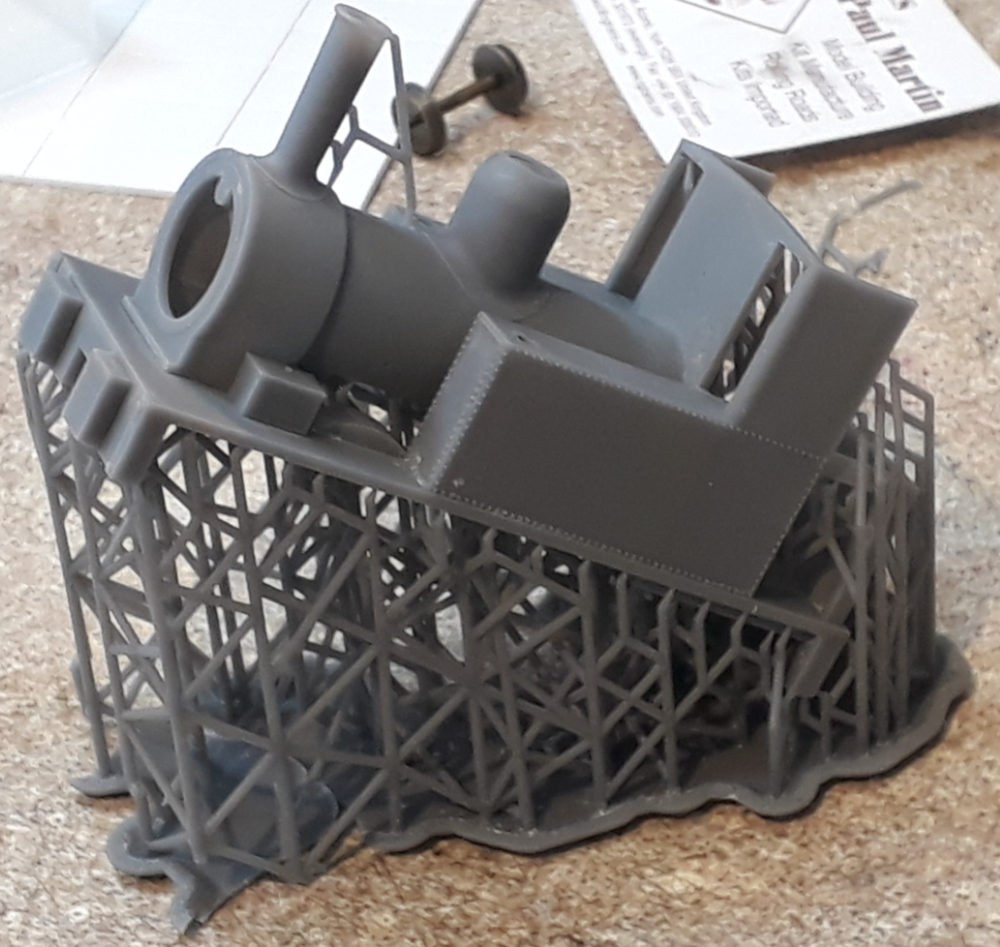
It starts life as a 3D print off my own printer and appears at this jaunty angle and on a lattice of supports. It actually prints upside down hanging from the build platform. The angle is all to do with getting the prints with as little striation of layers showing as possible. After a lot of experimenting the prints now have virtually no lines on them.
Typically though, I am using up a couple of seconds.
These do need just a small amount of treatment.
They have had a little bit of filler on top of a spray with a primer. The trick with, and why fillers come in different colours, is to use a contrasting colour so that you can see when you get the edges feathering in as you get it flat.
The other trick is to have some wet and dry paper glued to a rigid surface so you are sanding it flat. Here I have made some small T pieces out of some offcuts of scale lumber. The sanding is done wet and then rinsed off.
The main body colours were then spray painted using acrylic paints. I made some T shaped sticks to hold the models whilst they were sprayed. Those sticks were held in my coils of copper wire when I hadn’t got hold of them.
Spraying does give a superb finish but the spraying is over in moments and all the time is spent either cleaning the airbrush or masking the model. It makes sense to save up the spraying because you can flush the airbrush between colours and then only give it the full strip down clean at the end of the session.
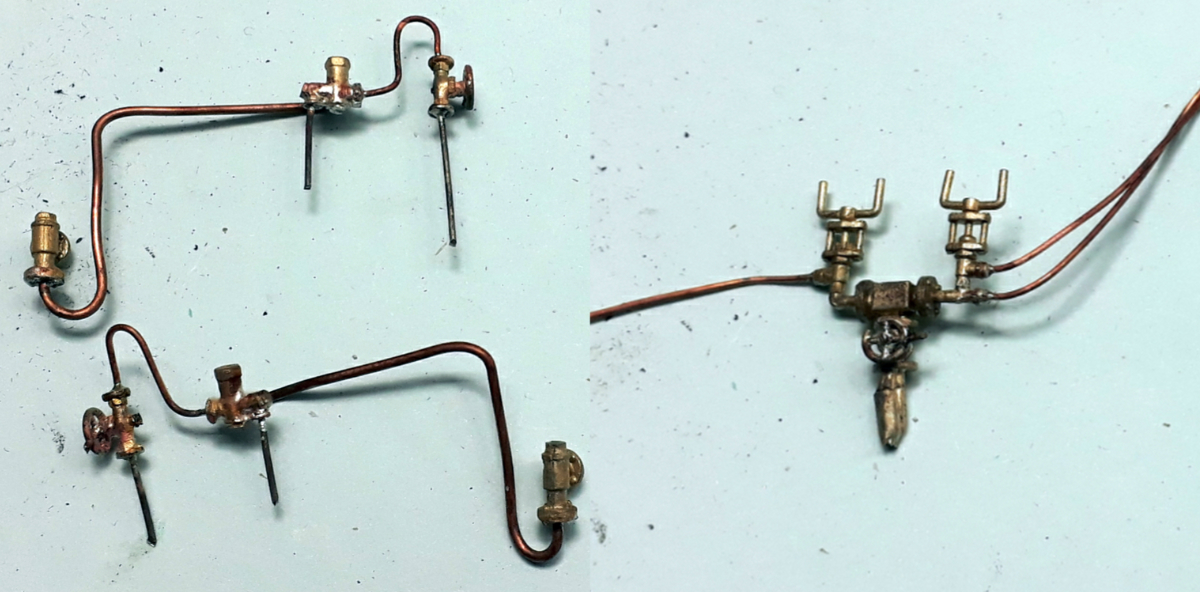
Next job was to make up the pipework from the last wax brass castings and copper wire. The castings were fitted with brass spigots to go into holes in the body and, as much as possible, the copper pipes bent to shape.
All the parts were silver soldered together. Harder to do but it gives a stronger joint than soft solder and is less likely to come apart with the bending and tweaking of the pipe runs needed to get it all into place on the model.
When done all the brass and copper were given a dip in acid dip to clean them before they were brushed with metal black. Once the metal black had dried they were given a little polish. The aim being to remove the metal black where access was easy leaving the black in the hard to get to bits as if its been half heartedly cleaned.
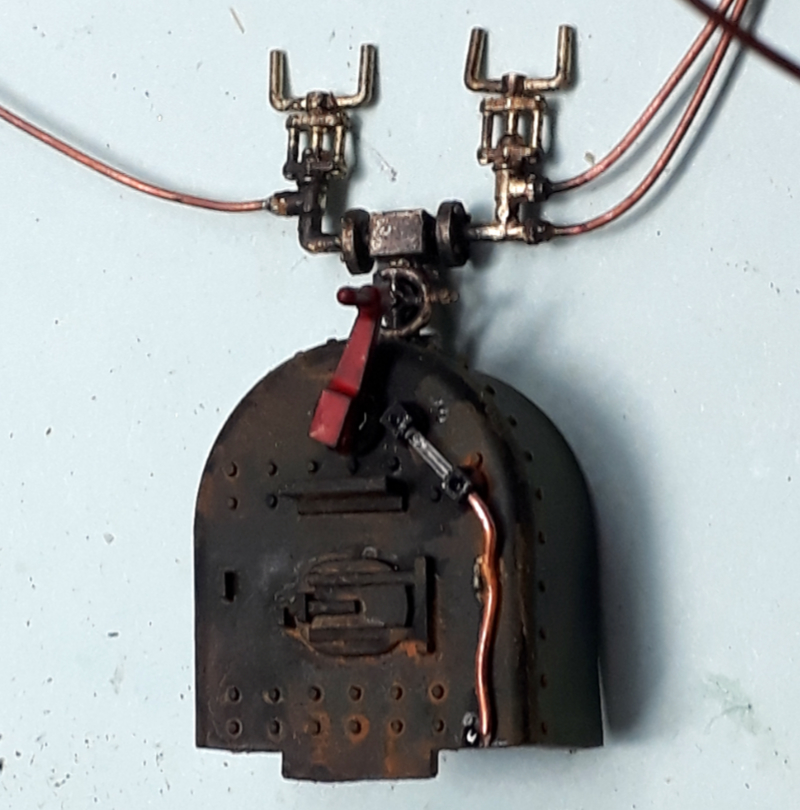
The resin firebox was then assembled with the resin regulator handle, a piece of fibre optic as the gauge glass and a copper wire drain pipe.
The turret was then glued in place and the plain black of the firebox was weathered with a rust wash and then some white highlights to bring out the detail. Once dried the firebox was glued in place on the loco.
The plumbing was then assembled on the outside of the loco and the cab pipework formed to shape and connected to it.
Other bits of detail such as the safety valves, whistle and tank fillers has already been chemically blackened and fitted to the loco.
Also being prepared at this stage were the cab roof, roof stays and supports and the smokebox door and dart. Here I encountered some brass rod that for some reason wouldn’t chemically blacken despite several cleans and abrading.
A bunch of additional detailing in the cab was done at this time. The reverser and brake handle were blackened and then painted as required before being stuck in place. A pressure gauge and tail pipe were added as was a pipe to the whistle. Some foam was stuffed in the bunkers to fill them before PVA glue was painted on an sprinkled with coal.
The driver was added at this point with a wire through his foot and the floor to reinforce the joint. A little bit of touching up in the cab was done whilst it was still accessible.
The roof was then added, first glued to the cab and then the rear support rods slid into place and glued. At this point it was time to set it aside for the night to give all the various bits time to dry. Next will be to sort its chassis and electronics out before weathering it all as an assembled unit.
For my first days proper modelling for a long while I found it both satisfying and tiring but time has flown past with constant podcasts for entertainment.
So the fiddly electronics start. The chassis as it comes has a 6 pin socket for a decoder but this points into the smokebox, doesn’t have keep alive or speaker connection whilst taking up too much space.
Instead, I’ve gone for an installation from scratch using a Next 18 decoder and a keep alive unit. It has a ZIMP decoder in it which at the moment thinks its Lyd.
I hope to fit a larger speaker but won’t know for sure if this is possible until I try to put it all together.
The next job is to tidy and shorten the wiring to make it all tidier and then try and fit it all in the body now that I have proved it all works as it should. At the moment it hasn’t got very much keep alive but it has enough to prevent any stuttering and misbehaving from the sound. Here is a test run of it on the rolling road. The chuff rate and so on haven’t been set yet so it does sound like its going like the clappers.
That will do for this blog instalment. I’ll make the next one about putting it all together and finishing the weathering to bring it all together. I’m aiming to have that done in a couple of days as I want to get on to the next job to write about which is a return to the Garratt.
So, back in February I bemoaned the lack of progress on the RR as work got in the way. That lack of progress was maintained until about a ten days ago but the seed of progress was sowed when I temporarily repurposed my own layout as a O14 track demo.
Looking for the silver lining I am going to say the delay was a good thing. Having designed the corner board and then stalled coming back to it eight months later has allowed a design review.
It’s probably fair to say the first version was designed with imagination and no not a lot of physics. The review has allowed me to check the design, superimpose a realistic curve radii on a board whose job is to turn the railway through 90’ and then further revise the design around the track layout.
The prompt for the extra board now when there is very little to show on the first is that the king point for the yard is to be close to the edge of the board and the track from it will immediately start to curve and it was going to be difficult to get the alignment right without it.There is the added factor that once there is some track down it would be difficult to play trains without some track beyond the point. The above image shows how the two boards go together and how the high level section mates. That isn’t fully detailed as it didn’t contribute to this design exercise.
I am lucky that I have posh 3D CAD in the form of SolidWorks for other uses but it proved ideal to design this board. A sort of pet hate is the layout that is flat. Not sure why it bother me so much, possibly because a now departed friend from my old model club whilst a profligate layout builder they were always flat boards with a backscene. On the first board I have taken the track above datum so on the corner board I was keen to see the ground drop below datum.
Using CAD speak each bit was designed as a part and was then put together in an assembly which creates the image at the head of this piece. All the parts can be seen in this exploded view.
Once happy with the fit of all the tabs and slots (and posh CAD helps here as it has tools to highlight errors) the parts laid out in 2D and a cutting scheme. The 3rd D now becomes a statement of “6mm ply for this bit, 9mm Ply for that bit”.
Having got the ply sheet sizes from the laser company I laid out the 2D cutting plot having done this sort of thing back when I worked for York Modelmaking and its not dissimilar to laying out etches. This probably saved me a few quid as it’s something the laser firm would charge for.
There was a bit of toing and froing with the files until we were all happy with them largely because posh CAD was being too clever for its own good at this stage. With this sorted the files were in for a cutting quote and to be honest I sat back thinking this is going to be where I learnt why people stick with flat boards.
The quote landed, I was pleasantly surprised, the quote was converted to an order and now we await the bits arriving.
I can already see the need for board three
Just for this illustration the third board is a copy of the first as I have done no design work for it yet. You will note that the viewing face changes sides . This last sketch of my model room explains why. This would be the master bedroom if we were selling the house as it’s the largest but it’s in the extension and full of trains. Once upon a time I had visions of a grand layout but the day job took over most of the space and the modular approach is the antidote to getting nowhere with the larger layout.
You enter and see the viewing face of the first two boards as they sit on a peninsula made of kitchen units and have to go round the end to get to the work area. That work bench is where I try to concentrate on doing electrical, electronic and DCC type stuff.
Board 3 (& 4, 5 etc) are against the other wall and need to face inwards. I haven’t committed pen to paper or pixel to screen for board 3 but have in this instant realised there may need to be two board 3’s. One and two are built with the idea of them being exhibited in which case 3 would need to be a fiddle yard for that whist at home it could be another scenic board. That thinking is for another day.
It is fantastic that Lionheart are doing the L&B in 7mm scale and I will be writing more about that in coming blog posts. This post is expressly to explain pre-ordering for these models.
The Short Version:
You order now, cart is set at zero so you’re not charged at this time, (the prices are shown in the product detail), when the models are imminent, I invoice, you pay, I send model.
Please don’t order if you don’t intend to pay
The Longer Version
The models are due in the Autumn of 2022. They are likely to sell well and ordering in advance is highly recommended. The quantity made is also likely to be determined by pre-orders received.
In an ideal world the process for taking your pre-order would be that the website collected all your payment details and kept them in a safe place until the models are nearly here and then charge your card. I investigated adding this functionality and it went something like this.
Me: “Hello, web developer I need this functionality”
WebDev: ” We can look into that” insert money
WebDev: “There is a plugin that will do that” insert more money
WebDev: “It’ll need setting up and maintenance” insert even more money
All well and good but that money they want inserting has to come from somewhere, half the credit/debit cards people use will have lapsed and the payment processors are awkward about stored cards. With the current card rules we can’t store card details ourselves, they are stored behind the bank security. When you actually get to the `pay up’ part of a transaction that takes place between you and the bank, only they see your card details and they send me a `they’ve paid up’ message.
My thought at this time were a) stuff that for a game of soldier and b) I need a plan B
Plan B
Please don’t make me live to regret this but Plan B is that I am going to trust you! Please only order if you fully intend to pay.
Here is what will happen.
You order now,
The cart is set at zero so you’re not charged at this time
The prices are show in the product detail
You complete the checkout so I know what you want and how to find you.
When the models are imminent, I invoice you giving you options to use a card or bank transfer
You pay,
I send the model(s) when they arrive.
I’m going to say this again and then explain why. Please only order if you fully intend to pay. I will be ordering your models from Lionheart at the point you order it from me to ensure you get your model. As a new Lionheart dealer my first orders are pro-forma which means I have to pay them before they send me the models. That is why I say I want your money when they are imminent rather than in stock and why I am worried about timewasters turning round and saying `don’t want it now’
I do understand that circumstances change suddenly and I’d ask you to let me know asap if you want to cancel an order.
This process may evolve as the time gets nearer and if you want to pay now then drop me a line and I can take a payment and stash it away until I need to pay Lionheart
Puffing Billy, or more accurately the Victoria State Railways 2’6″ gauge railway in Australia of which The Puffing Billy Railway is the preserved section.
The iconic loco’s that are the mainstay of this line are the Na Class 2-6-2s. The original engines were built by Baldwin in America but all the operable ones are made in Australia virtual copies with the usual developments over time.
I think there are 6 of the original 17 built still in existence. Five are or have been in service in the preserved era [6A, 7A, 8A, 12A & 14A] with 3A unrestored and apparently the closest to the original spec. The Baldwins [1&2] don’t survive.
You’d think these iconic locos would be a dead cert for being modelled but it took until 2014 for that to happen [apart from some very expensive brass examples] in 0n30. Separately, in the UK modelling scene and in the American 0n30 ranges there has been a gap in the range of a largish tank loco. You’d think that what is basically a Baldwin the American modellers would lap it up but sales to the USA were disappointing.
So in 2014 Haskell Co introduced their model of the Na Class 2-6-2 in 0n30. Produced in China for a Taiwan company and sold mainly in Australia it was a bit convoluted to say the least.
Here at EDM Models we imported them directly from Taiwan and initially they sold well.
They have a decent spec with pick up on all the drivers, a flywheel fitted motor, DCC socket (with provision for sound) and working directional headlights.
The included provision is for a speaker in the bunker but I don’t like engines where its the wrong end that goes chuff so I do it differently with a large keep alive in the bunker and speakers in the front end, Proper Na sounds are available for an ESU DCC chip from me via Australia.
Five livery versions were produced.
Apple Green
Canadian Red
Black with Red Trim
Plain Black with the original Chimney
Plain Black with the modern Chimney
A year or so later Haskell produced a model of the NQR bogie open wagon. This was sold in packs of three with ten different packs covering different numbers and livery variants.
This might have seemed like an illogical choice of something to go with the Na class loco’s but there was method in their madness. From a prototype angle the NQR was a general purpose wagon but so general purpose they got rebuilt into all sorts of special purpose vehicles and even rebuilt as carriages.
From a model manufacturing point of view they were a shrewd move. Haskell, aiming to set up production in Taiwan, picked an easy first model for the new production facility whilst at the same time making many parts that are common to the more complicated examples of rolling stock.
This may bear fruit next year with plans afoot and CAD work started for an NBH passenger car.
So, are these still available and why haven’t I got them in stock?
Like many things its complicated. On the one hand you might expect a limited run from 2014 to be long sold out. On another the shipping and currency transfer arrangements to/from Taiwan were fraught with complication and that was before the current Covid induced complications. On the stock holding front the minimum order was twelve locos which ties up a lot of money which you then have to shoot off into the ether wondering if its going to get there as you listen to any number of disclaimers from the banks and intermediaries explaining that if it vanishes its not their fault.
Once you could get over the twitchiness of launching money into the unknown it was fine whilst a batch of twelve sold quickly so earning the outlay back in a relatively timely manner. Once the initial demand was satisfied though the batches of twelve started to sit on the shelf tying up money and only selling slowly.
Once this had happened a couple of times we let our stock run out and didn’t even move their existence to our new website and sort of assumed that they would have sold out. Our last arrived in 2017.
Fast forward to 2021. Haskell are talking about the NBH coach on Facebook. Three enquiries come in asking if the Na is still available. A conversation with Kieran Haskell about something else all together reveals that all the Na’s are still in stock with him as are some of the NQR wagons.
A cunning plan was needed.
As it has been awhile since new Na’s locos and NQR wagons have been available the cunning plan is to do a one off import of these.
The minimums for shipping and the scary currency transfer issues remain and are, if anything, made worse by Covid19 as the reduction in passenger flights out of Taiwan is reducing the cargo space for parcels.
Now I can’t afford to do this as a speculative deal as it comes on top of other committed financial developments for the business but I can do it with your help.
Simply it goes like this: –
You pre-order and pay for your Na class loco on my website here
You pre-order and pay for your NQR Wagons on my website here
I will put the money in a segregated account and keep it separate until
a) we get enough orders to go ahead or,
b) we call it off and you get all your money back
If we get above the minimums for to be viable by enough then we’ll upgrade the shipping to ensure they get here promptly. I may also add a very small number for direct sale but they will be at a higher price than the pre-order price. My target is to have them here for mid October.
The above offer has expired any stock is on the website here
The Iffy Ones
When you look at the website you will see that the NABE, Black with original chimney and NABM, black with the modern chimney are offered at a lower price because there is a minor moulding defect. I was sent with and without photos and I still had to ask Kieren to point out what I was looking for.
You see that ledge, or angle bracket, that the arrow is pointing at? On the right hand tank of the plain black engines the mould hasn’t filled totally.
Looking at the prototype it seems to serve little purpose other than to be a ledge to rest the number plate on whilst you bolt it in place but its actually part of a precarious stepping route to the water fillers which goes side rods, running plate, works plate.
Would you have noticed if I hadn’t told you?
Anyway that’s the deal and the cunning plan lets see if it gets anywhere.
You may think I spend too much time playing trains in Wales but I don’t care! For reasons I will reveal in a future post there is an imperative to do as much as possible this season.
The truth is that with this last winters lockdown and my bad leg playing up and taking an age to get itself sorted again I got a massive dose of CBA (can’t be @rsed) which others might call depression. I was questioning if I wanted to carry on driving or if I could even be bothered. There were other forces at play too.
In the end in a moment of positivity I said yes to a call for a driver to cover three days back in June before I had time to talk myself out of it. I am pleased to say the second of those three days reminded my why I enjoy it. On that day I had the loco manager with me for my routine, once every three years, practical assessment which I passed with flying colours.
Ever wonder why model filler comes in different colours?
Its the same stuff just in different colours.
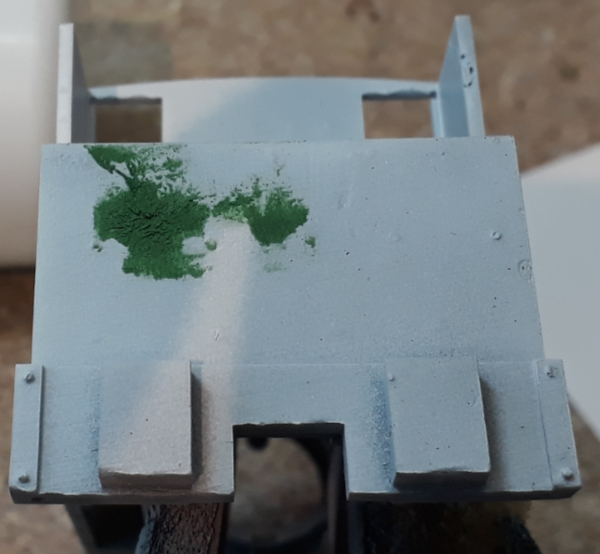
The theory is this. You should use a filler of a contrasting colour to the job you are filling.
As you can see on the back of this loco it has been primed with white acrylic primer and then green filler and left to dry.
The next example is a side on view of some filler that has been rubbed down with some 1000 grade wet and dry paper used wet.
The contrasting colour lets you see when you have feathered the edge of the filler into the body.
In this case its left filler just in the groove in the tank side. The groove shouldn’t have been there in the first place but the 3D printer had a little wobble and I am using up development prints to experiment with.
The next stage is to add either undercoat or the final body colour. Having sprayed both bodies with white primer to better show any blemishes the cabs were masked off as the upper parts of the interior will be cream so the white is the ideal first layer.
The green engine has body colour added straight on to the white. The green I had is a bit darker than I wanted and adding it to the white lightens it a bit.
Alternatively the red engine has had a coat of brown primer on top of the white. This is a bit of opposite logic to above. Adding the red body colour straight on to the white would have made the red look more pink so the brown layer better preps for the red.
The red hasn’t been applied yet as just as I was getting to it the weather went scorchio and the paints were going off before they could be sprayed.
That’s it for this little interlude. More of these locos as they develop.
Well, I certainly chose a corker of a week to drive trains. I can recall a few hot ones in the past and to some extent forewarned is forearmed with regards to dehydration and heat stroke having had a bad experience in the past.
I was very fortunate that my roster on each of the four days was just one lap. It was enough. Day 1 was on Blanche on the 12:25 Mountain Prince service. Blanche is quite enclosed but you can stand away from the hot bits. With the number of bottles of water on the footplate, some for drinking and some for wearing a trip to Wilco for a wine rack would have been handy.
It was pretty hot on the engine but that was a taster for what was to come.
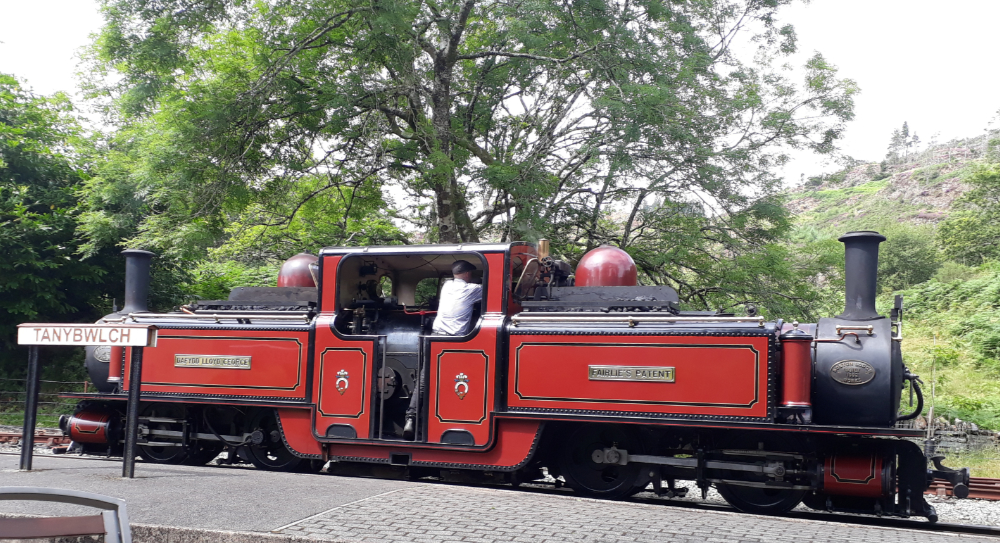
Day 2 was one lap on the 10:00 driving Merddin Emrys. In most ways Merddin is the worst for a hot day with its more enclosed cab but in a surprise way DLG is worse, but more of that later.
The train service this week was the Mountain Prince which is a version of the railways Covid secure service. The up steam service runs to Tan-y-Bwlch where a diesel is attached to the rear. The up train also crosses a down train here. We then run up to Barn Cutting, just above Dduallt, where we pause for a scenic interlude. The diesel then guides the train back down to TyB where the passengers get around an hour to use the cafe, toilets and explore the woodland walks. The diesel is uncoupled ready to go on the end of the next up train and the steam loco moves up to close to the water tower. Ingenious train crew have set up a staff seating area in the shade. Trouble is the engine sits in the sun getting hotter for this 45 min. I ended up tipping bottled water over the steam brake handle to be able to use it! Once the next up train has gone with the diesel on the back the steam loco runs round and takes its train back to Porthmadog.
What does a steam loco driver do on his day off?
Goes and looks at steam engines of course!
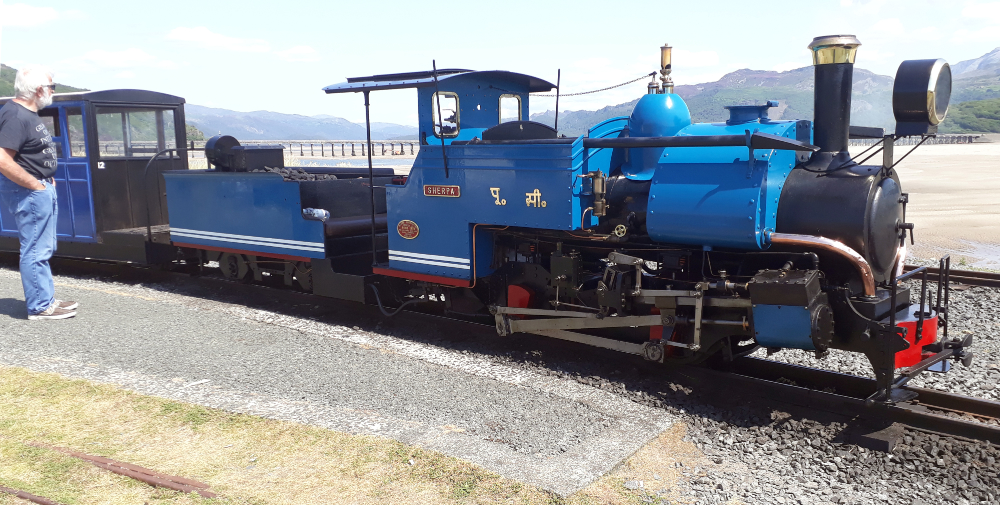
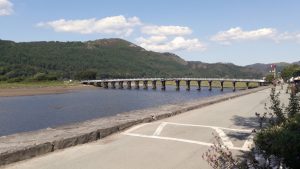
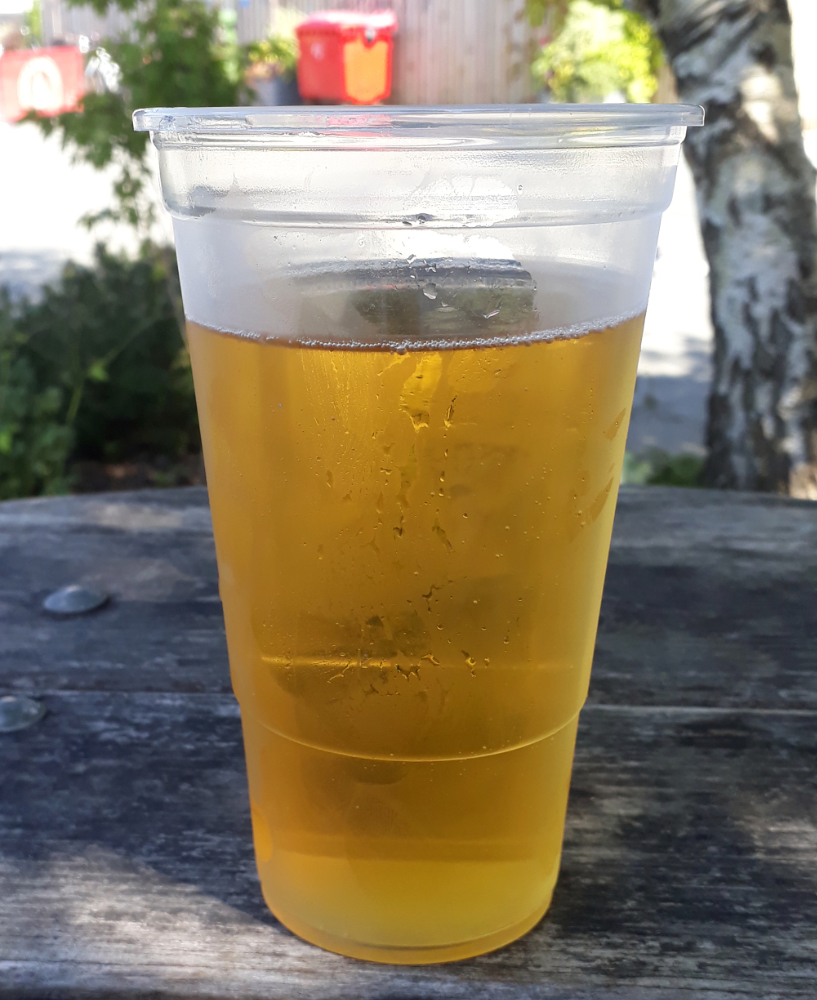
Actually, it was a bit of a tour taking in Barmouth and then visiting friends at Fairbourne. They made us have a ride – honest! The tour did continue with a scenic interlude and some light refreshment.
Day 3 was another day with Blanche.
The heat was getting very silly now. The track had been suffering in the heat and we had a blanket 15mph speed limit on but there were a number of places with emergency lower speeds on them because of it.
This was an interesting trip as Blanche was loaded with a trial of an imported coal as our current source is due to close next year. The only slight worry was that this was the engines second day on it and there wasn’t much left on the engine.
The temperature resulted in further engine crew ingenuity.
As well as our shady picnic spot we now had a drinks cooler. The water tower always has a bit of a dribble and is ice cold so be delaying its trip to the drain with a bucket the bottles of water get chilled.
Drinking two or three 2 Litre bottles of water in a round trip is not out of the ordinary. Also much to the pain of the railways medical staff they recommend salty crisps and rehydration salts.
In olden days it would have been a pint of mild!
Day 4 and its the other double engine, David Lloyd George, for a lap.
This is perhaps where you’d think the more open cab would make it a bit cooler but in this heat it was a losing battle.
The surprising difference was that on the more enclosed Merddin the Vacuum brake handle is in line with the window and therefore gets a cooling airflow. DLG’s is set lower down and doesn’t line up with the window. It gets very hot when stood and isn’t cooled by a draught. As the down trip is all about vacuum braking I ended up driving with a glove just on my left hand.
Well, that was a scorcher but I am off to do it again in a weeks time and this time we get to go to Blaenau for the first time since October and one of my protégés should qualify as a driver.
I have been told this a few times when sent STL files to print but I know from printing I do for my own kits and for others `in the know”. I now have an example to hand with the advantage of also having the original drawing to work with so this would be an opportune time to explain.
First up, what’s an STL file. Over to Wikipedia for this bit…………
Granted its a bit tricky to read but if you click on it it’ll take you to the Wiki page. The gist of it is that it a format for 3D printers and it takes the outer skin of you model and describes it as a series of triangles. So in your CAD program you save your model with the file extension .stl and you get a faceted version ready to load into your printer.
What with all this Covid19 stuff and not being very well I’ve not played with any steam larger than my garden railway stuff since October last year. That got fixed on Friday 10th June 2021 with two engines in steam on the narrow gauge and a standard gauge contraption nearby.
The time the museum has been closed has turned our industrial narrow gauge line a even more of a scene of post industrial decay
 Now it’s time to finish the painting. First job is to add some tones to the chassis whilst it’s still separate. This was done with a matt white and a brown called brake dust applied via the airbrush with it on a low air pressure.
 Things slow down a bit at this point because whilst acrylics dry very quickly the oil based colours need to be left a lot longer before you can do the next bit. Some metallic black was added to the cab floor. This is a black with a metallic pigment in it that once dry polishes to give a used steel sort of look.
 I’ve been working on this and other things at really odd times of the day and night as I try to catch up with things. It seems a side effect of having the leg strapped up for fifteen weeks and then, just as I was escaping that, having a reaction to my Covid booster there have been two casualties. Firstly, my body clock seems to have died. I can be wide awake and working on models at four in the morning as there is no point lying in bed wide awake staring at the ceiling. The second things is endurance or lack of it. I am like a knackered rechargeable battery. Sat on the charger its green lights and raring to go, twenty minutes later flat as a pancake and needing another hour in the charger.