NGG16 Garratt #138 – The Finale
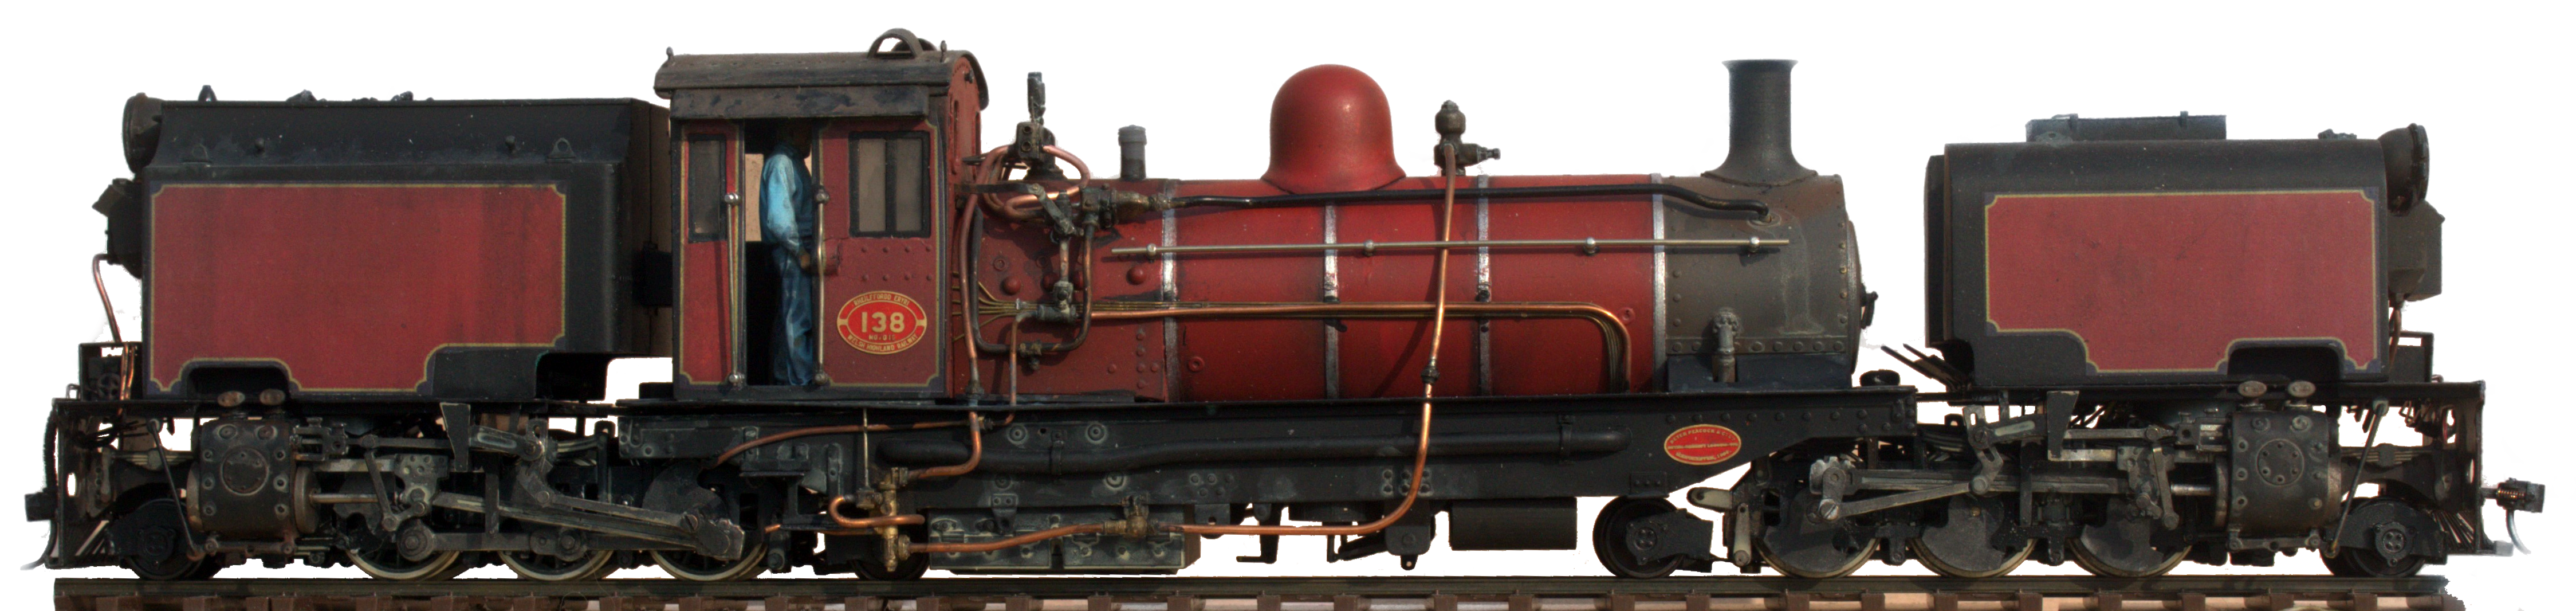
138 has finally gone to its new home and I went from loathing it to not wanting to part with it. I hope the new owner is pleased with it.
This is a job that took way too long. Why? Me really.
- Scope creep as I was always wanting to do a bit more or a bit better to it.
- Poor starting point as it started as one of the Chinese assembled models. That said starting from a kit would have many of the frustrations too.
- Several times I got to the point with it where I just had to put it aside as the more I tried the more I struggled. Inevitably, picking it up some time later I’d wonder just why I was struggling.
- Dissatisfaction with the source model just left me struggling for motivation.
That last point probably needs some explanation on two counts. The NGG16’s were built in five batches each batch had subtle differences. The biggest being between the first batch that includes the WHR’s #87 which were built in Belgium by Cockerill and the ones that followed. The model tries to be a medley of all of them. Notable the tanks are the shape of the later welded tanks but were covered in rivets. The water filler was early, the cab later.
It would be easy to say the kit was scaled up from 009 but that doesn’t explain the whole issue. The model dates from the pre CAD hand drawn artwork era. Standard when hand drawing artwork was to draw it several times finished size, typically six, and then photo reduce it as this shrinks out any pen errors. This model was only drawn 2 x full size for a finish in 4mm scale so that’s less than 2:1. That might be acceptable for the 009 model as might the simplifications in the construction. [Those that have built the 4mm one might tell a different story]. To produce a 7mm scale kit the reduction from 8mm to 7mm scale gives virtually no error correction and the compromises no longer stand up to scrutiny. The other thing not noticed is that each axle of the power unit has a different shaped fly crank but the model has them all the same. Well, nearly the same as in the model they are made of three layers each, so that’s 36 copies yet there is no cut and paste with a pencil as there would be with CAD.

The model has all manner of detail changes with new 3D printed and cast parts. I filed off all the rivets and added all the pipework with copper wire. The cad and the tanks were coloured and lined by doing the model version of a vinyl wrap as they were covered in decals with the livery and lining onto a black surface. The boiler was spray painted. All was then weathered. It’s also now a very heavy loco as the boiler and tanks have a lot of lead in them.
It is DCC and sound fitted. The speakers are under the loco in a an enclosure that looks like the vacuum reservoirs. It also has a large keep alive that smooths the operation of the loco but also keeps the sound and lights alive for several minutes after the power is removed.
Having said all of that I am delighted with how the finished model turned out. I couldn’t resist having a shunt with it as seen in this video
You might think that I would never want to see another NGG16 ever again! As I was fighting to finish 138 I would have agreed with you. However………
Now its done my mind turned to how to address many of those issues that frustrated me with this one and thoughts are turning to a new design of power bogie. The thought being to address the poor detail, missing bits and the captive wheels (really don’t like them) and making the pony trucks less of a dangly thing that are prone to derailing.
Then there’s this

It had a feline induced flying lesson that it failed in spectacularly. I don’t have the parts to mend it so if I am making new its back to the new bogie ideas.
I do need a break from NGG16 nonsense so it will be a little while before it sees any progress.
So, what am I doing next? Seems I have an articulated problem as there is a 3 truck Shay to mend, Two Uintah 2-6-6-2 Mallets to sort out and four O&K 0-4-4-0 Mallets to build.
 |
That’s the end of this series |
